


An elevated mount for the new AC condenser unit
Now before we start let me say if I had time I would not do it this way. The traditional thing to do is pour a little concrete pad for the condenser to sit on. Even though I wanted something big that is what I would have done too except because the size really meant I would have needed to rent a 1 yard mixer I didn't have time to pickup a rental mixer, form the pad, pour the pad, let it cure and break down the forms in time to install the new condenser. So I went with a welded frame and hardi-construction. A little unconventional but I am sure good for the life of the system.
Because I was in a rush I didn't get as many pictures as I would have liked. I started off welding up the frame out of steel that I had lying around. 3ft wide, 4 ft deep and about 18" tall.
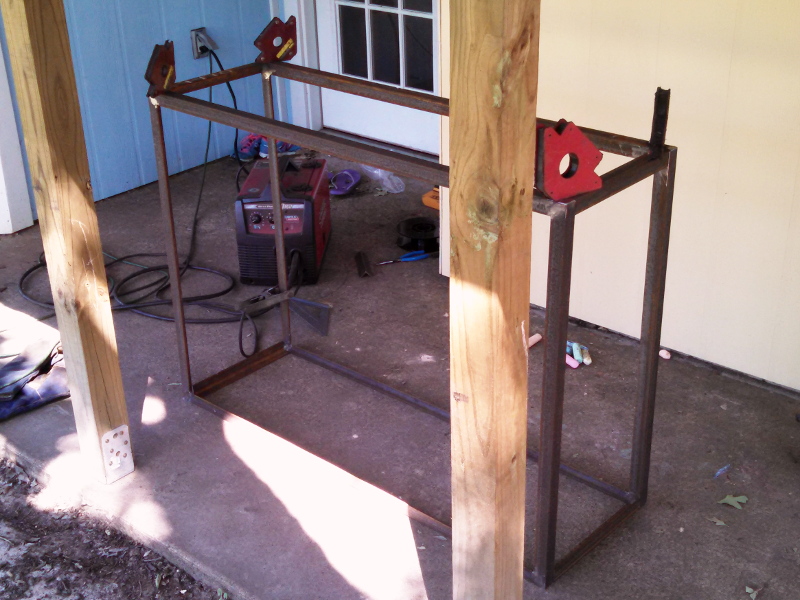
Now in the middle of welding the frame up I had to switch spools of flux core wire on my welder. I was prepared and had a new spool on hand ready to go but it was a new kind of wire made by INE I was trying out (not bottom shelf stuff but a little cheaper than the Lincoln). Anyway, it works but makes a lot more dingleberries than the Lincoln wire I usually use and also just doesn't weld as nice. I can't get the penetration that the innershield gives me. So, lesson learned. As soon as I finish this spool off I will go back to the Lincoln NR-211-MP

After I welded up the frame I cut some galvanized fence posts in half then drove them into the ground where I wanted to put the mount. Of course the sledge from my grandfather decided this was a good time to part ways from the fiberglass handle and I had to finish pounding them in planet of the apes style with no handle. Not optimal but I got it done.
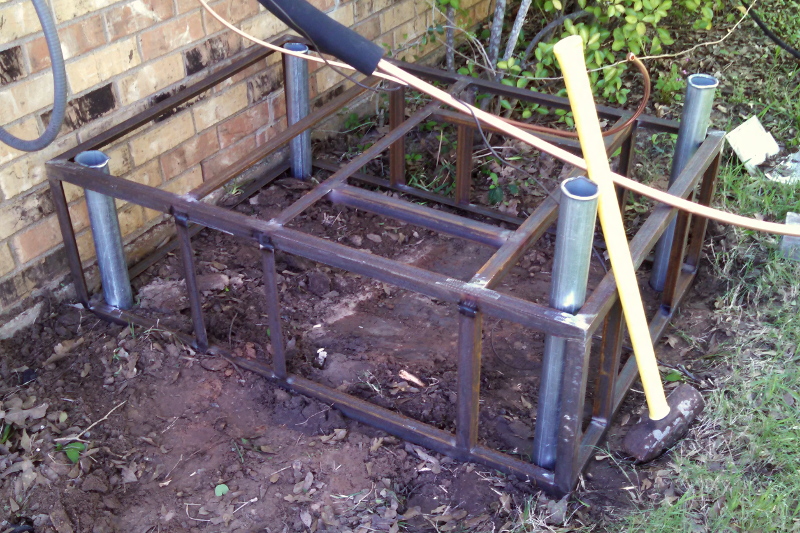
With the posts driven in a few feet I cut them off flush with the top of the frame and welded them to the frame which was now held up by the four posts.
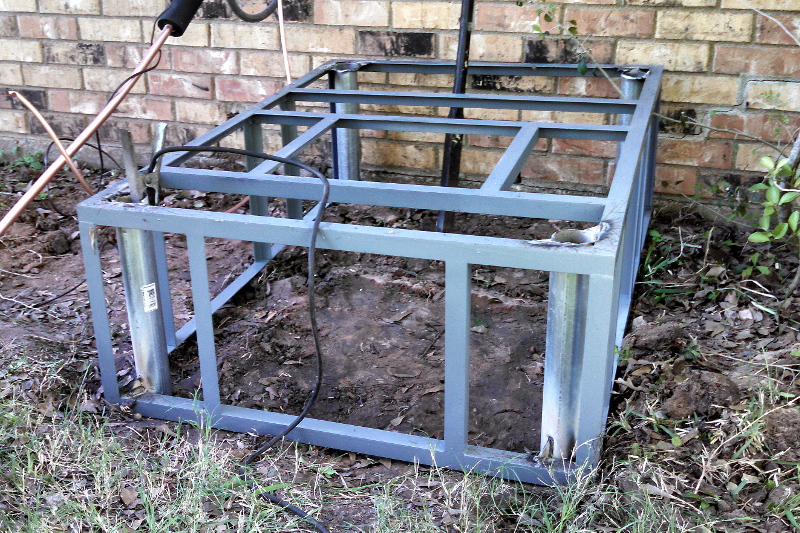
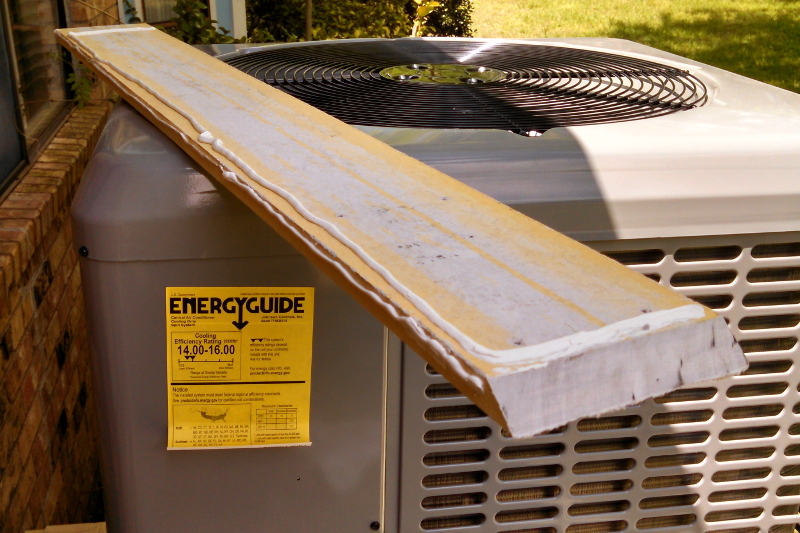
Then I skinned the frame with 3/8" Hardie panels that I had on hand. Because the frame top has angle running directly under the load bearing points which will support the condenser on top the single Hardie board will be sufficient up there. The sides though would fall apart quickly under the abuse of weed trimmers and mowers so I left an overhang on the top board that is just the width of Hardie trim boards which I would install after the condenser was placed.
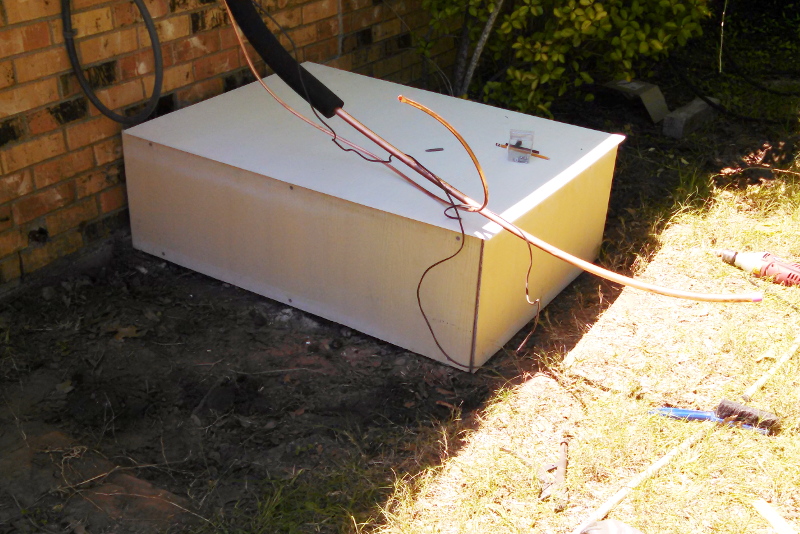
Before putting the condenser on I was able to squeeze in primer and topcoat on the top panel.
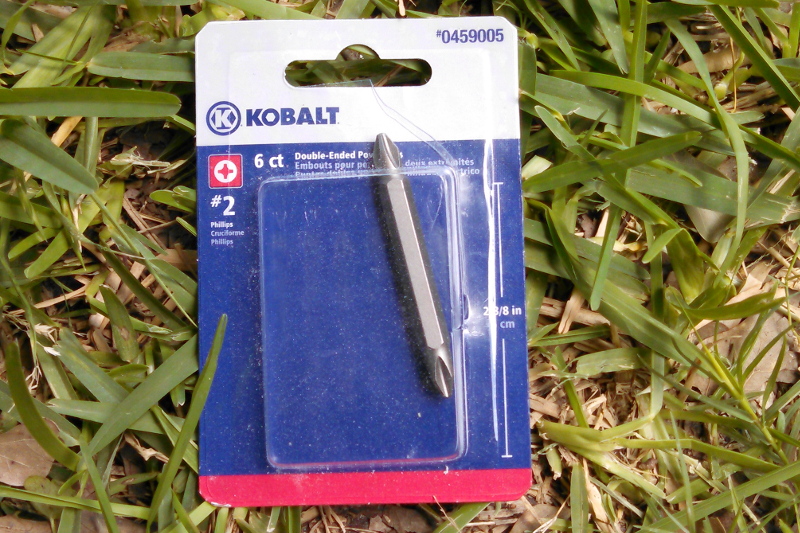
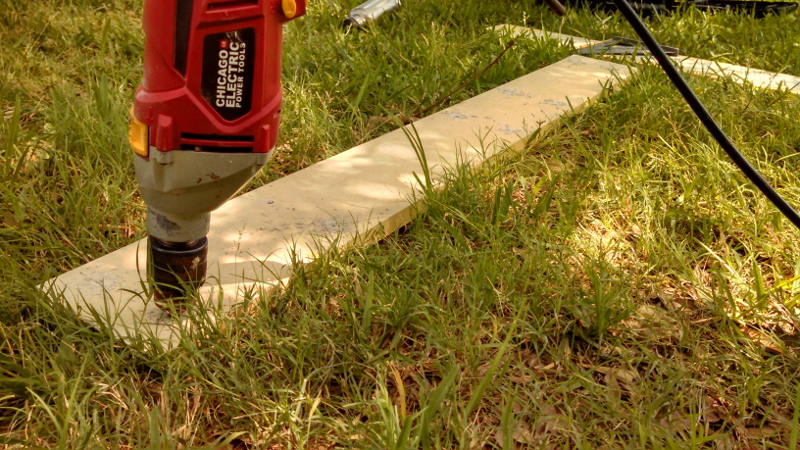
The Hardie board was installed with self drilling screws that drill and tap their own hole in the steel angle. These worked great but there was something that didn't work great. Both Lowes and Home Depot have stopped carrying the #2 Phillips drivers that I like (Bosch with the serrated gripping tip) so I figured I would give the Lowes house brand (Kobalt) a try this time and order some Bosch online for the future. DO NOT DO IT. These were the absolute worst drivers I have ever had the misfortune of suffering through. I would 200x rather use Harbor Freight ones. They were simultaneously brittle and soft. I averaged 2 screws per end alternating between shattering and rounding over before I said screw this and dug up an old worn out (but quality) bit that finished the rest of the job without complaint.
Anyway, next day after the condenser was installed I started on the boards that would make up the side. First I marked them against the brick wall of the house.
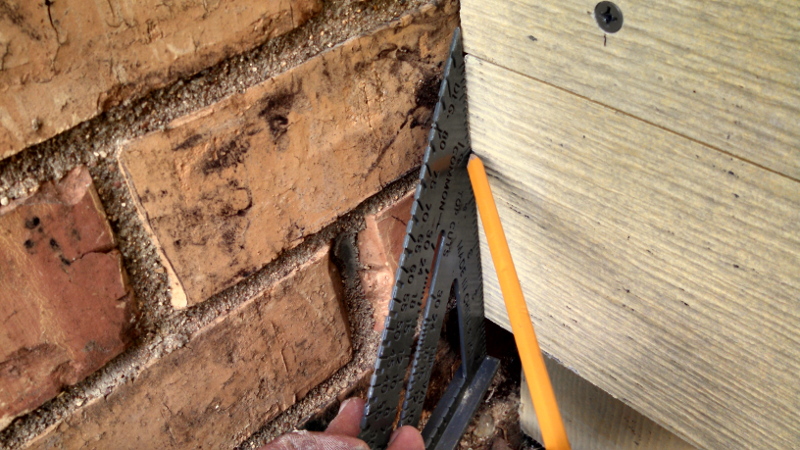
Then hold the board up against the house and mark the front edge using a 3/4" spacer board to get the corner right.
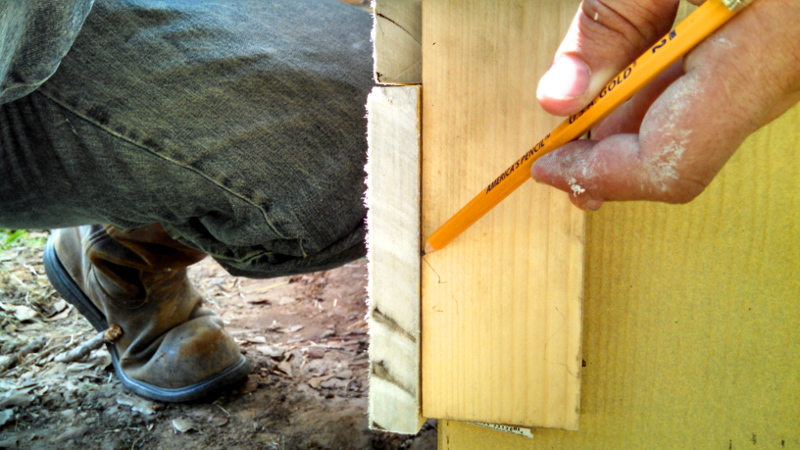
A little trick for mitered corners where you will only have one visible edge, cheat on the angle. In this case I was making a 45 degree cut on the mating boards but I was only going to see the outside edge. So if you cut it at a few degrees more (roughly 50 for me this time) then the visible joint can be more easily pulled tight and there won't be an ugly gap caused by the back of the boards hitting before the front does.
I also pre-drilled the boards since these were thicker and I wanted to get all of the screws lined up nicely instead of having to worry about holding the board in place while simultaneously lining up and drilling the hole right. Just holding things in place while the screw drill and taps it's hole in the steel angle is much easier.
Before I screwed the boards on I applied a bead of caulk to the top and ends of the board backside (but not the bottom edge). This was really just to help make everything solid and provide a path for water to prefer running out of the boards instead of sitting against the steel frame inside. Not really necessary and maybe not effective at all.
Sharp corners out in the wild where they are likely to get hit by a mower or something won't last long. So, after I installed all the boards, caulked the seams and let everything dry I got out the angle grinder and rounded over all the edges. I highly recommend getting a cheap miniature diamond saw blade to use in the angle grinder for cutting and grinding Hardie, stone and concrete. Even a dirt cheap one like I have (Harbor Freight) is far superior to using the standard abrasive discs, even the concrete specific ones. The same goes for the sawblade itself. The abrasive discs just don't work that great and the carbide tipped "Cement Board" blades are a downright ripoff. They are expensive as hell and last about as well as a standard wood framing blade. So spend the $15 for a continuous wet/dry diamond blade.

So I got the corners rounded off and everything finished. A little paint and there you go. Again, I would make it out of concrete if I had the time but I think this will work.
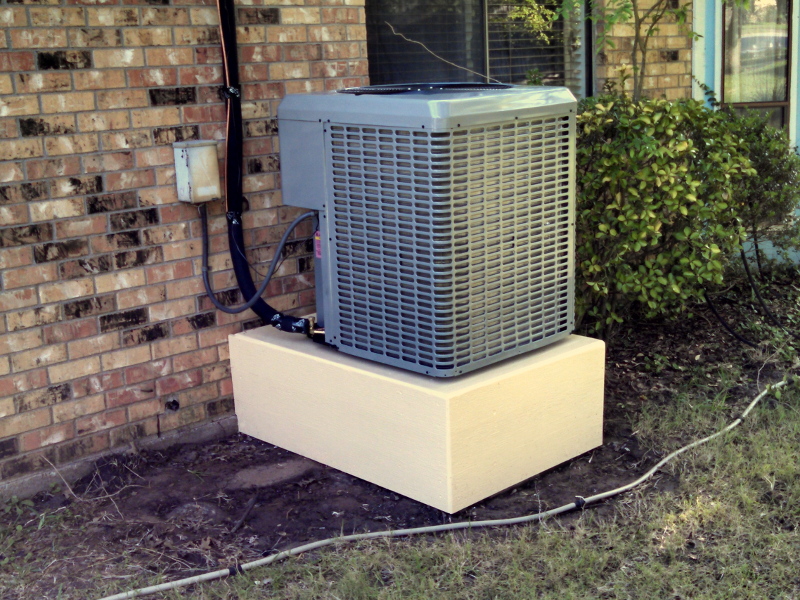
I say everything was finished. It isn't actually, there is always the finishing touches to complete project and sometimes it is hard to go back and do them. I do need to put some trim from the soffit down to the condensor to hide the copper lines. When I do that I will probably also trim around the area where the mount hits the wall. I'll do this when I get around to replacing the soffit with Hardie board though otherwise it will make my life difficult. So, probably finished a year or two, we shall see.