


Columbarium (a box for ashes)
I was fortunate to have an aunt and uncle with a farm up in Virginia. It is a beautiful place and during high-school/college I got to go up there and work in the summer. Some people might not phrase it as "got to go" since I did a lot of hard work but it was a great experience for a large number of reasons including the time I got to spend with my grandpa on some bridges he designed.
Anyway, there is an old cemetery on the property and during a recent visit to Texas my aunt said that my brother was finishing a stone wall around it this summer. She wanted to include a box in the wall to hold the urns of various family members including a small one of my grandfather. So I decided to help make it for them.
Design
After hearing some of the desired features of the columbarium (I wasn't familiar with the word either but nothing else appears to fit) I suggested bronze. Besides being a classical material that feels befitting of the purpose it has two qualities that make it particularly suitable. First, the longevity of bronze outdoors in a rural setting is exceptional and a useful life measured in centuries is likely. Second, in order to minimize disturbance by people who do not know about it my aunt desired that the box blend into the wall and not attract attention which makes stainless steel or aluminum unsuitable since they would be flashy and easily visible. Like with any material choice though there were notable downsides to utilizing bronze. It is an expensive metal and even though my aunt insisted on paying for materials $1150 is a little eye watering for something this small. Also, it was a material I hadn't worked with in this way before so making a box out of it was going to be unfamiliar territory.
So the material was decided and the intended contents + stone wall thickness dictated a box in the roughly 18" wide x 12" tall x 8" deep range but what should it look like? I started throwing a few sketches out to show possibilities. Here are some of them:
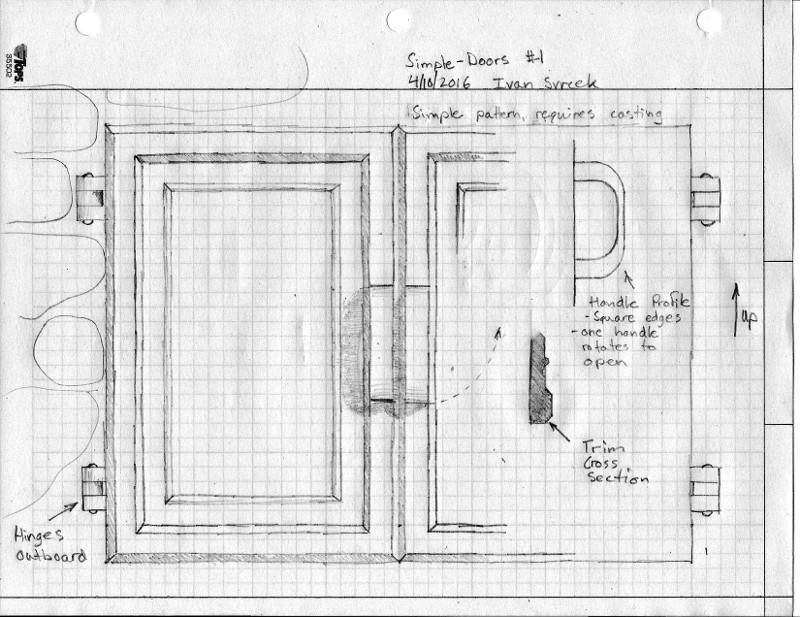
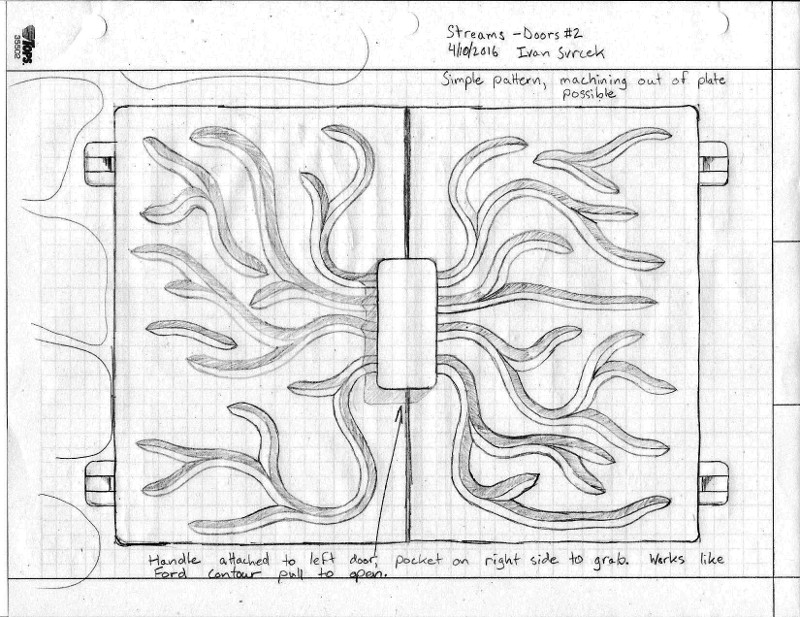
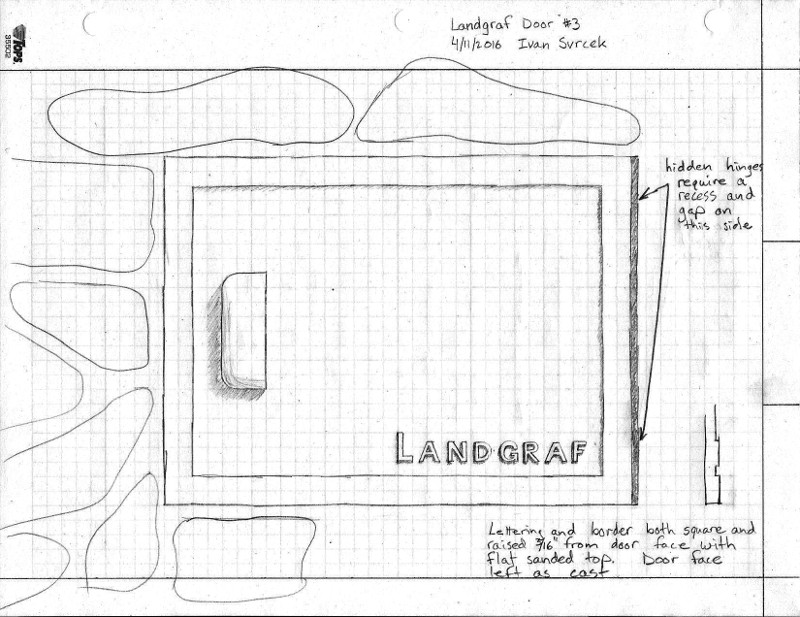
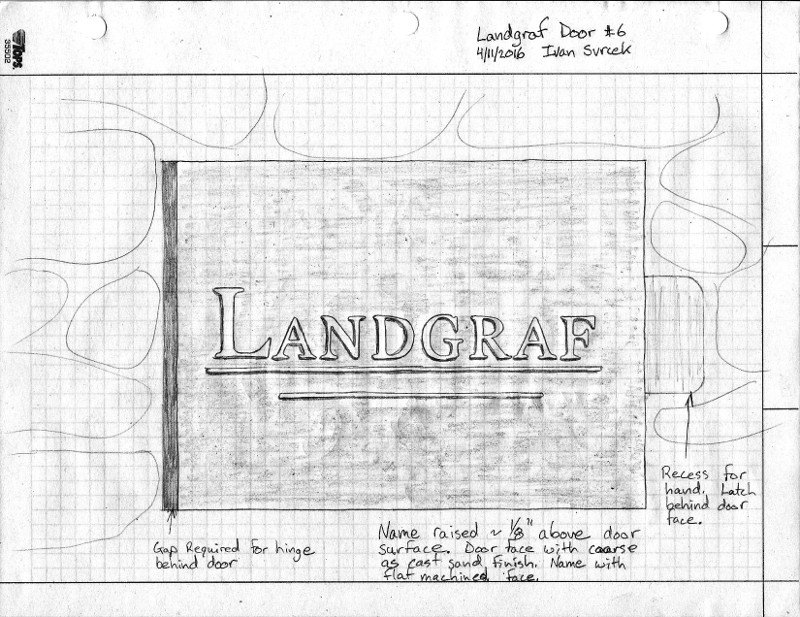
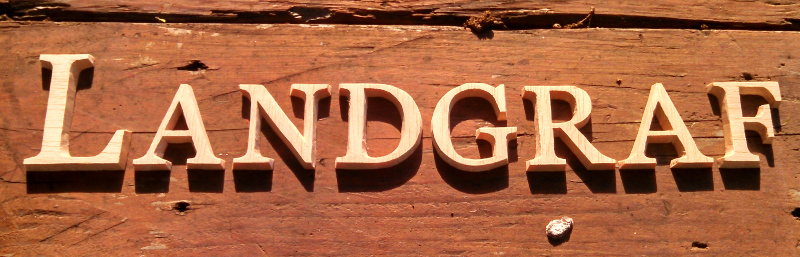
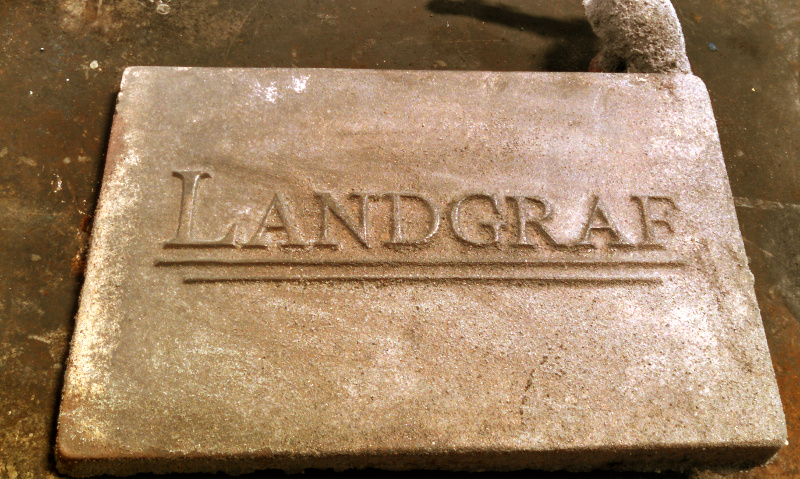
The winner was the last one, simply an underlined Landgraf with no other adornment.
Gearing up for Bronze
Now when I first talked about making the box I was thinking about making a pattern of the door for an art foundry to cast and taking pre-cut parts for the box to a local fab shop for welding then perform the machining and finish work myself. I am always looking to increase my capabilities and experience though so the project expanded (like they always seem to) and I decided to do everything personally. Like I mentioned earlier I hadn't worked with bronze like this before so in addition to actually making the box itself I needed to purchase or make some equipment.
Until this box I had been able to get by with just stick and flux core wire welding but I don't think a flux core silicon bronze wire exists and I had a hard time finding rods with flux to use on the stick machine in anything approaching reasonable quantities. Fortunately my little lincoln has a regulator and valves so I went out and picked up a bottle of 100% argon and some bare .023" silicon bronze (apparently sil-bronze mig wire is readily obtainable because some auto-body people use it to minimize heat and distortion when putting patch panels in).
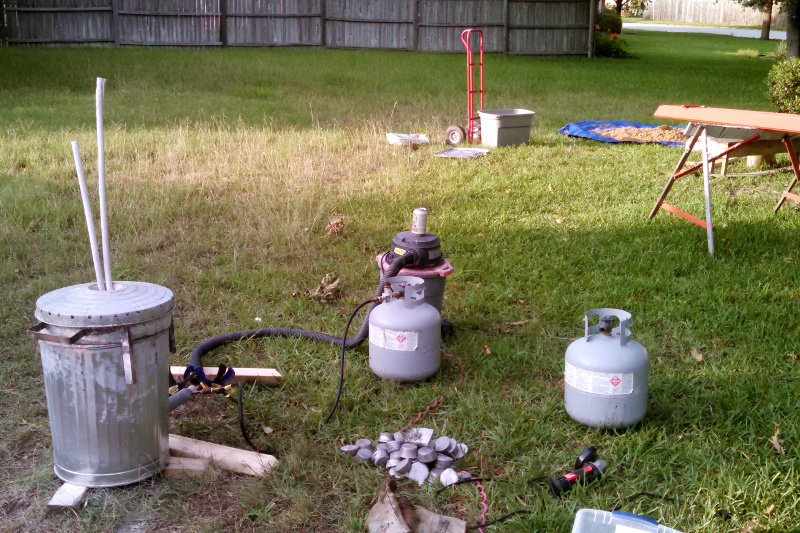
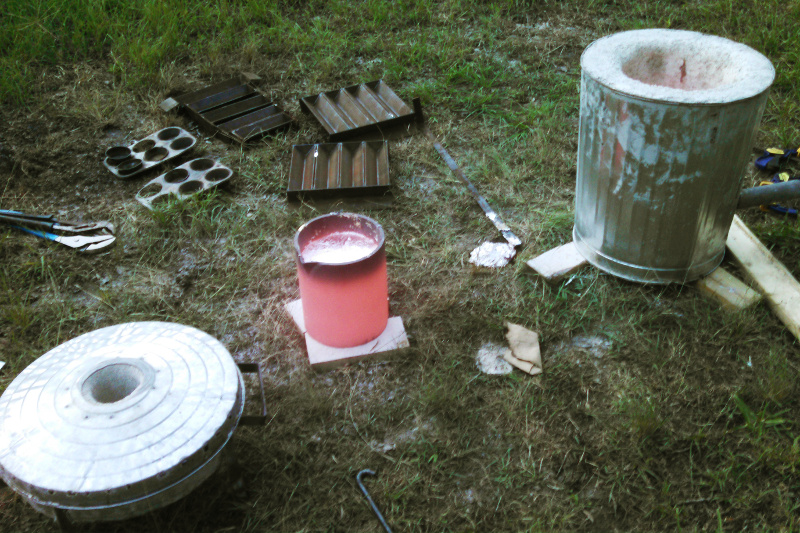
The casting situation was more difficult though. I had access to a small furnace I made with my brother but we only had a steel crucible in it that was too small for for the door casting and wouldn't survive bronze temperatures. I also didn't know of the furnace itself would handle that much heat so I asked my brother if I could try and fired it up. He said yes but the answer was no, the refractory it was made with couldn't handle the temperature.
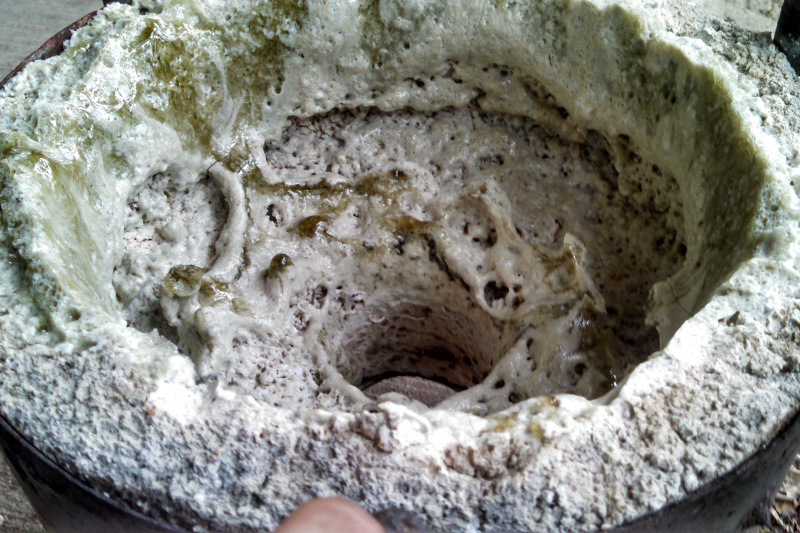
It got melted up pretty good. It still works fine but definitely isn't capable of temperatures above aluminum casting so I had to make something that was:
A larger bronze capable furnacePattern Making
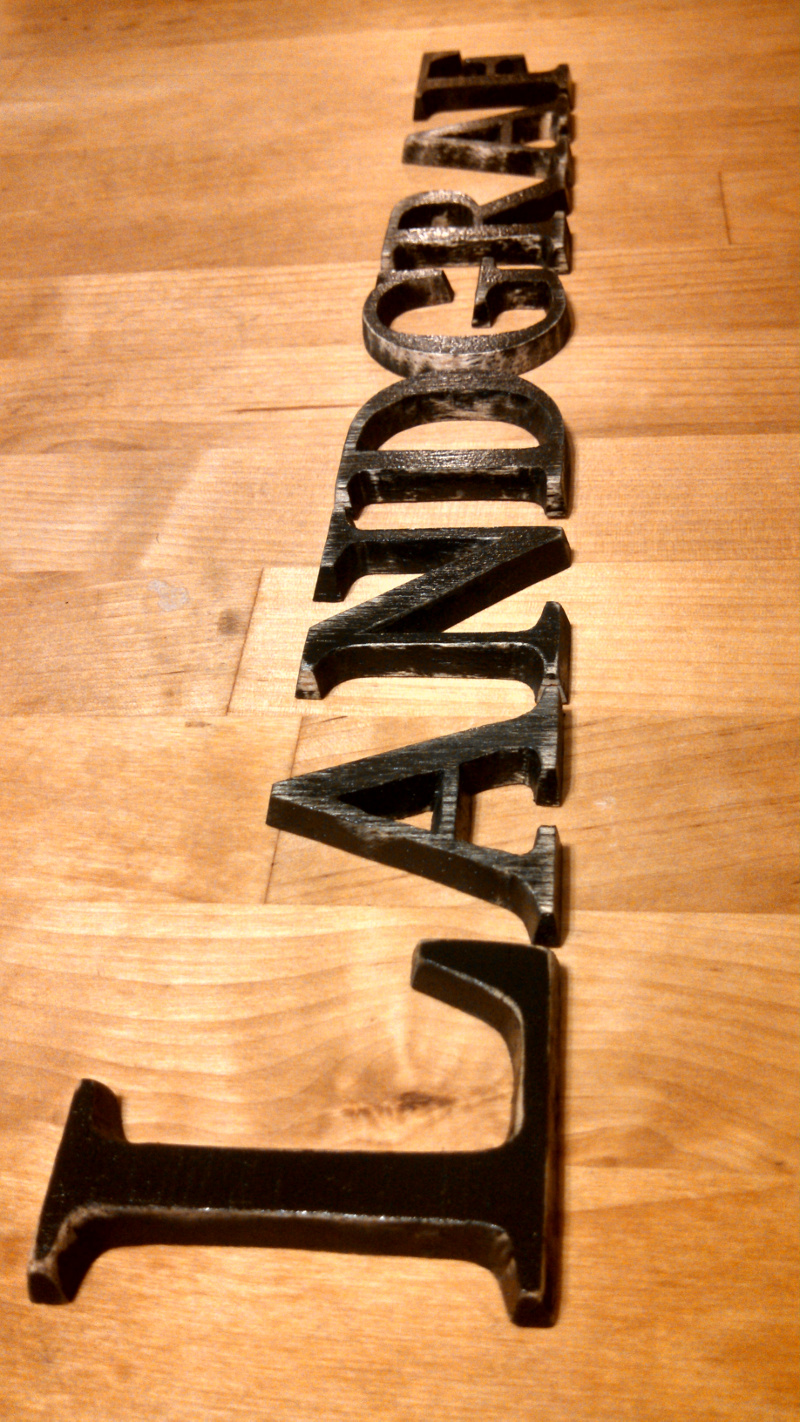
I simultaneously proceeded with the rest of the project at the same time I created the furnace. First order of business on that front was making a pattern for casting the door. Unfortunately I couldn't find any letters that were the right size and font so I had to make them from scratch
I determined exactly what I wanted in open office then printed the letters out on standard paper. I taped them to a piece of 1/4" balsa and cut the letters out with an exacto knife. While I was cutting out the letters I included some draft on the sides so the pattern would release the greensand after molding.
Then I painted the letters to help fill in pores and make the grain hard so I could sand it all smooth.
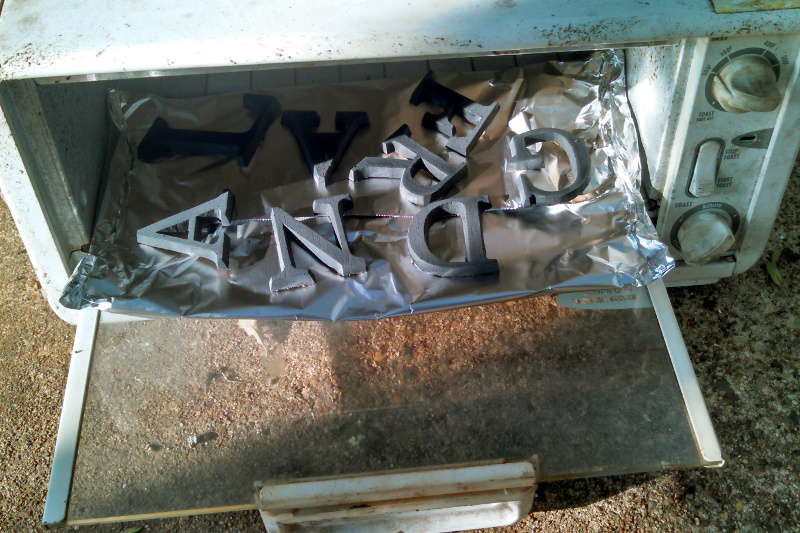
Because I am an impatient man I wanted to make sure all moisture was driven out of the wood before I went further I popped the painted letters in the toaster oven at a really low temperature for a couple hours to make sure that the paint was good and dry
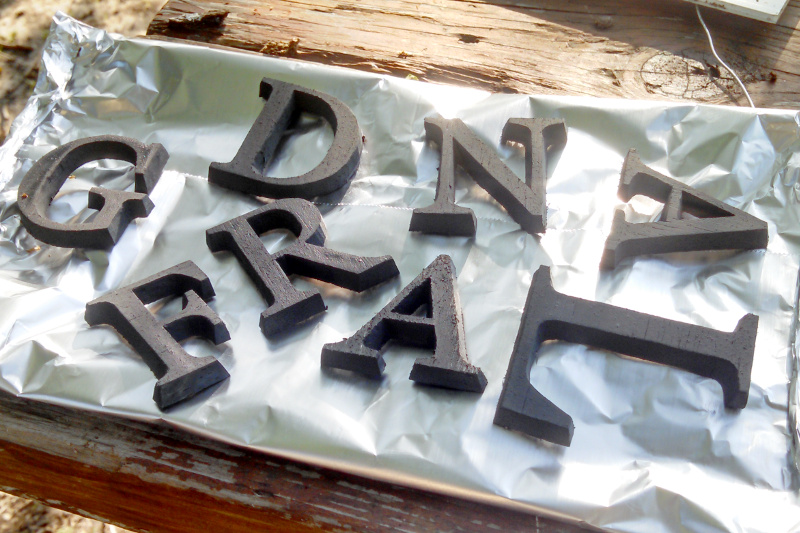
Then I sanded the letters and re-painted then sanded a 2nd time. Like most other projects involving finishing of some sort I always try to do as much of it as possible while it is in pieces, much easier than after everything is all assembled. After I painted and sanded the 2nd time I coated them in shellac as a final coat (because I am impatient and shellac dries real fast).
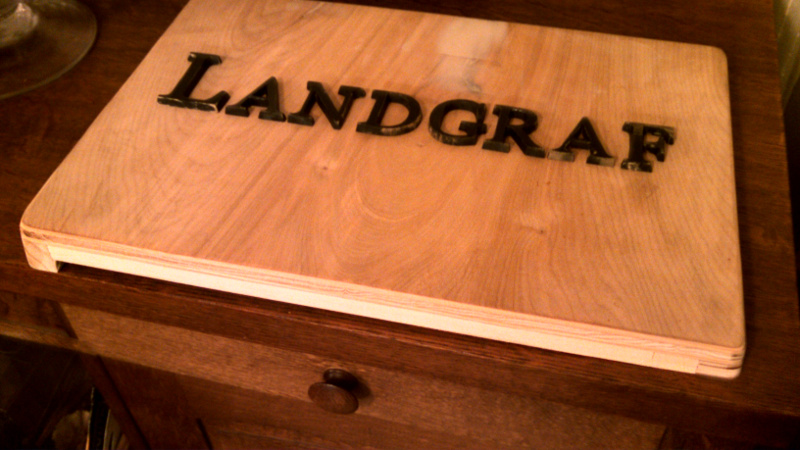
Now that the letters were ready I needed the rest of the pattern. I glued it up out of 1/2" plywood and balsa then used bondo to fill in imperfections and performed a couple alternating rounds of shellac then sanding. Once I was happy with the level of finish on the board I glued the letters into place.
The pattern was ready for casting now but I had to finish the furnace and support equipment before I could pour bronze. Eventually I got other things completed though and prepared for my first attempt at casting the door.
Casting
Since large thin items can be one of the harder things to cast and I had a lot of new things in the picture I decided to do a preliminary aluminum trial run of the door before I went for the final bronze shot. I got the new furnace out and fired up the first aluminum melt ever in it.
While that was heating up I started ramming up the mold. I sprinkled a fine layer of corn starch (don't use that, it isn't good) over the pattern and bottom of flask then gently sprinkled wet greensand on and progressively rammed it up.
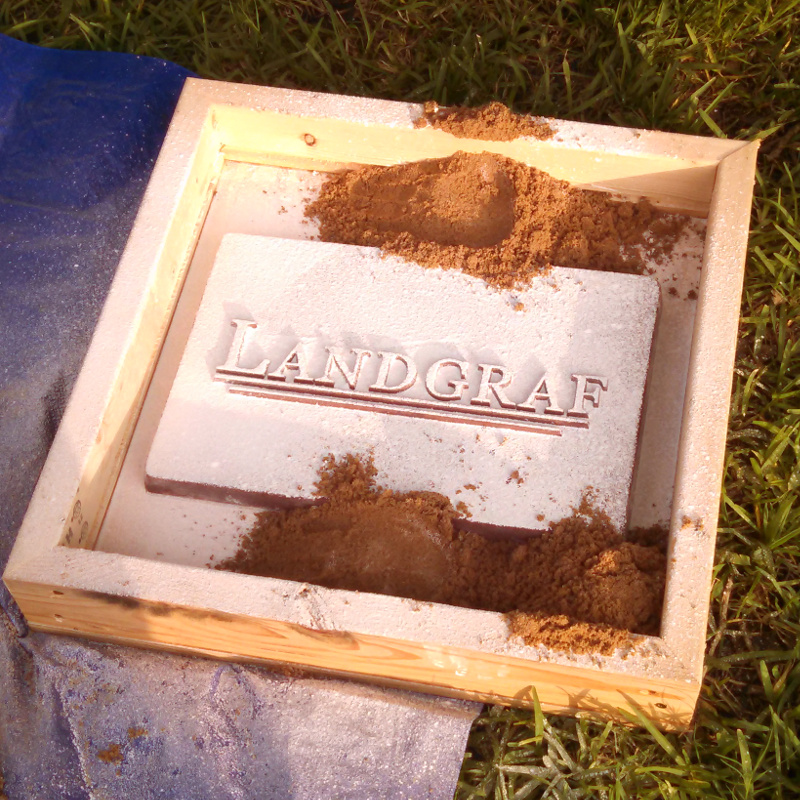
Now you may have caught it already but I started ramming the mold up after I lit the furnace. That was a mistake right there because lighting the furnace locks you into doing a pour of some kind and makes you rush to get everything ready before the metal is at pouring temperature. Well, I got bit by it this time. The corn starch did not act like a good mold release but more importantly I didn't have the sand quite wet enough or have enough place for it to grip onto the flask so when I tried to open the two halves up and remove the pattern my sand fell out of the mold. I didn't have time to try ramming it up again at that point and I had a full crucible of aluminum at pouring temperature.
So I found a fire ant mound in the yard to pour another sculpture in.
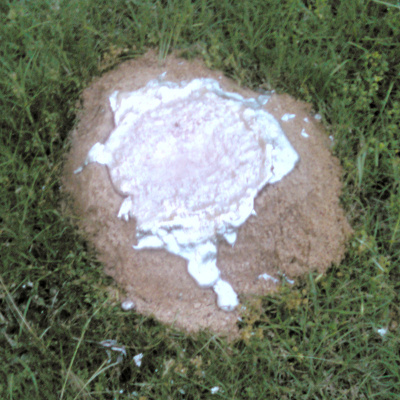
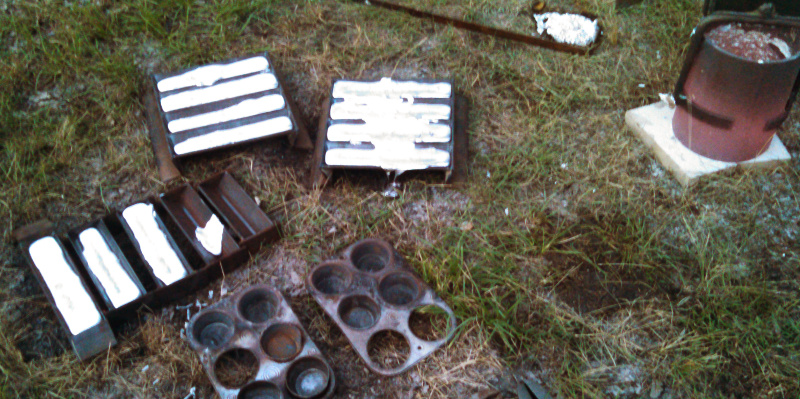
My large aluminum crucible contains much more metal than most ant mounds though so I also had to pour a fair number of ingots to re-use another time.
After that failure of the mold I knew I needed to work on the mold and figuring out how to get a repeatable process that wouldn't fail me when I tried to cast again. Unfortunately I didn't take any pictures durign my practice but I did learn a few things.
1 - First of all the corn starch is no good. I switched to marking chalk like you can buy at any hardware store and that worked better but I have since moved on to finely powdered graphite
2 - My greensand wasn't wet enough, it needed a little more water to make the clay effective at holding it together.
3 - The letters on my pattern were even more difficult than I thought to get a good release. I ended up cutting them down in height a little and increasing the draft significantly.
4 - I had routed some grooves into the flask for the sand to grab onto, this was insufficient and I had to nail in some auxiliary strips to give the sand something better to key into.
In the end though I determined I had figured it out and I set up for another trial aluminum pour. I started the pour in the small sprue to control metal flow into the mold then after the liquid level came up out of the mold cavity itself and I switched over to pouring into the large shrinkage riser. Nothing fell apart and everything appeared to go well.
The important part though is what you find after things have cooled down and you knock the sand off. This time it turned out great and I was really happy with the result. There was a little shrinkage defect under the G and some mold erosion where the riser was but those aren't that big of a deal on something that is supposed to look like it was cast.
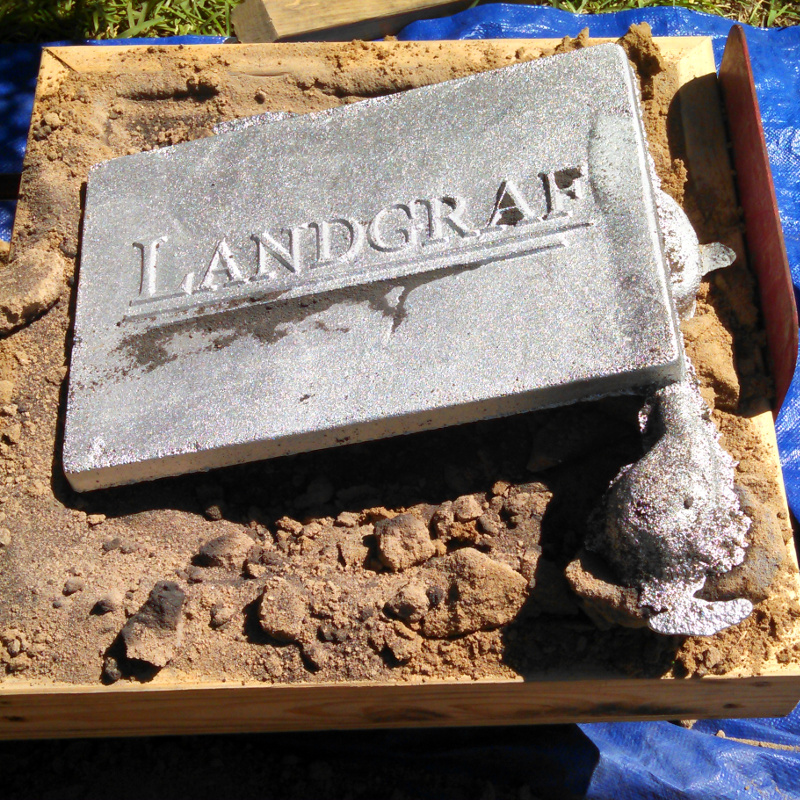
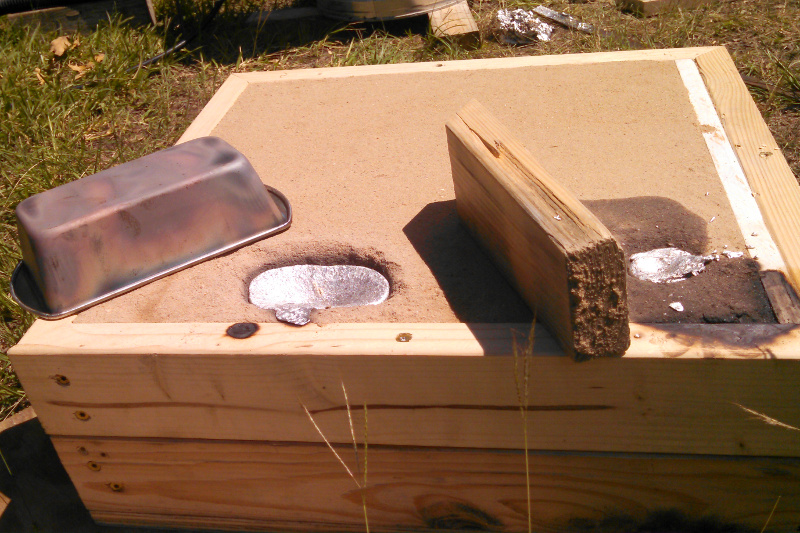
Here is a shot of the back of the casting. You can see the sprue and pouring basin as well as the rim that runs around the edge of the door. In particular notice the size of the riser and the large depression in the top of it.

With a thin casting like this managing temperatures is important to prevent defects. You want the metal to solidify at the end of the mold and then work its way back to a point that you control. When the metal solidifies and cools down it shrinks which sucks in molten aluminum from the surrounding areas. Including a large riser and filling it up directly last naturally creates a place that will be molten longer than the rest of the mold and therefore accommodate the necessary shrinkage.
With a successful aluminum version of the door under my belt the next step was going for the final bronze version. This would be my first bronze casting so even though I was confident in my pattern and mold ramming procedure there were still some unknowns.
The first thing to know about casting bronze is that it is hot, hot, hot! That seems obvious but pouring bronze at 2200°F is a big jump from pouring aluminum at 1400°F. The furnace takes much more fuel and time to get up to temperature and everything is more demanding. Carrying the crucible and pouring is physically much more taxing between the heat and increased weight vs aluminum. Any gaps in your protective clothing become obvious very quick as the radiant heat hits your skin. The crucible sticks to plinth blocks in the furnace if you forget to insert a sacrificial piece of cardboard. Sand can melt in contact with the molten bronze. Steel tools get soft if allowed to heat up for long...... I could go on but the bottom line is that bronze is hot and heavy and this first pour was interesting! I only got one horrible picture but look at the glow from everything after I got it poured.
In person everything was glowing a bright almost white yellow but the IR filter on my phone isn't very good and the heat came through as purple.
So with the help of my brother in law I successfully made a pour without anything disastrous happening but how did the door come out? Unfortunately not good.
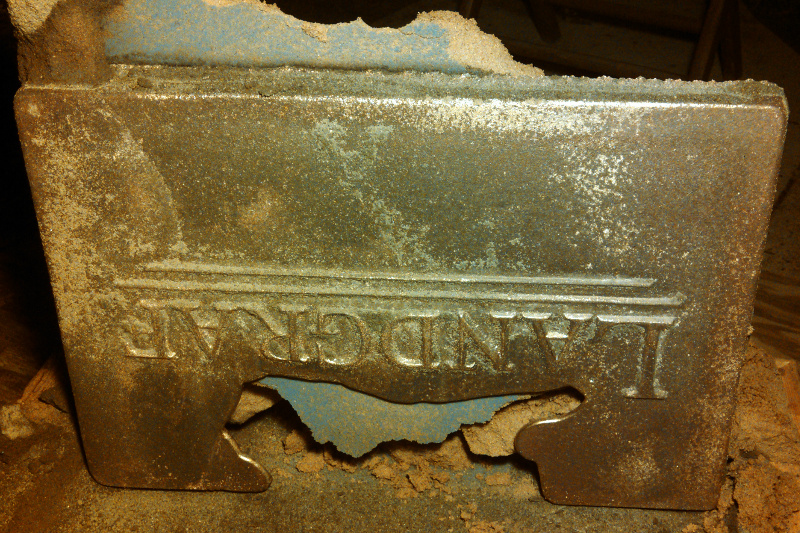
Despite all the glowing I didn't have the melt hot enough and the cavity didn't fill completely. This could probably have been avoided by some sort of temperature gauge but unfortunately I don't have anything that can go that high yet so all I have to go by is color which is imprecise and new to me.
Things were on the right track though. Everything else seemed to work fine, I just didn't have enough heat. So I chopped the mistake up and ran it through the furnace again another night. This time results were better and I had something I could work with.
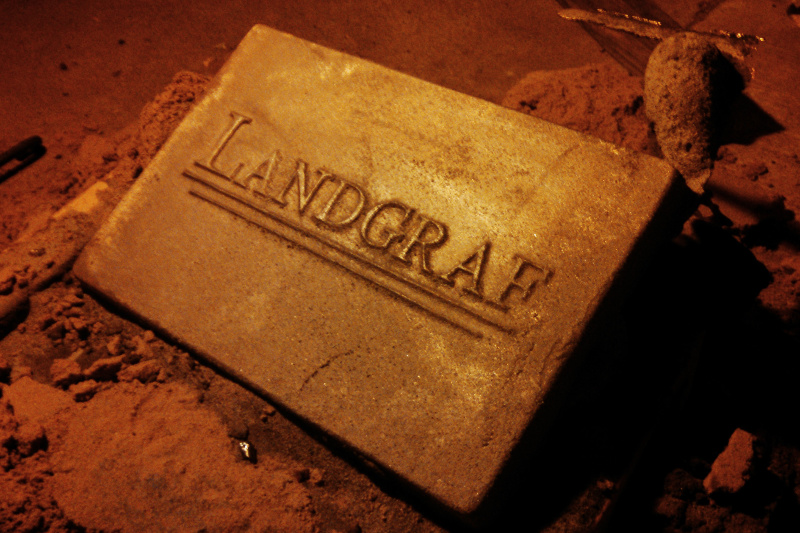
I let it sit in the sand over night and then took a better look at it in the morning when it was totally cool and I had daylight.
It definitely wasn't perfect but I was pretty happy. There were some places where the bronze penetrated the sand and a couple of shrinkage marks on the bottom and right hand sides but nothing that would make me pour it again.
Box Fabrication
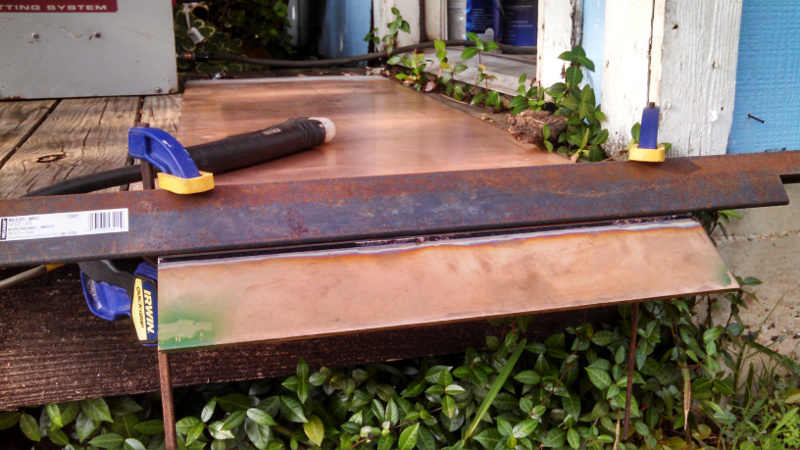
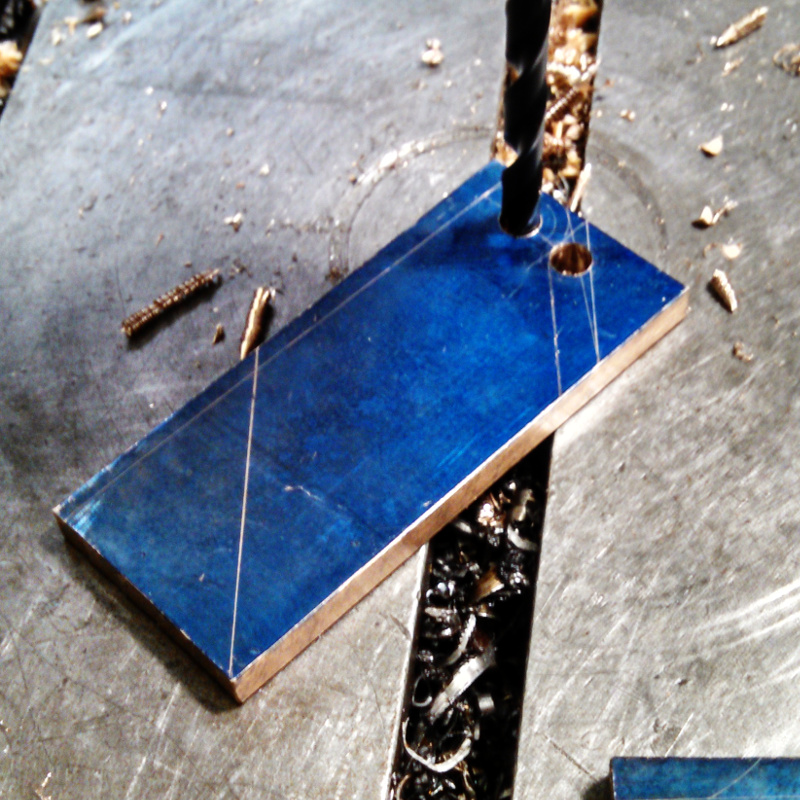
As I mentioned earlier I originally planned on getting a fabrication shop to make the bronze box but ended up decided to do it myself and push the experience envelope a little further out. I got a bottle of 100% argon and sourced some silicon bronze mig wire. I called around at a couple red metal suppliers for quote and sourced some 1/4" thick silicon bronze sheet from Farmer's Copper in San Antonio. After $$$$$$ and a few days I had a sheet in hand which would be just enough material. I layed it out then started cutting it up with my plasma torch.
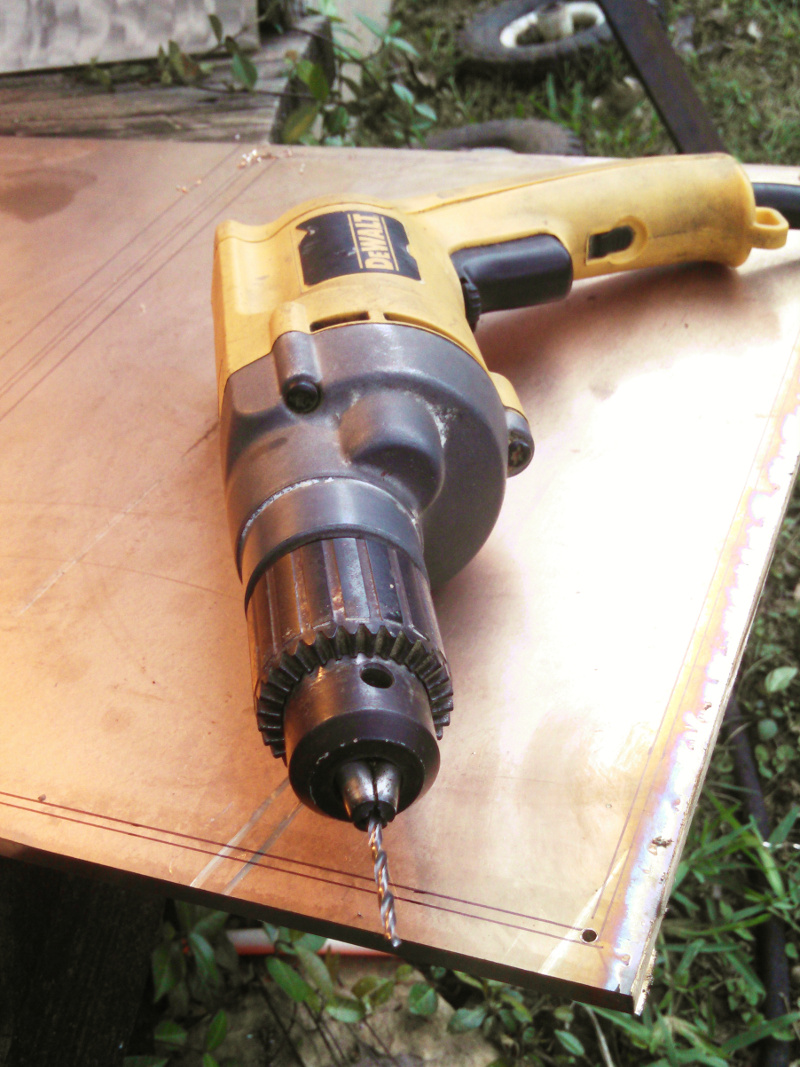
I had old consumables on hand for the torch and 1/4" bronze is approaching the limit of my 50 amp machine but it barely did the job. I knew I wouldn't be able to pierce though so on the front plate that I needed to make a cutout in I drilled out the corners first to have a place to start and stop.
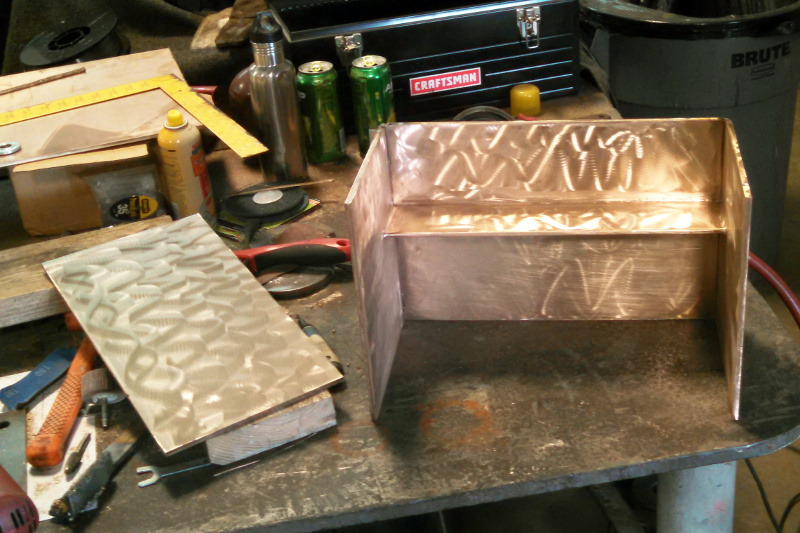
Once I cut out all the parts and cleaned up the cut edges with a grinder I took everything over to the day job where I could weld inside and not worry about the wind blowing away my shielding gas.
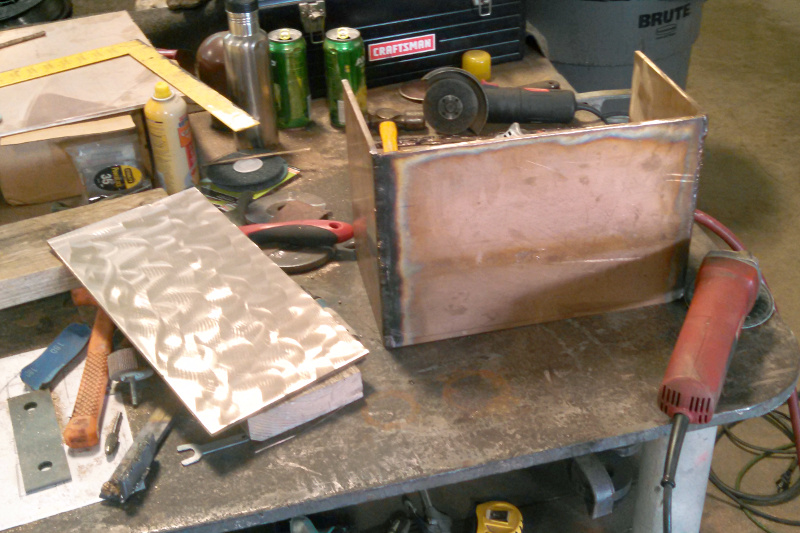
As I welded the box up I finished the inside surfaces before I welded things up so I wouldn't have to do as much work polishing later once it was all finished and difficult to get to.
I tried to achieve almost complete penetration on the welds without blowing into the inside of the box. I didn't really have to worry much about breaking through. The thermal mass and conductivity of the box really required more amps than my machine could deliver, I couldn't make a weld worth anything with the normal polarity I use for flux core steel welding so reversed polarity and cranked up to try and get into the spray regime. It went ok and I got the box together but it was a struggle.
After I welded up the box proper I cut out some hinge tabs which I would weld on in the exact position once I finished machining the box and door.
Machining
So I didn't take any pictures apparently but I welded up the shrinkage cracks that the door casting had then gave the whole casting a once over with a needle gun to blend the repair and knock off the sharp areas where the bronze infiltrated the sand. After that I was ready to start machining the casting. First step was trimming the back of the door to rough size.
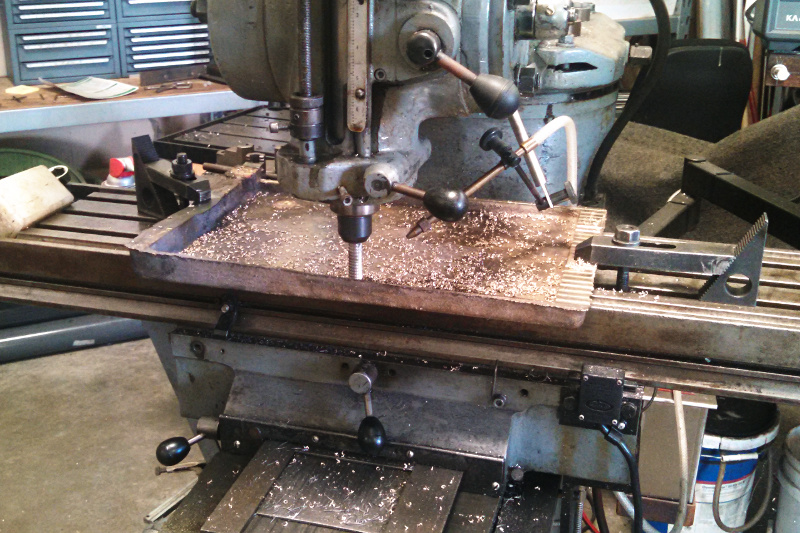
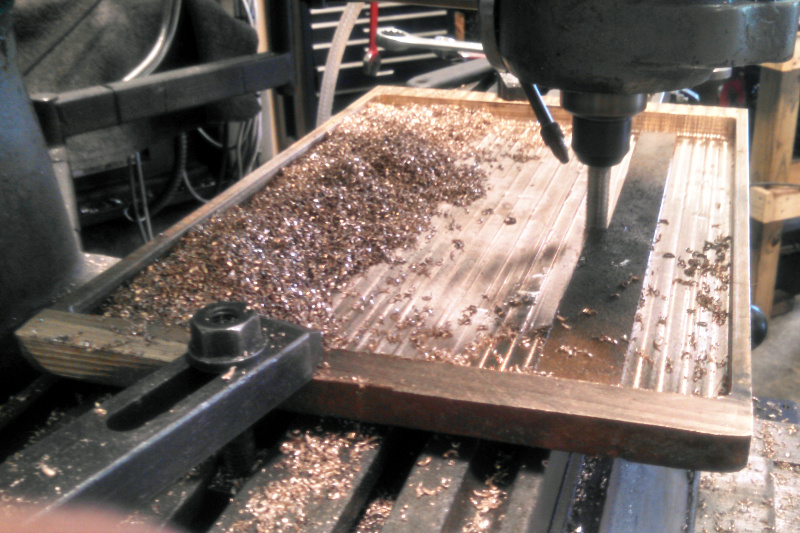
Then I milled out the inside of the door and added a lip to the inside of the top edge (so that water would drip off instead of running down the inside of the door). I collected all the chips while I was doing this to remelt for another less critical casting later.
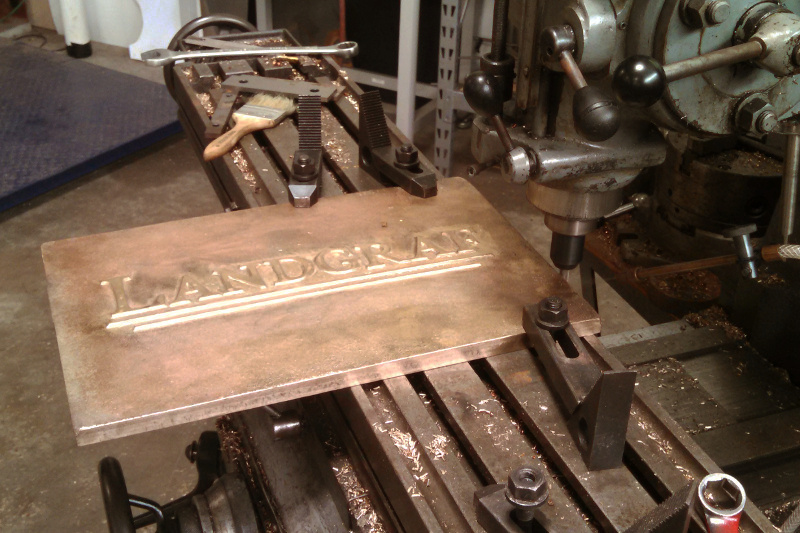
After I completed the majority of the back side work and knew things weren't going to move anymore I flipped the door over and took a facing cut with a fly cutter on the letters to make them stand out and look more finished.
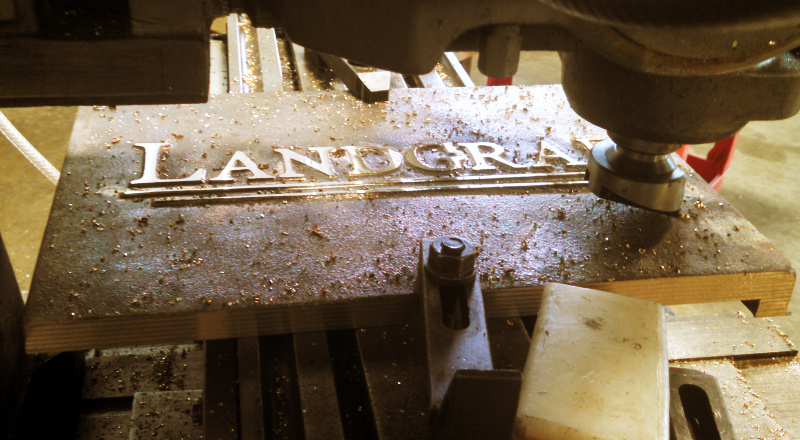
While I was machining the back side of the door I side milled the top and bottom of the door to make sure I squared it up true to the back side. After I flipped it over and faced the letters I took a finish pass on the top and bottom then milled the other two sides to square the door up and bring it to final size.
Then I flipped the door back over and performed a few more finishing touches on the back including the hinge details. Unfortunately I didn't take any pictures of that.
With the machining done on the door casting I turned my attention back to the box weldment. Since things always warp a little during welding I machined all the important parts of the face that would meet the door. I squared up the edges, cleaned up the weld on the back side of lip and fly milled the face to make sure the door would sit flat against it.

After I machined the box I quickly turned the hinge pins and set up to weld the hinge tabs onto the box. I put the door on exactly where I wanted it on the box then tacked the tabs in place. Then I took the door off and welded the tabs out. The tabs were the end of the welding so I broke out a die grinder and angle grinder and went at it on the box exterior to round over all the rough edges.
I now had a box with hinged door but didn't have a latch mechanism. I didn't have any nice bronze bar to make the latch out of so I cut up the sprue and built up weld where I needed it to make a blank large enough for what I planned then milled it out. The design is simple, just a lever that gravity pulls into position.
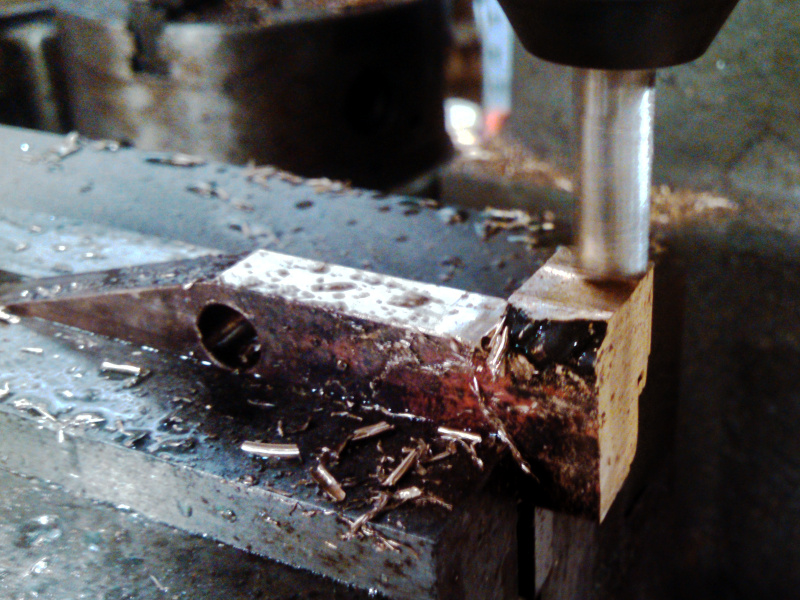
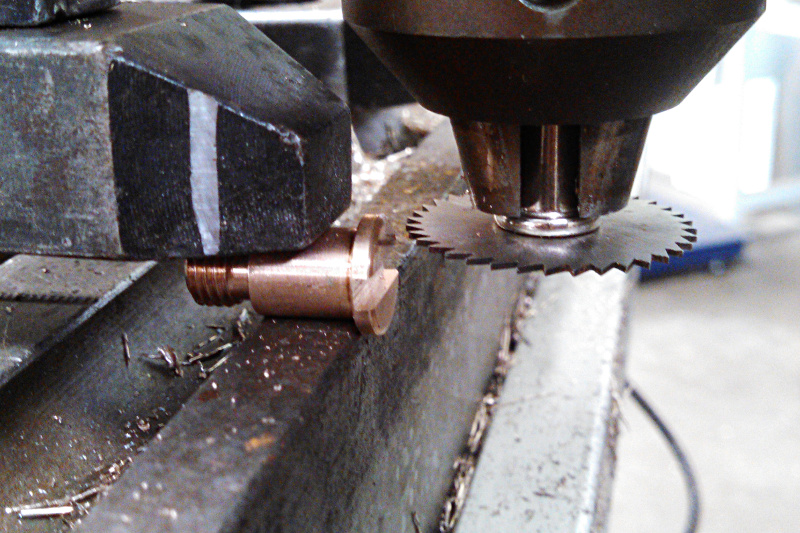
After I milled the latch I tapped the door to hold a shoulder screw then turned a bronze shoulder screw that was exactly what I need. Finishing touch was milling a screw driver slot in the screw head.
Result
With all the machining completed there was still some finishing left to do. I slightly tarnished the interior and exterior of the box just by cleaning it thoroughly then rubbing every part with my bare hands (I corrode things) and letting it sit out side for a few days. Then to lock in the slightly dull patina I gave the box a coat of Johnson's paste wax.
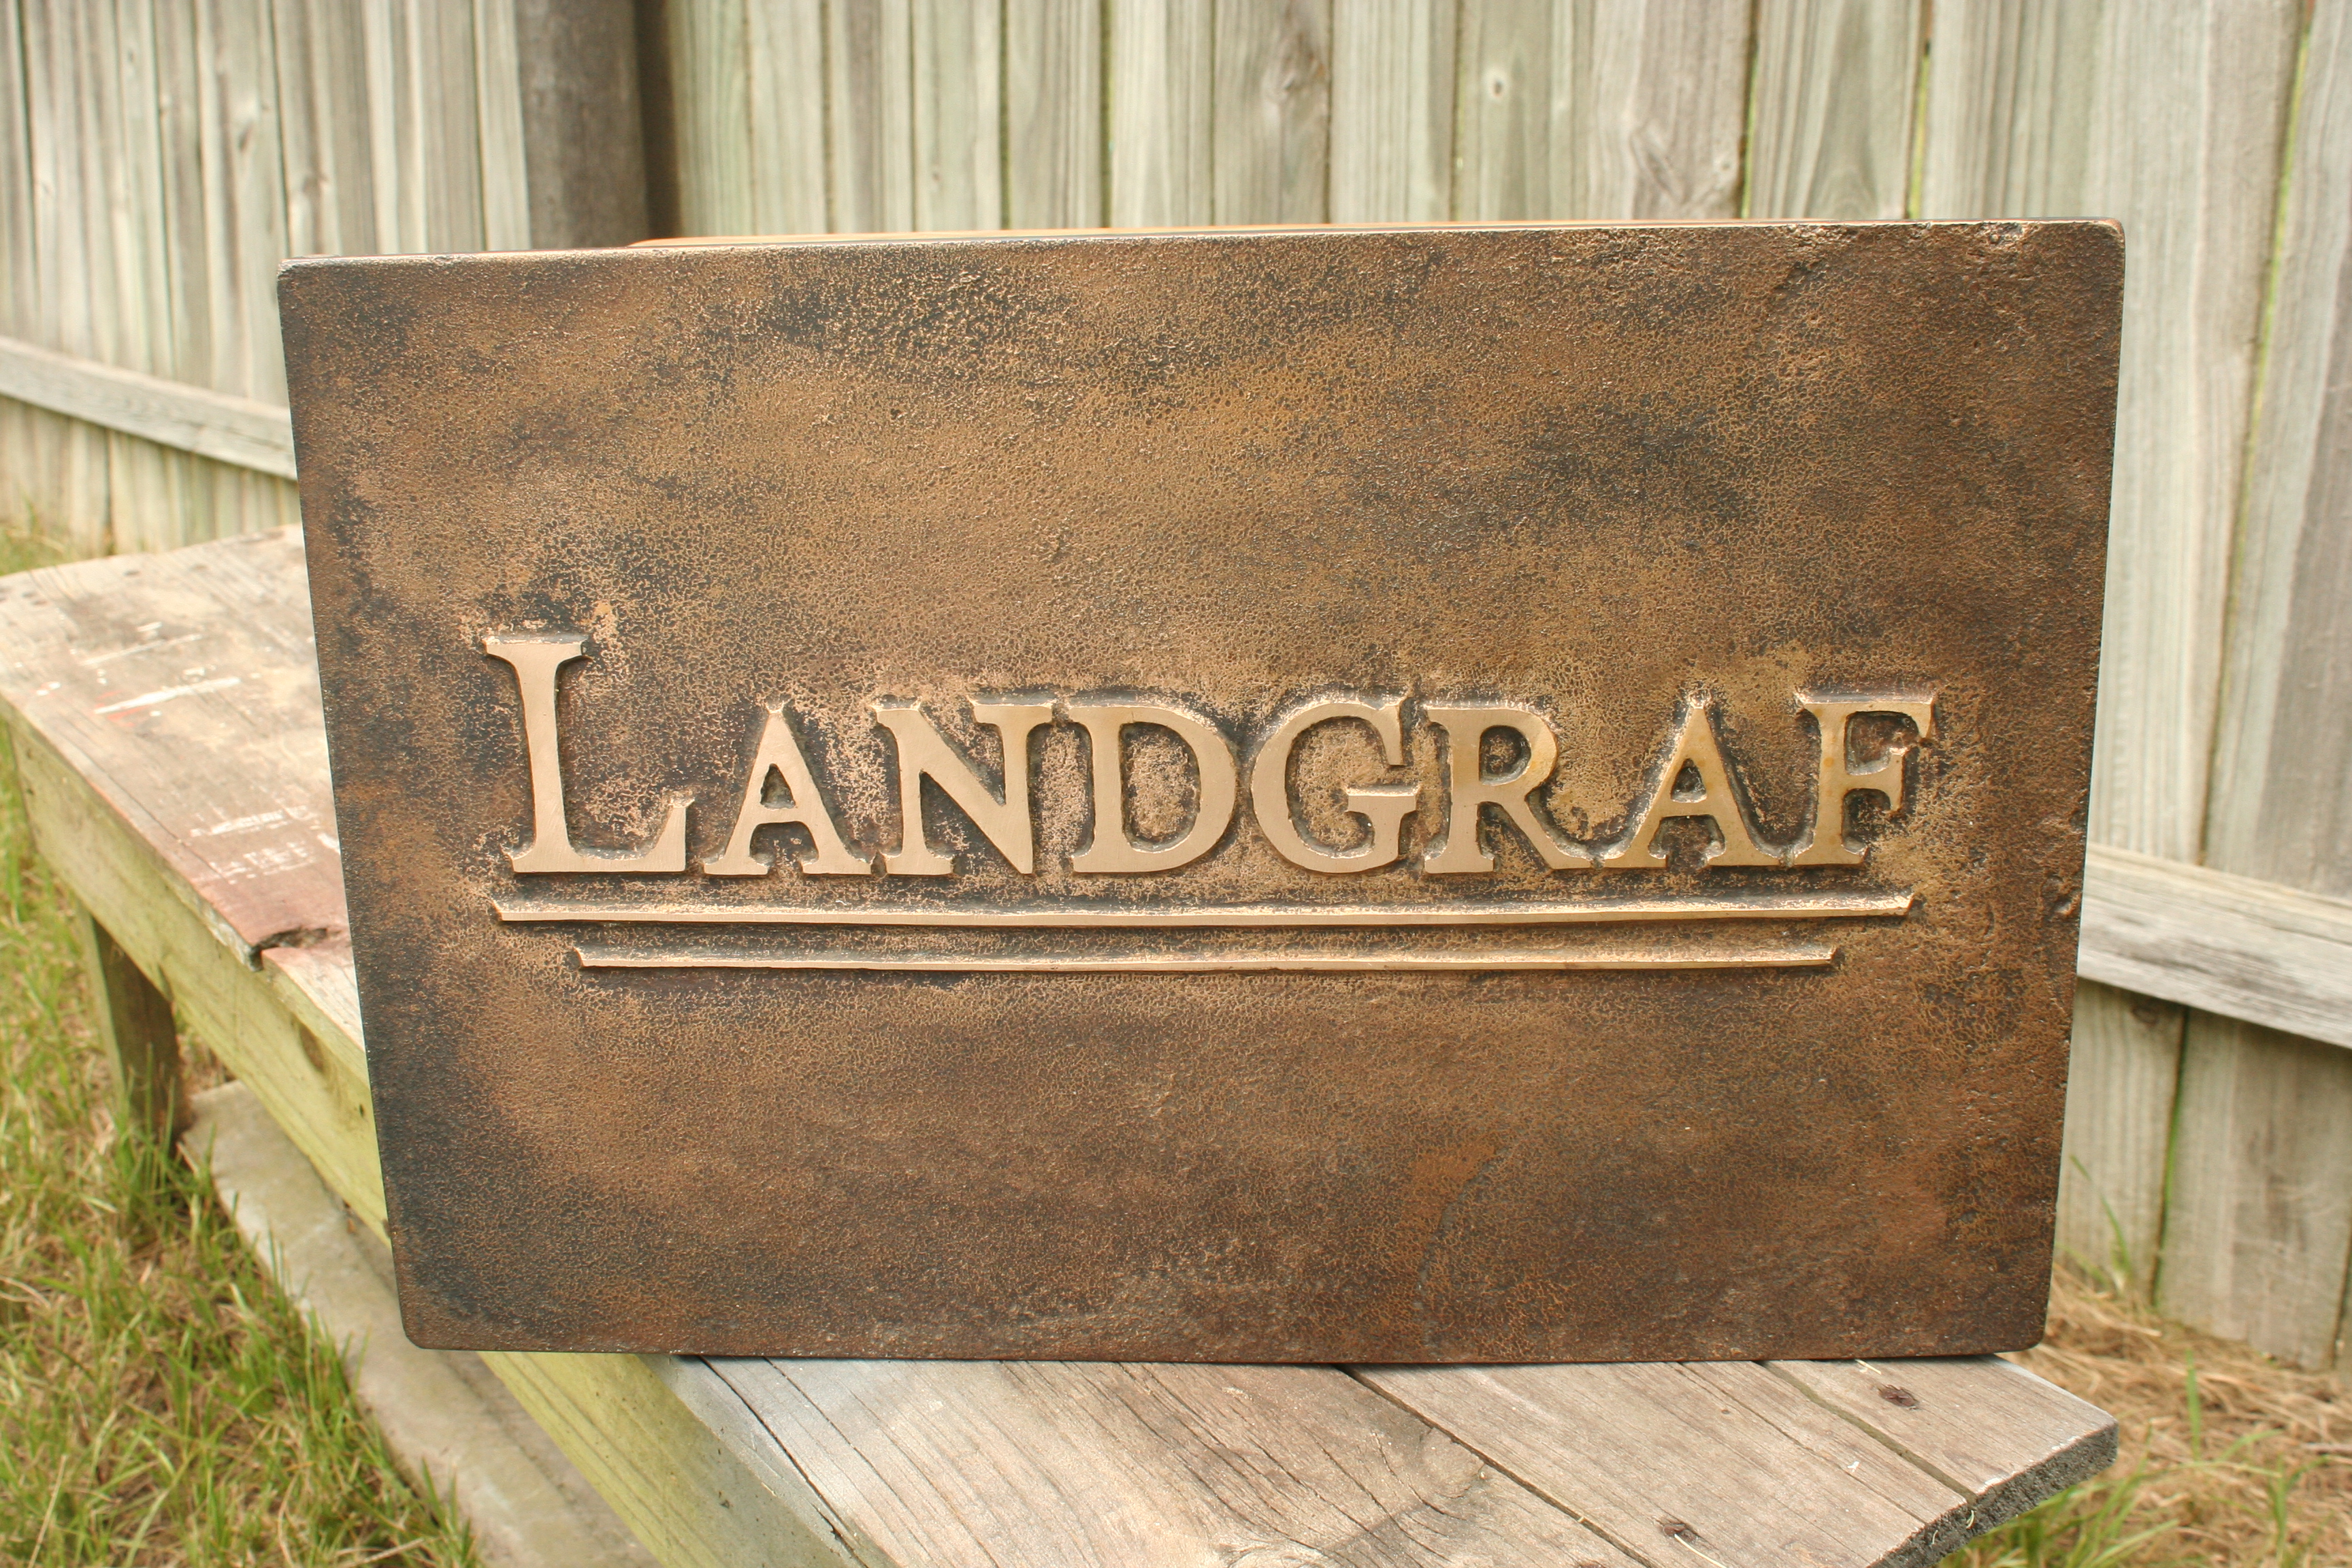
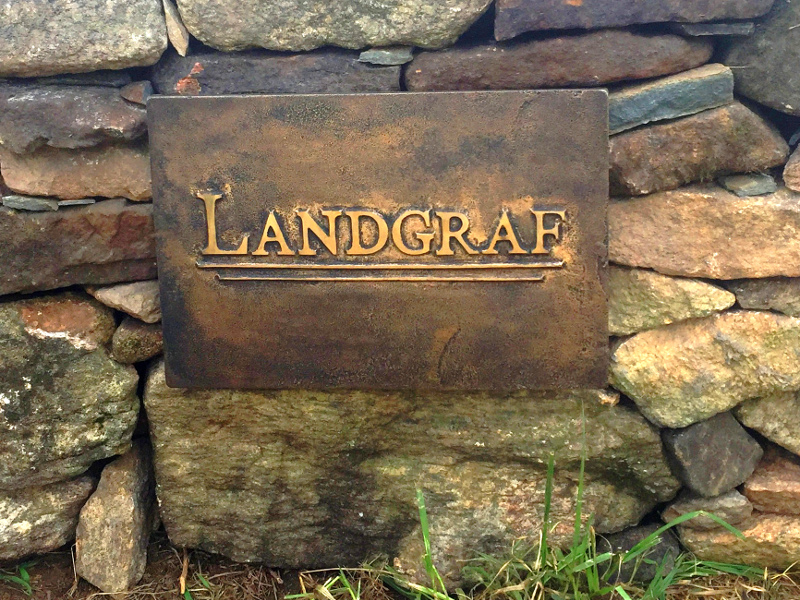
For the door though I went further, I wanted it to be a little darker and blend in with the natural stone that it was going to set next to a little better. I also wanted it to have a finish that would change less immediately and be a little closer to the final look it would take over time if it wasn't waxed. To bring out that darker color I crushed up some sulphur in water (readily available at any garden center) and rubbed it into bronze. It really brought out a nice dark patina that showed off the defects and imperfections of the casting (what I was shooting for, something that blends in with natural stone). Then to make the letters pop out I gave them a quick hit with the sander followed by an application of paste wax to the entire door.
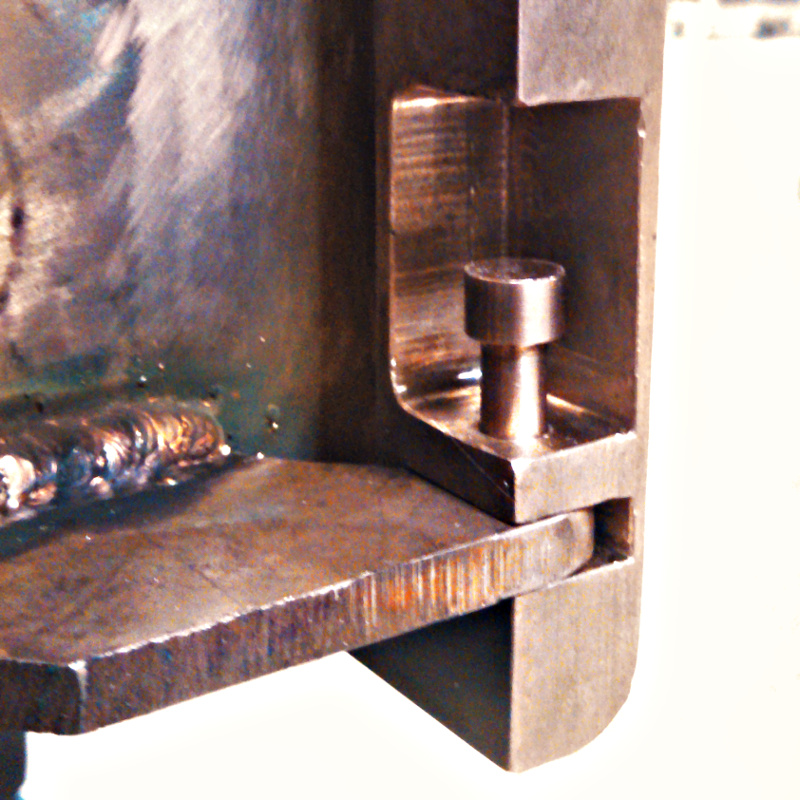
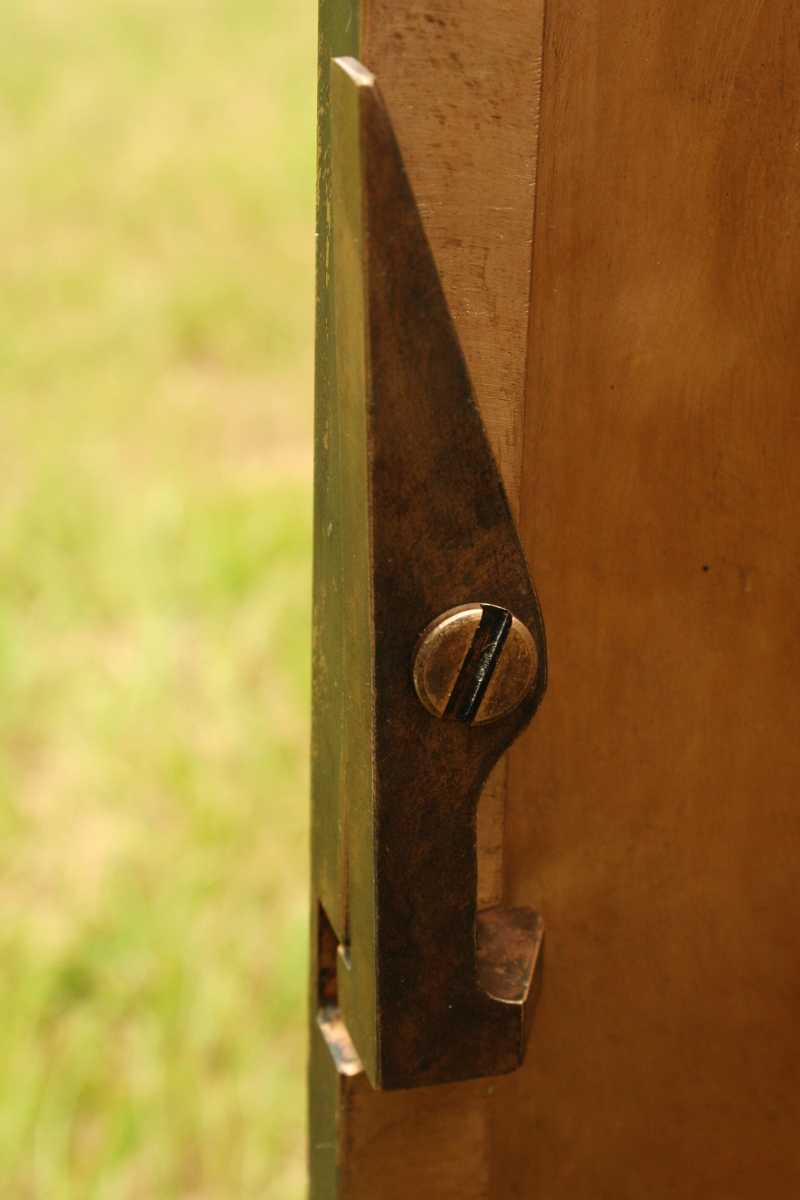
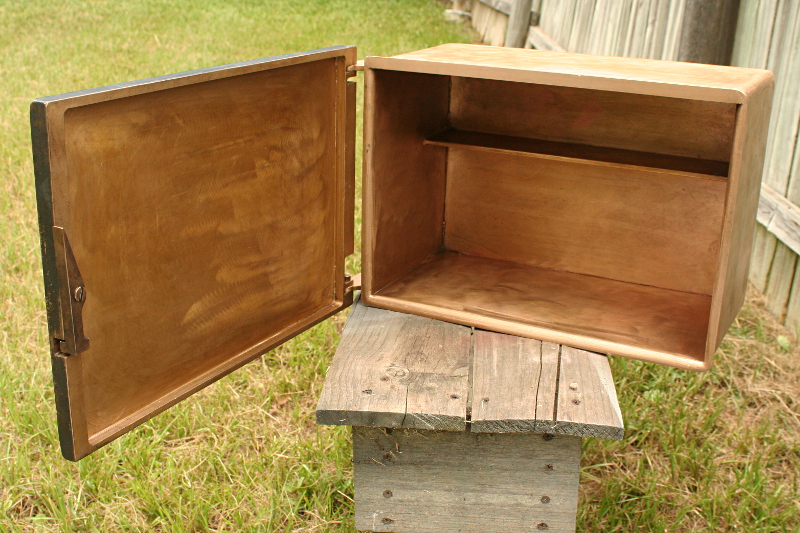
Here is the finished latch as installed, it simply pivots around the shoulder bolt and gravity pulls it into place behind the lip of the box when in place. Pushing in with your fingers on the top of the latch pops it out away from the lip.
And here is the interior, as you can see the finish is purposely not a perfect shiny affair but a more subdued and imperfect look. This will age better with time and scratches won't be as noticeably when they happen. I generally do not like perfect, high gloss finishes because they only look good until they are messed up, it is better to make something that doesn't draw attention to the inevitable damage.
Installation
My part was done now with the box. I packed it up and sent it off to Virginia just in time to meet my brother there so he could install it. Here it is as he started building the wall around it.
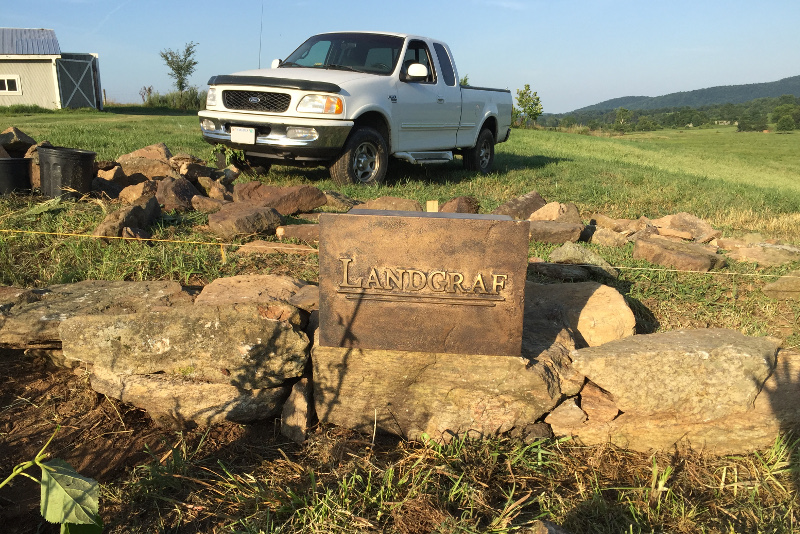
And with all the rocks placed around it.
His wall is coming along and almost done.
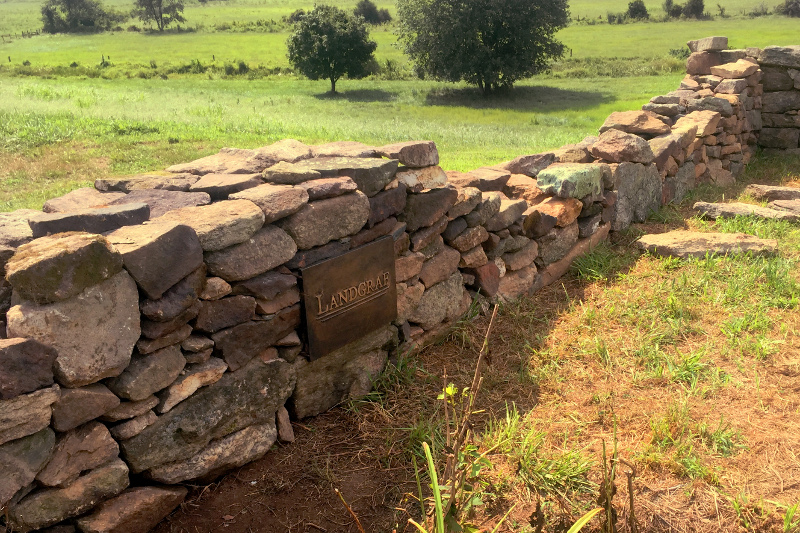
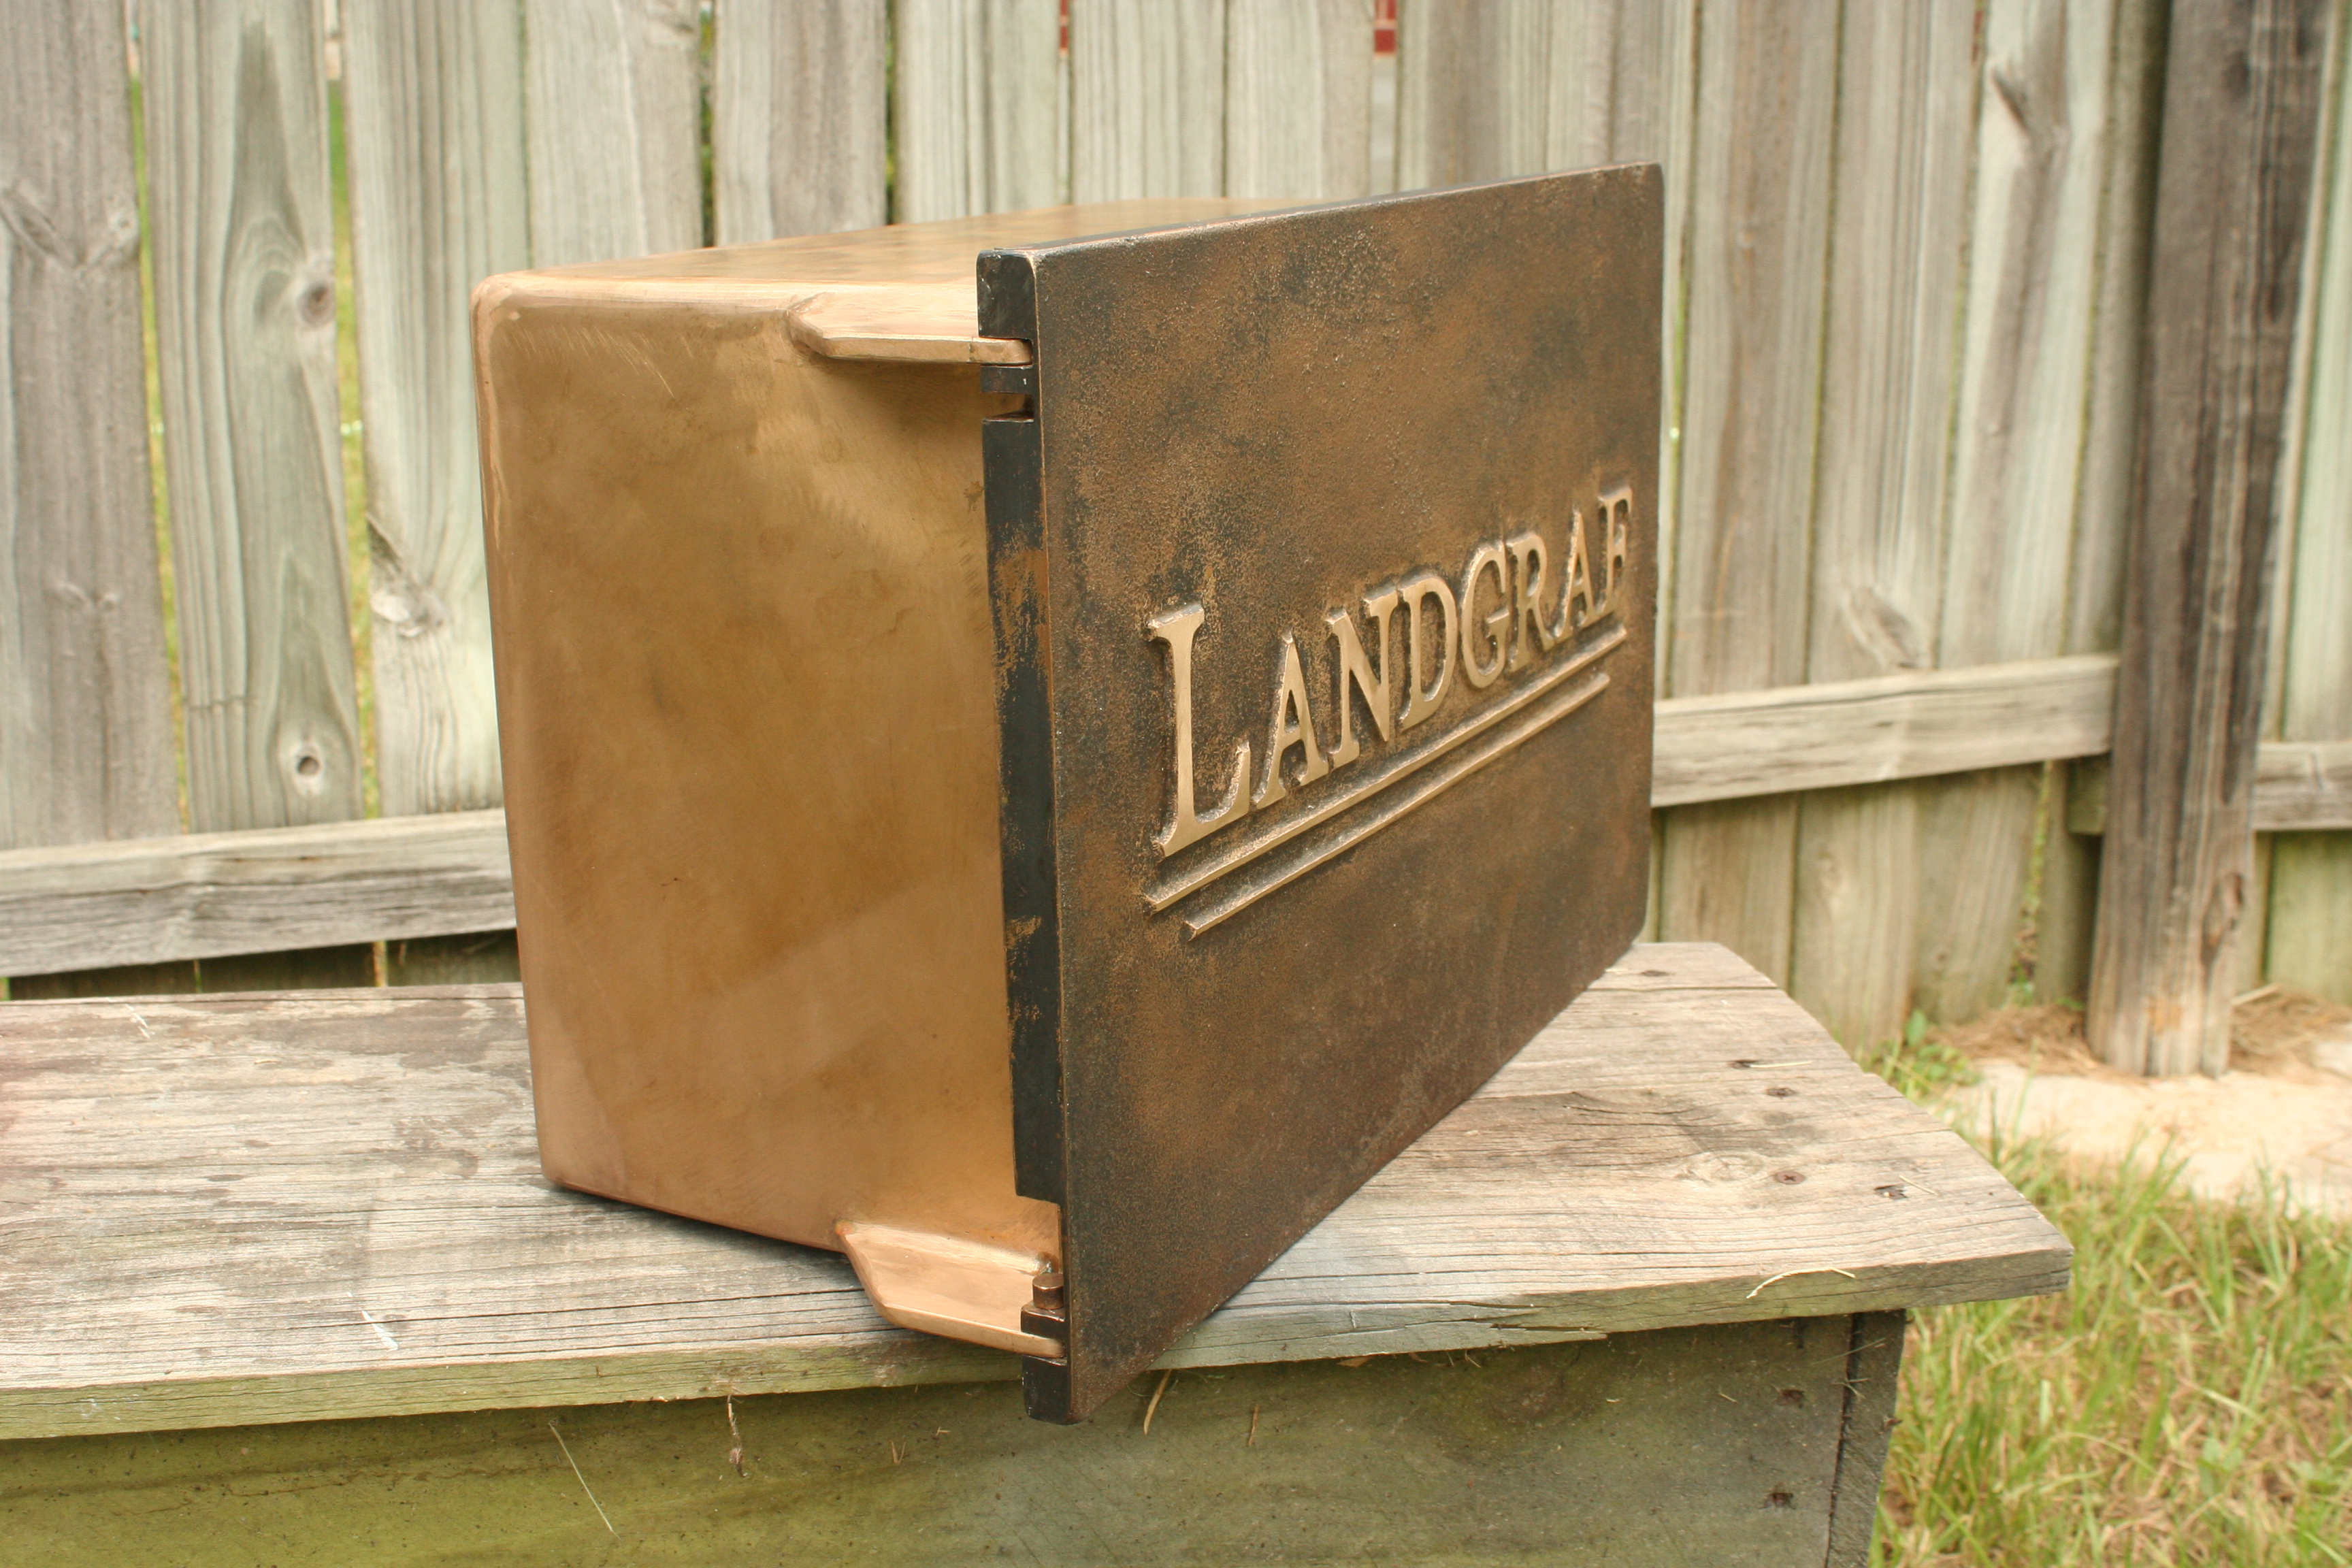
One final shot showing the completed wall and how well the box blends into the surroundings.
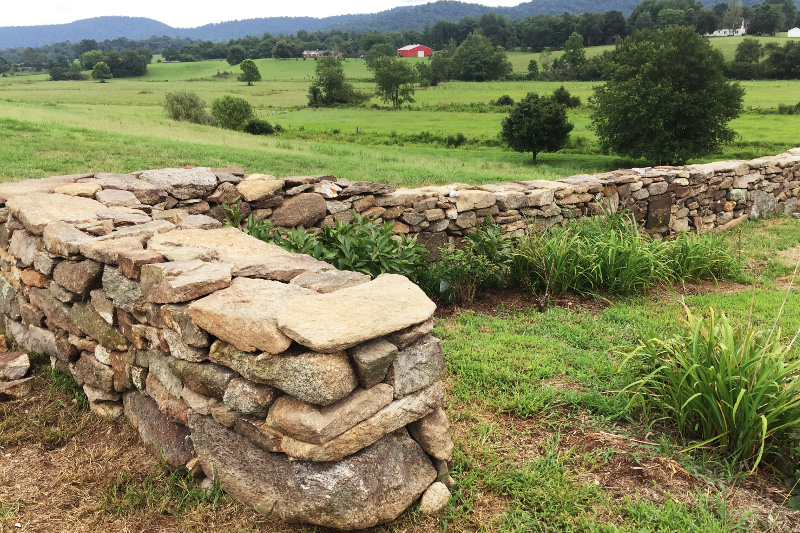
Completely finished! It certainly doesn't seem like it from this webpage but this was a seriously big project for me that spanned many months and one of the things I am most proud of making ever. It stretched on too long at times but it was very rewarding on many fronts. It was meaningful to make something for the farm after my aunt and uncle gave me so much with summers up there working on projects with my grandfather. It also stretched my capabilities and experience with a material I hadn't worked before in a significant way. It will outlast me by a long shot and who knows, maybe the farm will be in the family when I die and some of my ashes can go in it?