


A multi-window curtain rod for the kitchen
2014 sometime
So this one is a little lite on the construction pictures (a couple still frames from a short video is all) but worth it because it turned out nice and someone else might like the solution if they have a similar problem.
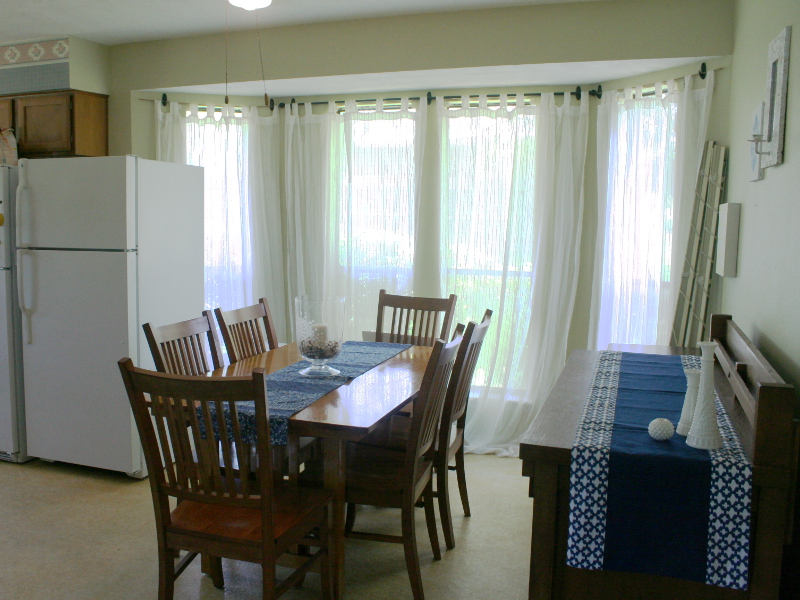
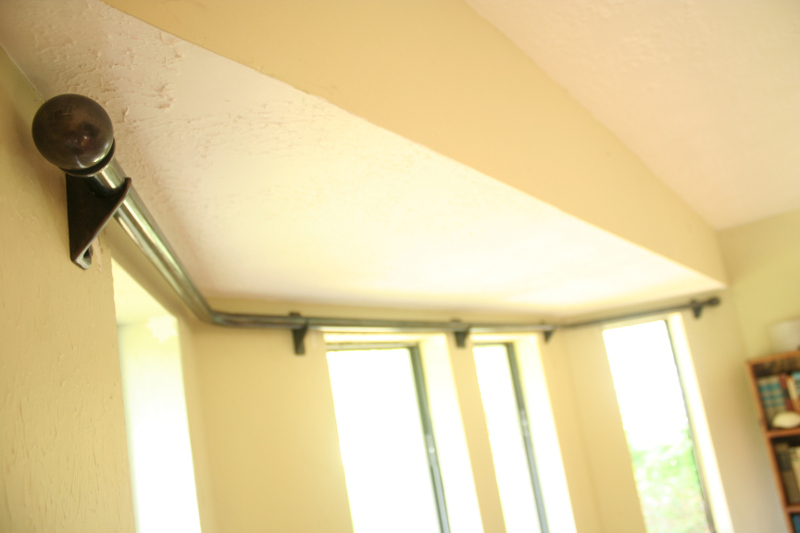
The kitchen in our house has an alcove with 4 windows which we really like because of the light they let in. They are easily visible from the road though so we don't want to have them just open all the time but blinds would be a hassle so we have some translucent privacy curtains. Hanging those curtains in an attractive way is problematic though. We don't like hanging them inside the recess but there isn't much headroom because the ceiling is lowered in that area. Also, the windows are pretty close together which means if each window had it's own rod the parts that stick past the edge of the window would probably interfere with each other.
I had more pressing projects when we first moved in so the immediate functional solution was command hooks and rods/ sticks that were on hand to hold up some curtains we had.
We looked for solutions and lived with the "temporary" curtain situation for a fair while but nothing that seemed right turned up and I decided to make something. Instead of making a curtain rod for each window I decided on one big custom rod to cover all 4 windows.
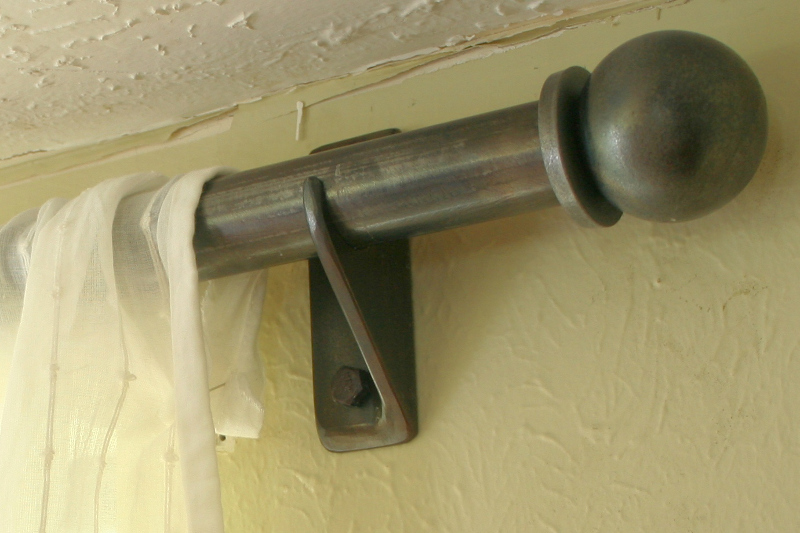
An easily accessible source of material suitable for a beefy curtain rod at a reasonable price is EMT conduit from any hardware store. Not as cheap as tubulars from a steel supplier but easy to get and also electro galvanized if that is beneficial to your project (not in this case). Anyway, that is what I decided to go with. But my end decorations (finials I think they are called) were not quite as common. I wanted something that looked simple, solid and not from a particular decade. In the end I decided to make my own out of solid 2" diameter steel balls with a large heavy washer to make a shoulder.
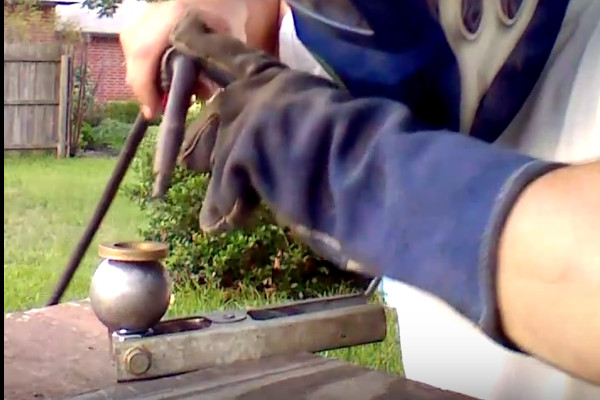
After I attached the washer I welded the ball onto a length of threaded rod. Once the welding was completed I cut the ball off with a couple inch long section of stud.
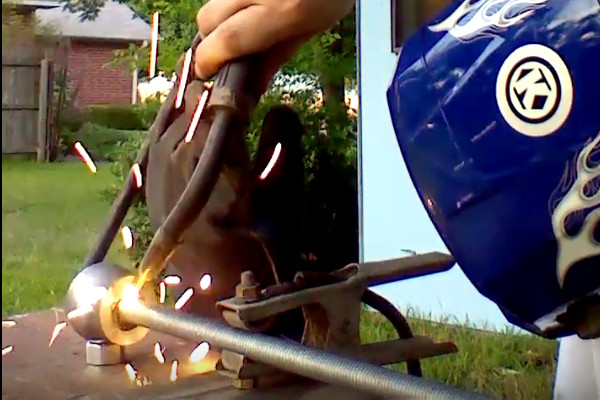
The stud would then allow the finial to screw into the end of the curtain rod where I had already welded a nut in inside the conduit. I used the thread size I did because the nut conveniently just fit inside the conduit without any modification which made it easy to put in. The welding on it wasn't very nice but it doesn't matter because it is never seen and doesn't do anything except hold the decorative ball on.
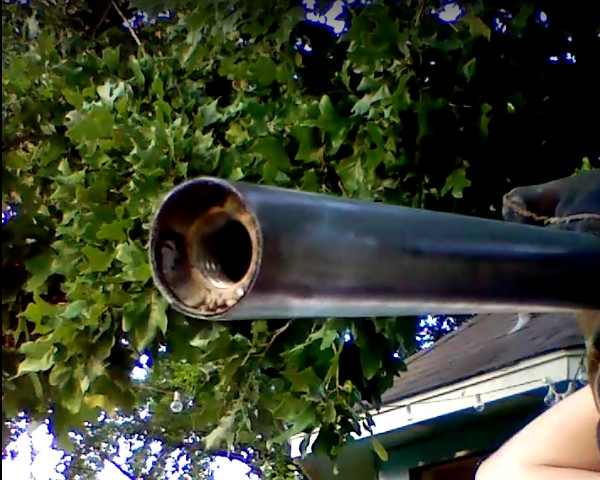
Now one might ask why bother with the nut and all-thread? Well, a 2" ball permanently mounted on the end means that whatever curtain is used must be able to pass over it and that is a pretty large thing to pass. It also let me hide all of the welds used to fabricate the end making my life much easier actually.
Unfortunately I didn't snap any pictures of the rest of the process so a textual explanation is all I have.
After the balls were finished and the nuts were inserted into the tubing I measured, and re-measured and checked again on the wall dimensions. As is always the case in house construction the alcove had different length walls and corners that were not the same angle. This kind of stuff is almost always small enough that it isn't noticeable to the naked eye until you have dealt with it personally or something that draws attention to it is put in close proximity.
When I was certain my measurements and math were correct I cut the conduit and pre-bent elbows to size then tacked everything up so I could drag it inside and test fit while it was still easy to tweak. I think I did have to tweak the corners a tiny bit but I was really close and after I welded everything up I was spot on.
Obviously I didn't get any pictures of the finishing or the brackets that hold everything to the wall. Because I made it out of EMT the rods were coated in a thin layer of zinc which I didn't want. I sanded / wire brushed all of the plating off which left me with bare steel. That wasn't the look I was going for and it would rust immediately so I applied a finish that I would have to describe as heat blueing/blacking. I got out my large propane torch and heated up the rod until the heat turned it almost the darkest blue possible. Then I moved the torch along and pushed the color down the whole rod shooting for dark blue all over. When I got everything as close to dark blue as I dared (don't go too far, it turns grey when the oxide layer gets light grey when the oxide layer grows too thick) I went over the whole rod with a stainless brush by hand. This roughened up the oxide film and changed the dark blue into more of a grey. To preserve the color and prevent rust later I then shot a coat of clear rustoleum enamel on.
The hangers I just cut out of angle that I had lying around and then treated in the same manner as the curtain rod itself. They are screwed into the wall with small lag bolts that hit studs in the wall. I cheated on finishing the screw heads a little. I painted them before installing the hangers but the socket always knocks some paint off so I touched up the bare spots with a dab of black sharpie so they aren't noticeable.
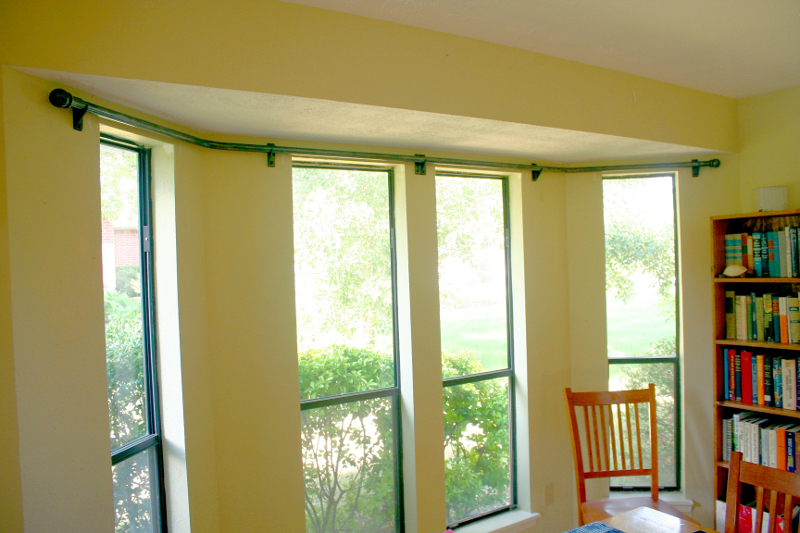
I think the project turned out quite well. Now I need to make the matching one that will go in our master bedroom. That is a little more complicated though because it needs to be a two rod system and blocking all light with no gaps is important. Whenever I find that stash of round tuits right?