Router Circle Jig
Winter, 2017
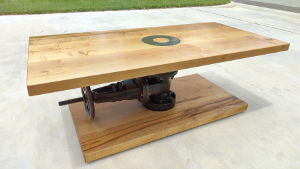
While working on the valve table I decided I needed to route out some nice accurate circles in the top and bottom. I didn't have a good way to do that so I made a jig for the router to help me out. It is made out of some convenient aluminum scrap I had on hand and is really crude but hopefully it will get the job done and be useful in the future.
So the basic concept is a screw on base that will replace the standard router base plate. The base will have a series of holes in it that can fit over a nail and constrain the router. So I figured out where things would be and measured out a series of holes. as well as an arc so the router could swing on the plate around one of the securement screws.

The incremental holes are for major adjustment (IE, a 5" circle vs a 8" circle) while the arcs that allow the router to pivot around one securment screw will allow a fine adjustment on the order of 1/2". Between the two adjustments I should be able to generate any size circle between about 3in dia and 2ft.
I drilled at each increment (shown) as well as drilled a chain of holes on the arc (not shown).

I then used a coping saw to turn the hole arcs into curved slots. If I had my mill and rotary table set up right now I would have just milled arcs but chain drilling and cutting out the waste isn't that painful to do.

When the sawing was finished I used the router to help make a tools for itself (I always find that kind of funny to self assemble). A nice thing about aluminum is that as long as you are careful with what you are doing carbide tipped woodworking tools often do a decent job on aluminum. In this case some simple routing to make a depression to recess the heads of the mount screws.

I didn't have a bit for the router that was small enough to reach into the chain drilled slots though and they were still a little rough after the coping saw so I cleaned them up some with a small bur in the dremel.

The dremel is faster than using little files but still can't do as nice of a job getting everything smooth and straight so eventually I moved on to finishing the arcs up with a file.

So after I prettied up those slots the jig was done. It simply screws onto the bottom of the router instead of (or below) the normal base plate.

The pivot point is just a plain 'ole brad nail with a head a little smaller than the pivot holes.

Then set it by measuring from the outside (or inside as appropriate) of the router bit to the middle of the pivot pin hole you want to use.

The diameter adjustment isn't super accurate on the first shot (probably within about a 1/16th) but it does make a pretty nice circle. Unfortunately the built in depth adjustment and stop on my router doesn't work that well so I ended up making this groove on the valve table base deeper than I really intended it to be.

There are other better circle routing attachment styles but this one was quick to make with the material I had on hand at the moment and does what I have needed it for so far so I consider it done and usable enough considering how often I need it.
