


Valve Table
August 2017
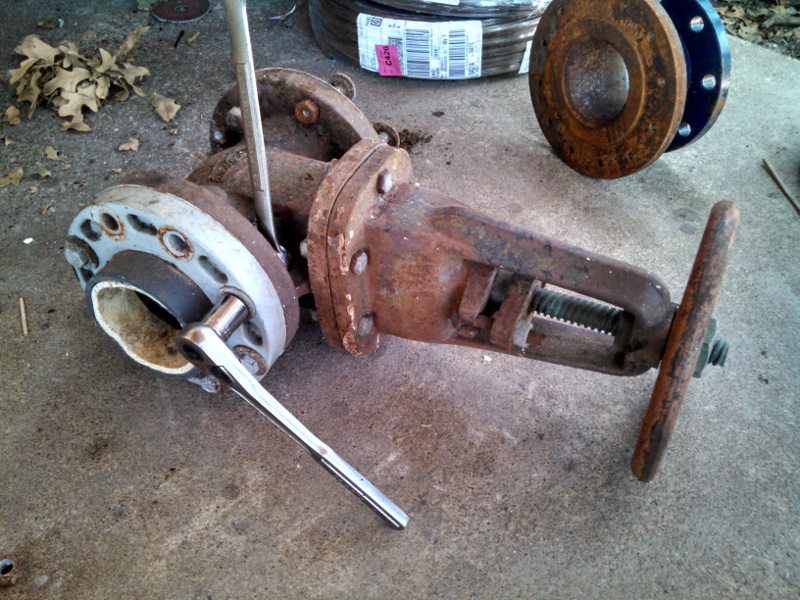
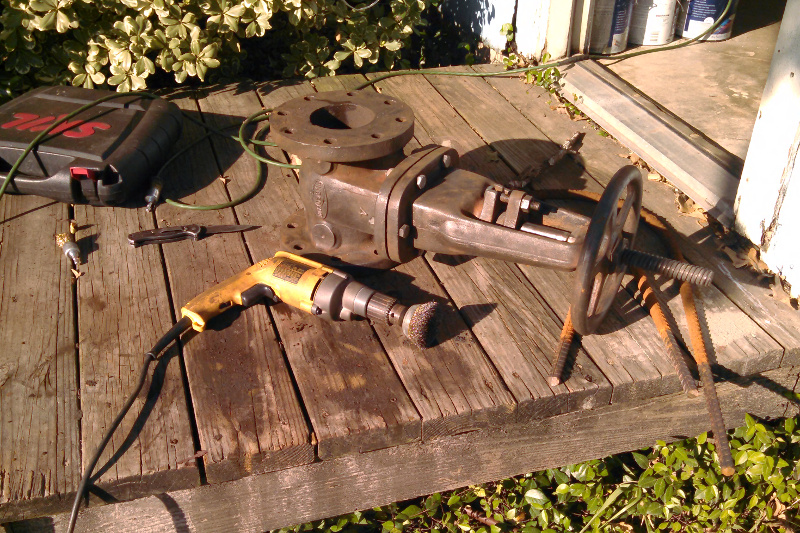
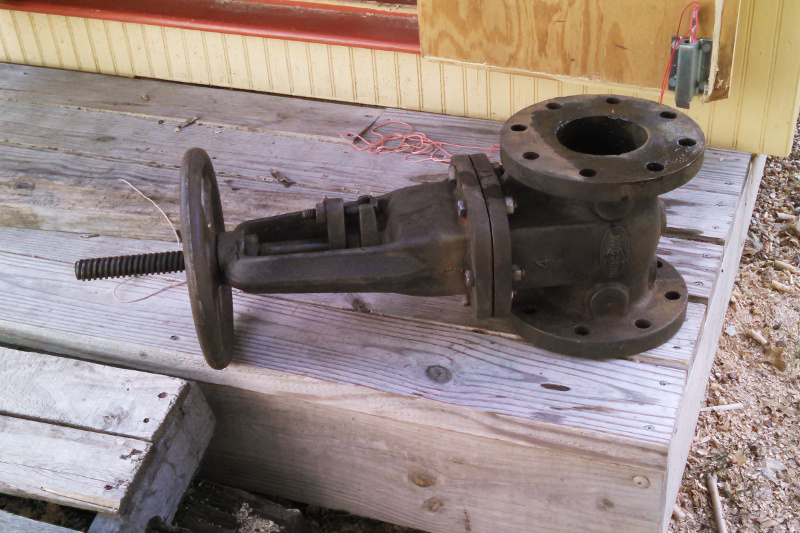
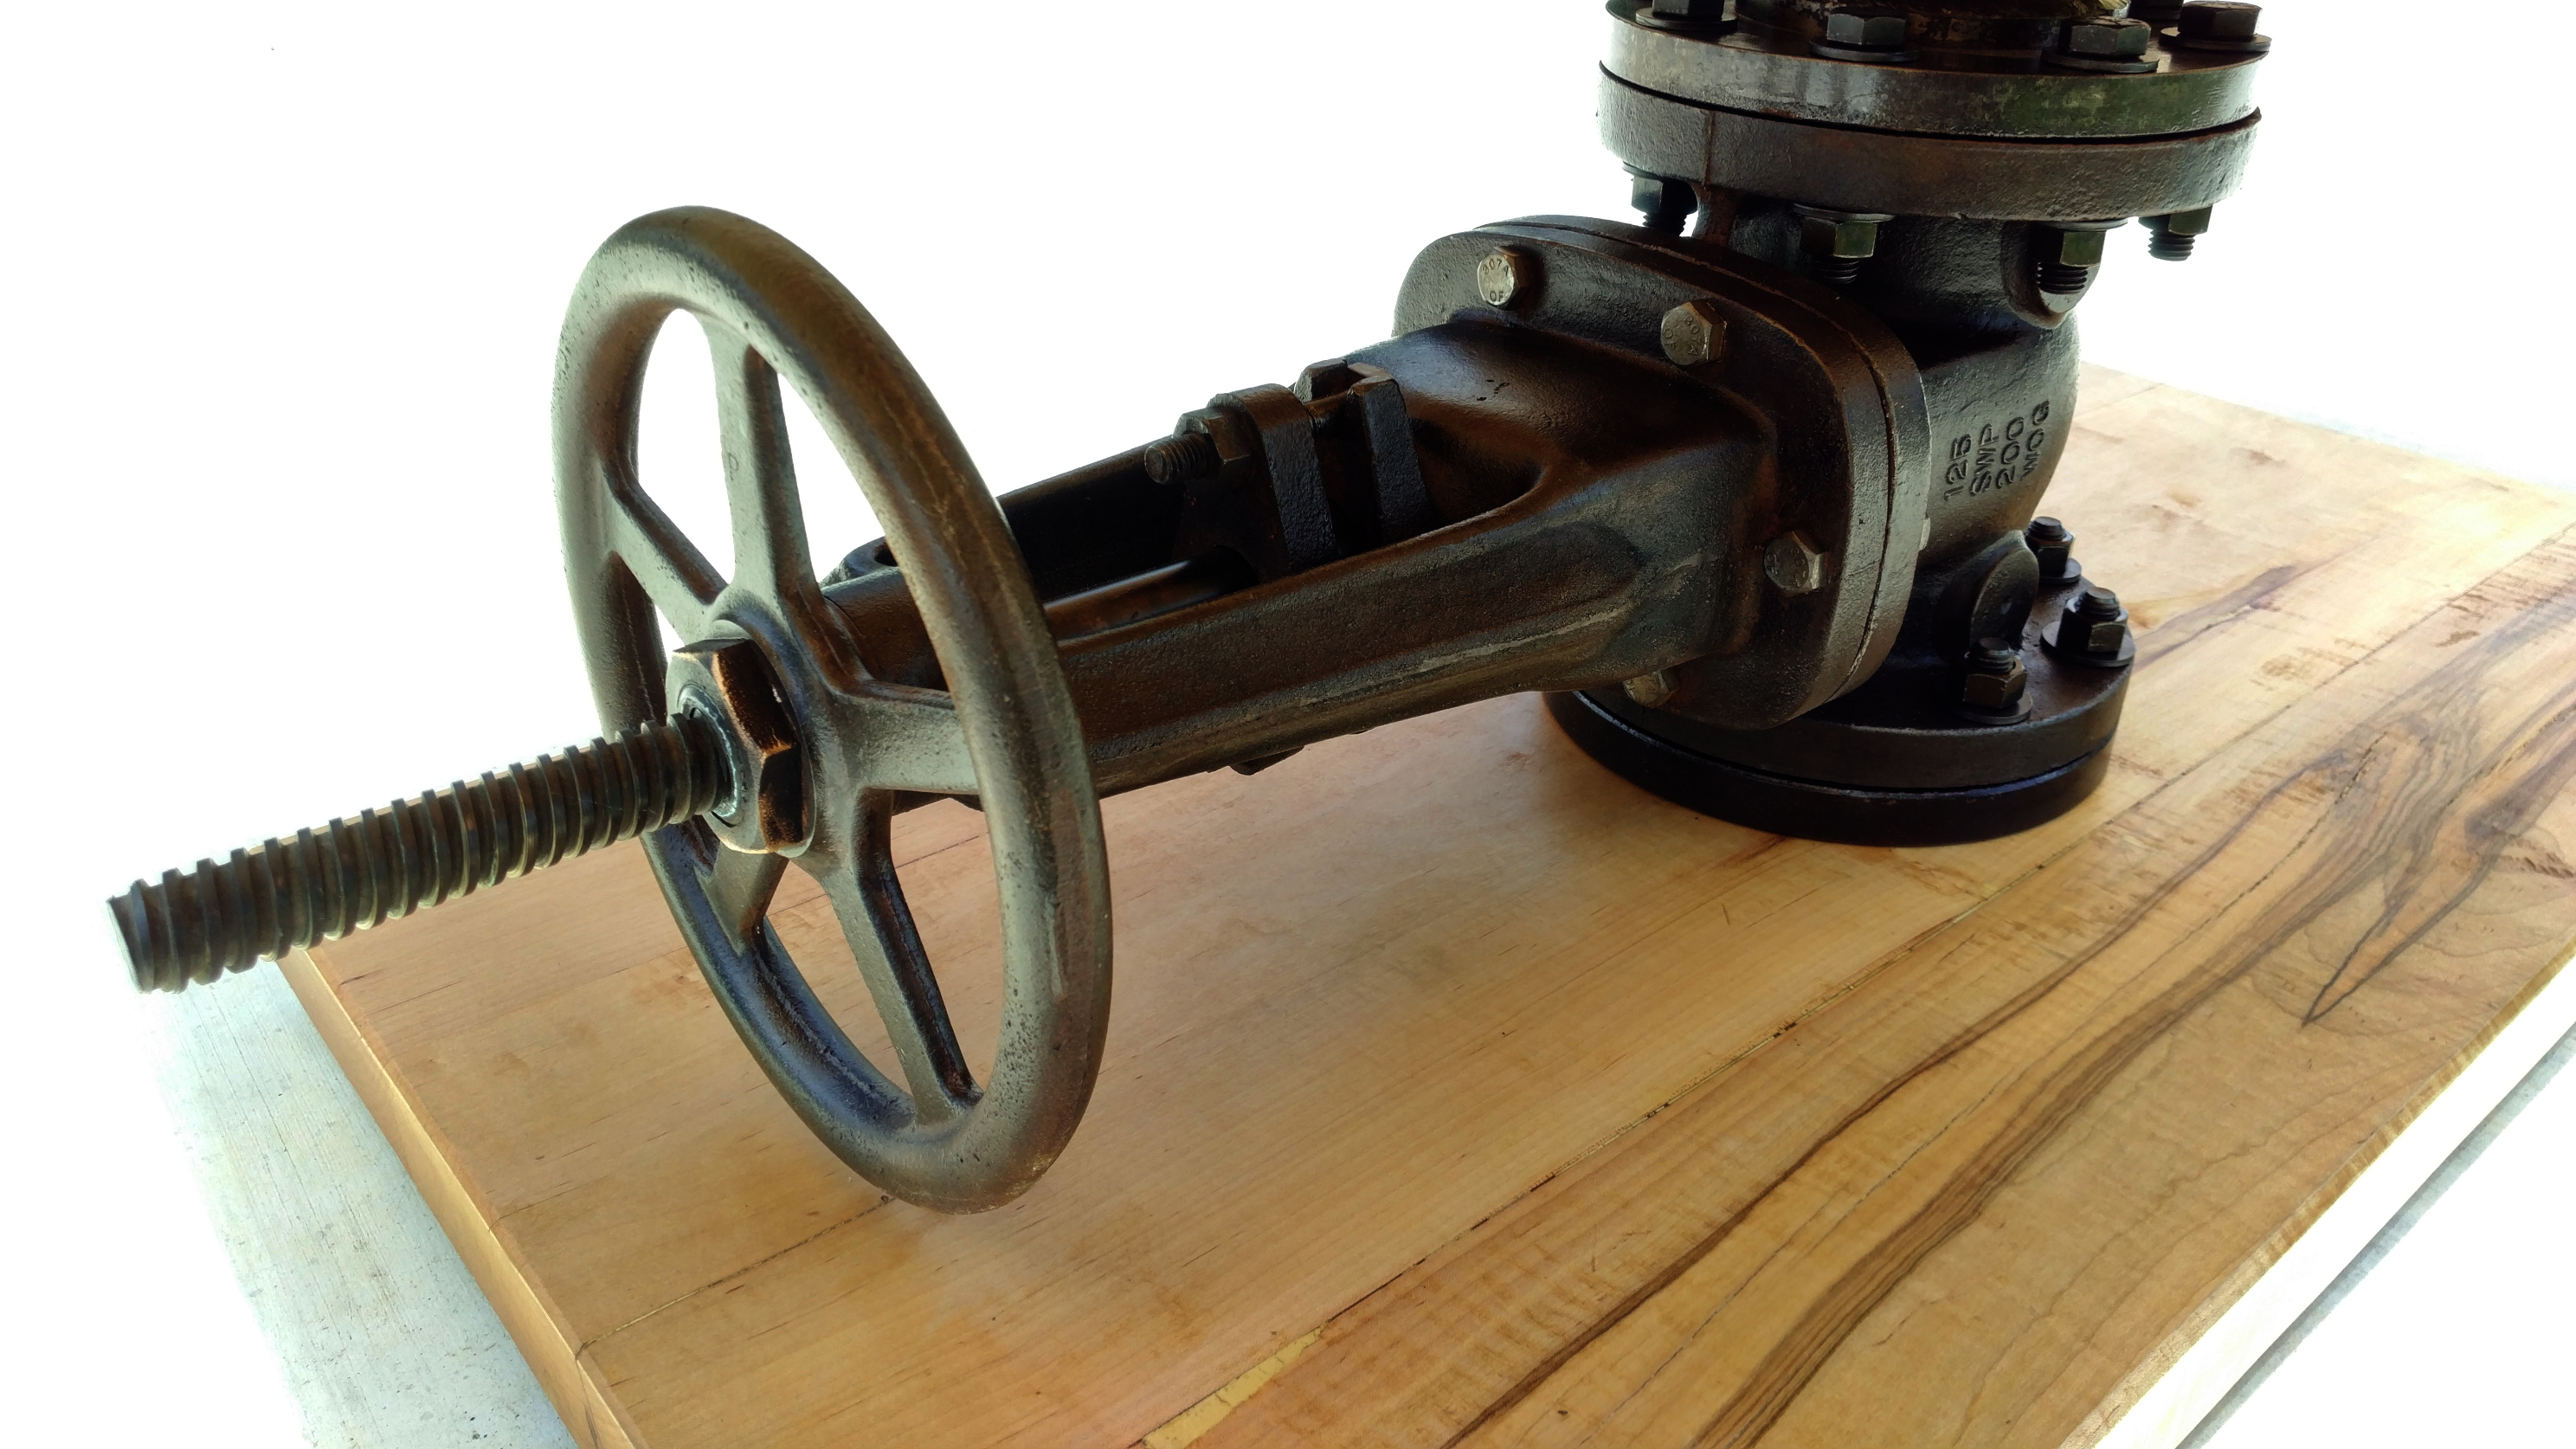
I salvaged this 4" gate valve from a building I was given access to that was being torn down. I didn't have a clear reason for it at the time but I quickly settled on a desire to make a table with it. The accompanying flanges etc.. aren't cheap so I set it in the "round tuit" pile while I scrounged parts.
Well, I finally collected the flanges that I needed and decided to build the table. I was at first intending to use pre-made butcher block countertops but everyone seems to be getting thinner and thinner on those and I didn't see what I wanted for anything approaching a decent price.
Even though it will probably cost more in the long run I decided therefore to make the table top myself out of rough sawn lumber.
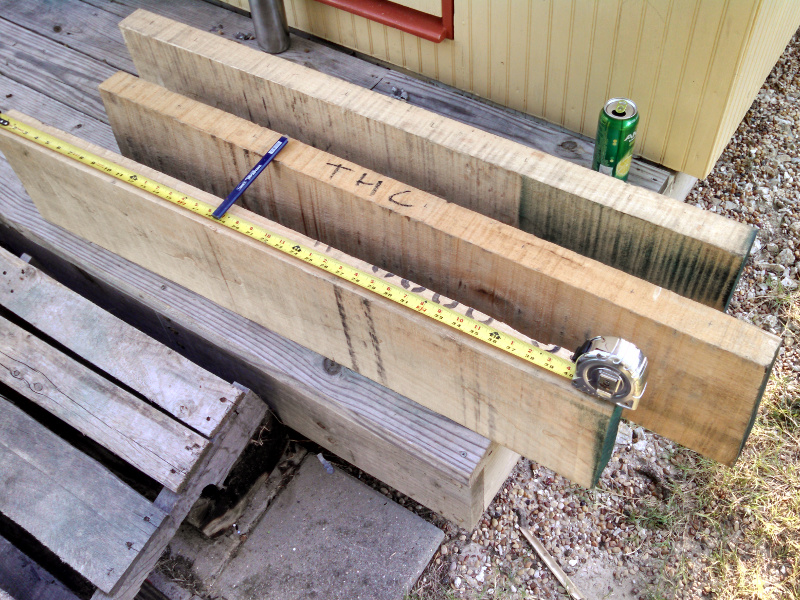
A local small lumber yard has a sawmill source that stocks hardwoods so I ordered 72 linear feet of +8in wide by 2in thick hard maple.
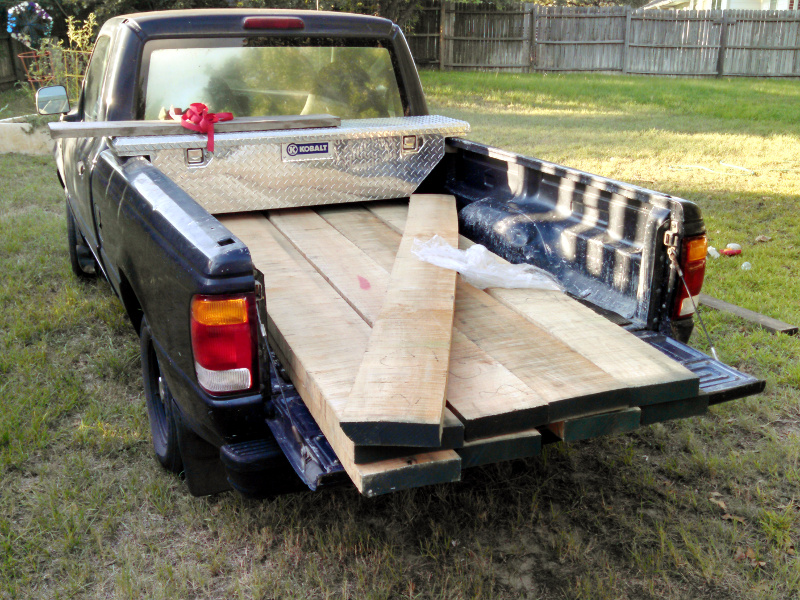
All of that wood isn't for this table, I will eventually make tops for a series of saw table clones when I get a pattern made for casting smaller versions of those legs in aluminum.
That is likely far in the future though so back to the table at hand. I had 8ft long board and wanted the top to overhang the base by about 6in on either side so I selected three boards and cut them so the best end was 4ft 6in and the worst end was 3ft 6in.
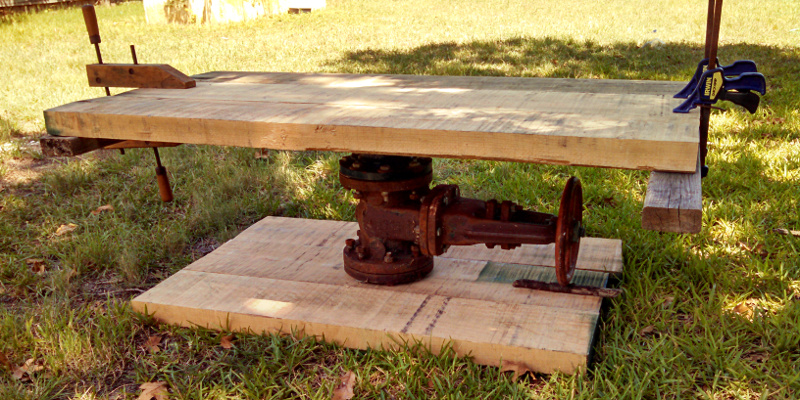
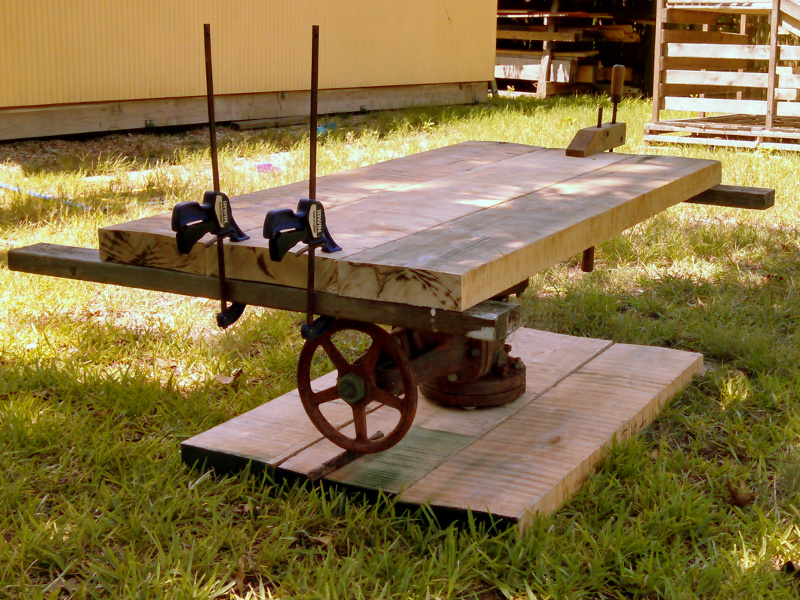
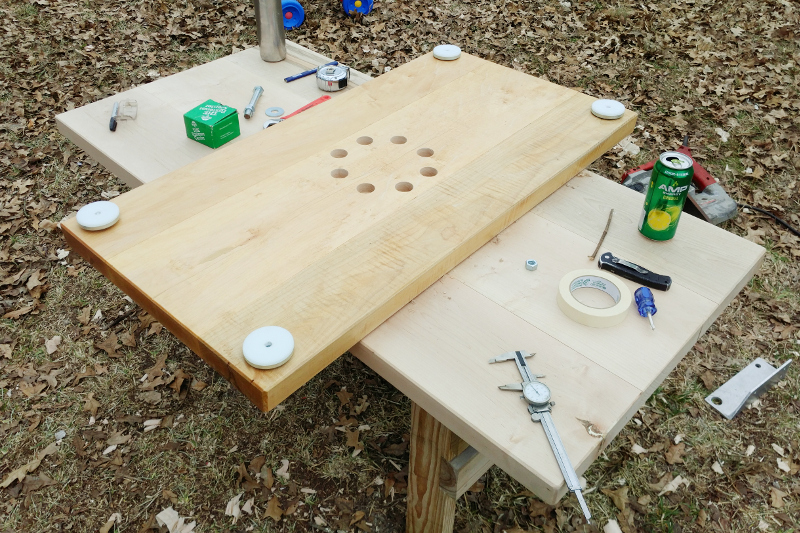
Because it is exciting I whipped up a quick mock-up of how the table would look.
Mocking it up is fun and all but doesn't accomplish much. I need to turn the boards into a solid top. At first I thought I would cross drill for all-thread and just bolt the boards together but after I held the hardware up to the lumber I decided that wasn't the way to go and I would take the path of a doweled glue up.
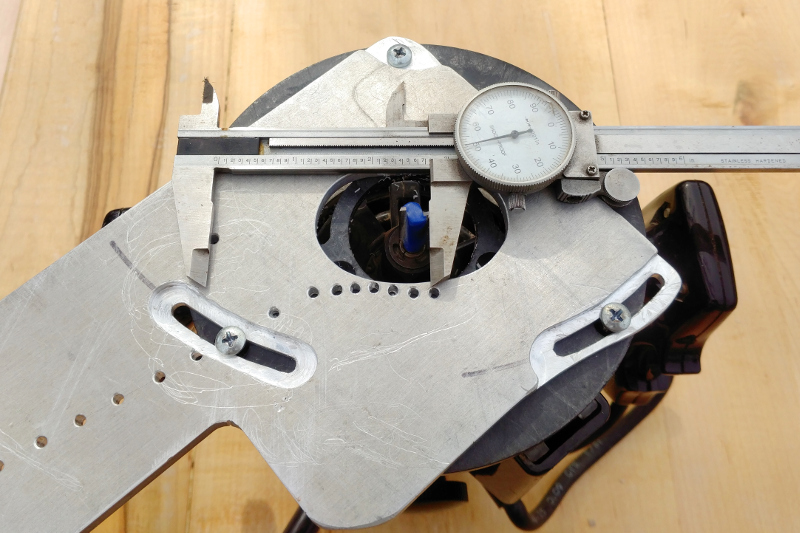
Doweled joints means holes and I don't have a jig for that so I made one specific to this project. First step was drilling a straight hole in some hardwood from another messed up project.
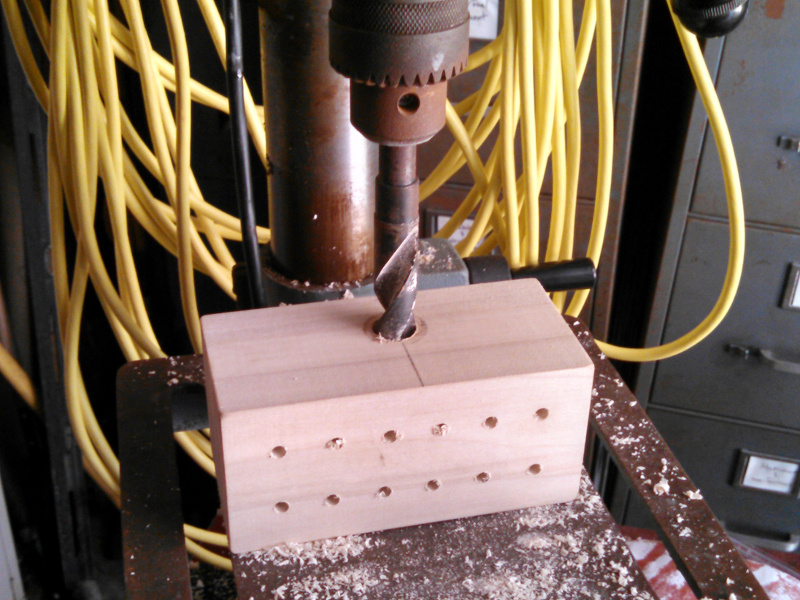
Then I attached that drill block to another peice of scrap and the jig was finished. Nice perpendicular holes in the center of the boards (I hope).
I decided to put a dowel in roughly every 6 inches, marked out from the saw cut end.
The drill guide worked just as anticipated and I made quick work of drilling the holes. To make them all equal I drilled until the top of the bit just sank below the top of the jig, nice and easy since the depth isn't really critical, just helpful to have them the same.
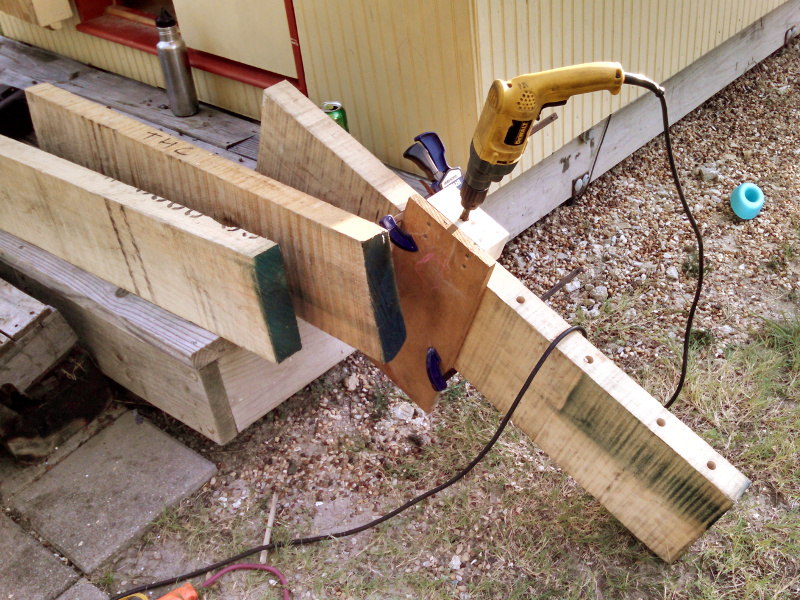
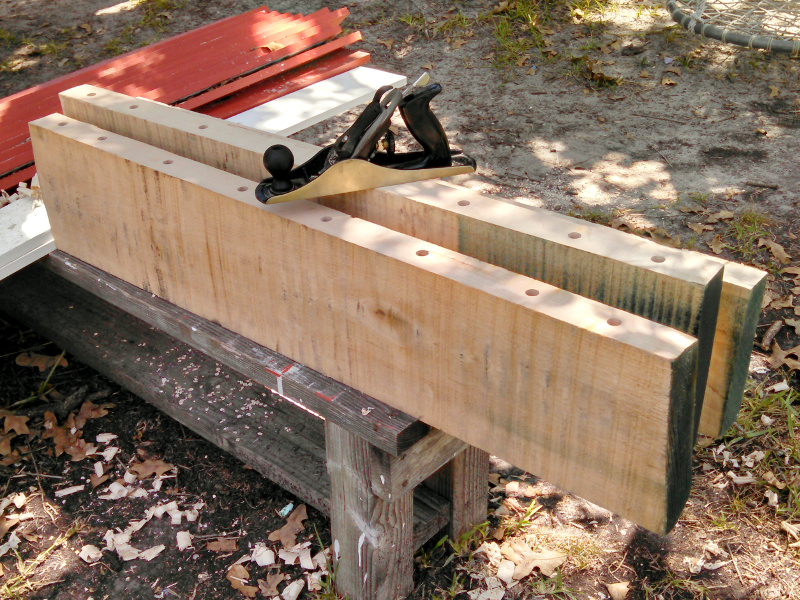
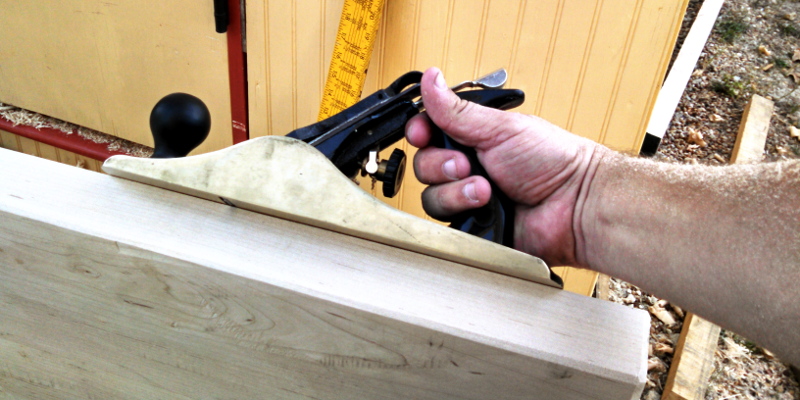
Before I glued the boards together I planed the surfaces down square and straight checking them against each other. I didn't shoot for perfect since this table doesn't need invisible seams (I want a semi-rough hand planed look) just within a 1/16th or so.
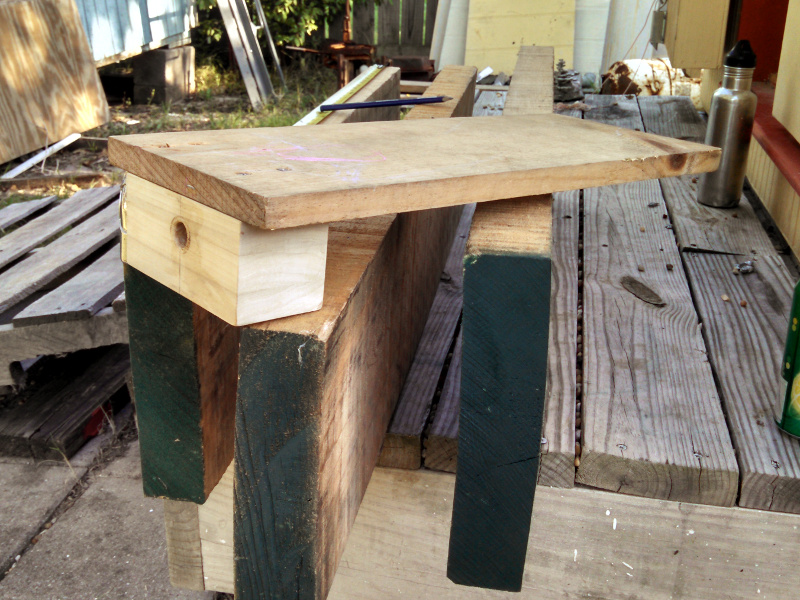
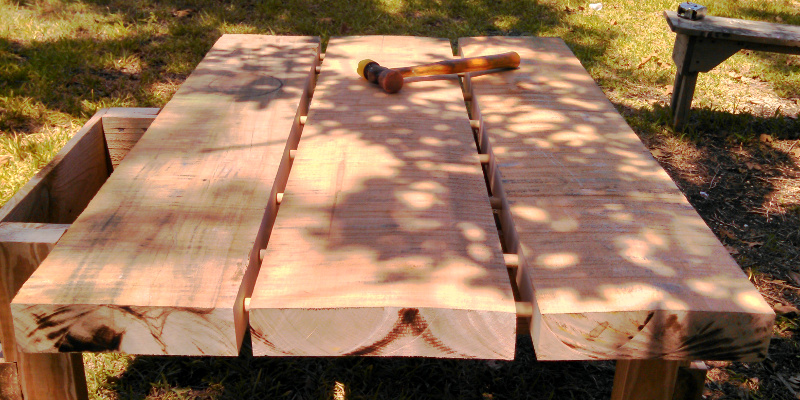
When I was ready for gluing I put the boards together with dowels to test that there wouldn't be any surprises after I broke out the glue.
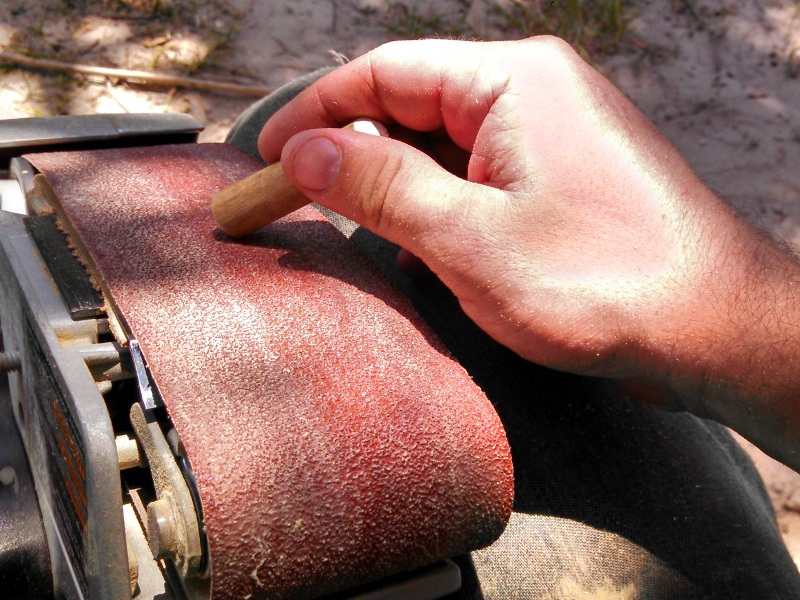
It was a good thing I did a dry fit up because there was a problem. My dowels were a little too long and more difficult to get into the holes right than I wanted so I broke out the belt sander and took the length down while adding a chamfer to each dowel.
All ready for glue now I filled the holes before inserting dowels and also spread PVA glue (wood glue/Elmer's school glue) on both sides.

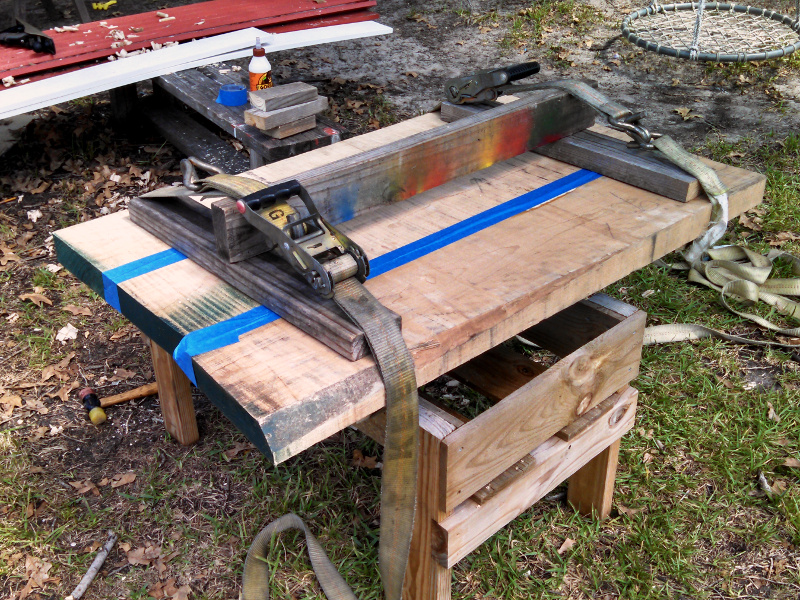
Things went together well and I got everything together with an adequate amount of glue. I knocked things together with a soft hammer then taped the seams to help hold the glue in while everything dried.

I used ratchet straps to cinch everything down and keep it clamped for a couple of days since that is what I have. I used a few bits of 2x4 to hold everything straight and keep the ratchet off of the work.
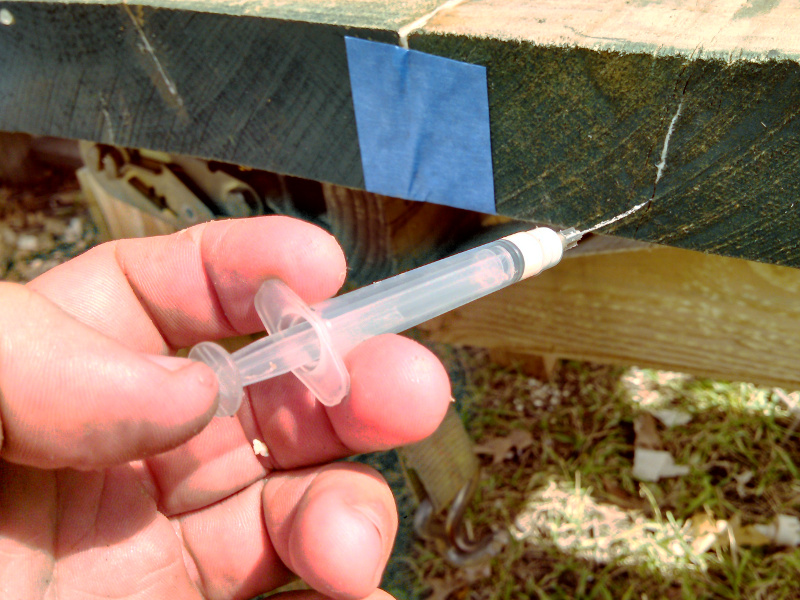
While that was drying I took the chance to fill some cracks with glue. A syringe works great for this. It is hard to fill the syringe with the glue (suck it up without the needle) but the needle lets you squirt glue down and inch or two into the crack.
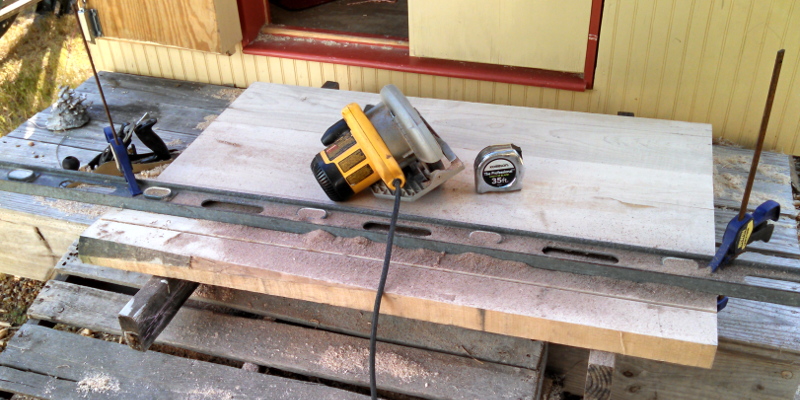
Now, I like using a hand plane but after I spent an hour or two going at it I decided that I would try out a power plane and picked up a new porter cable unit.
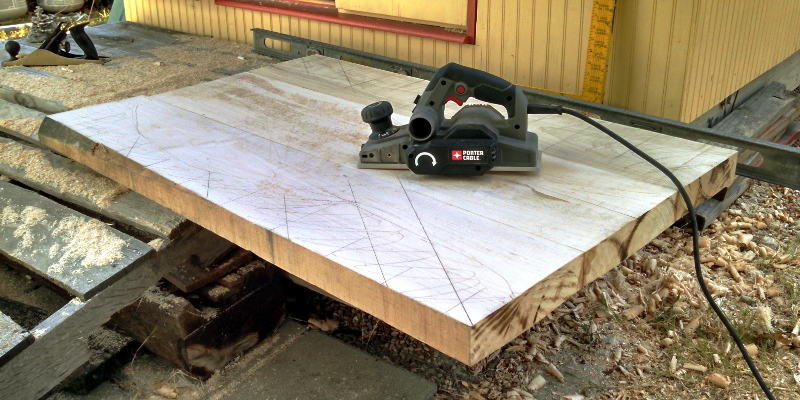
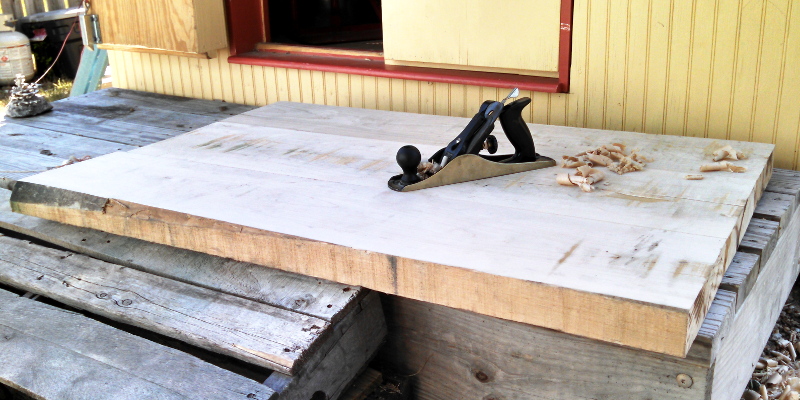
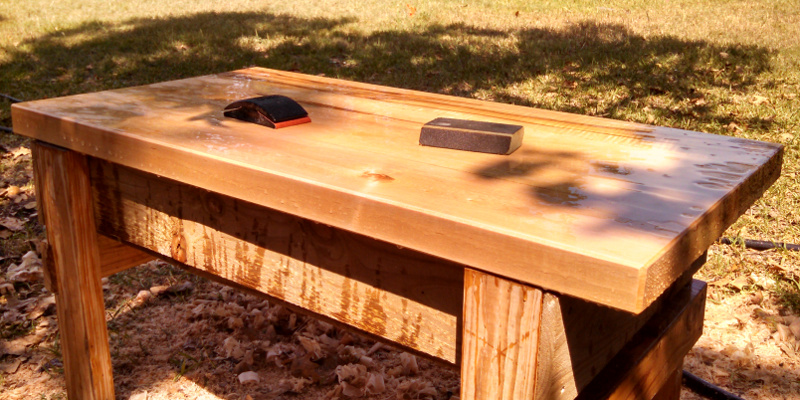
Let me tell you, no regrets on picking up that tool (I rarely do). It made quick work bringing down all the high spots on the base and was easy to use. Once I got all the work knocked out of the way I went over everything again with the hand plane to remove all marks from the power unit and fine tune the flatness.
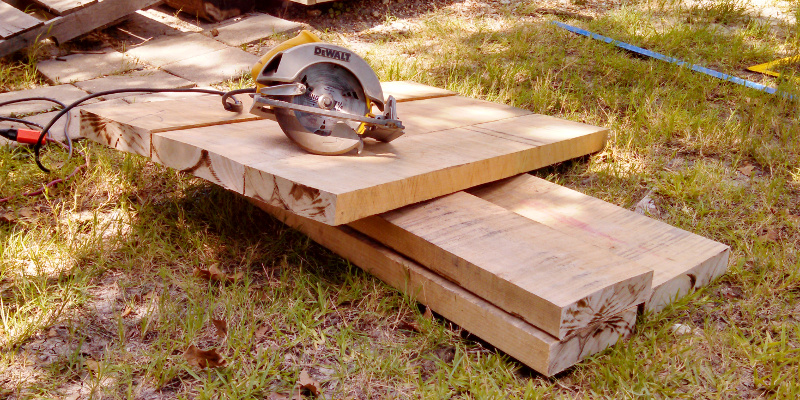
With both sides pretty much done except for maybe a final planing I trimmed the edges down to size. The full 2in depth cut in that hard maple demands a sharp blade and the one that I had in the saw burned up on the last cut. Luckily I purchase the thin kerf, dewalt framing blades by the package and always have more on hand to finish the job.
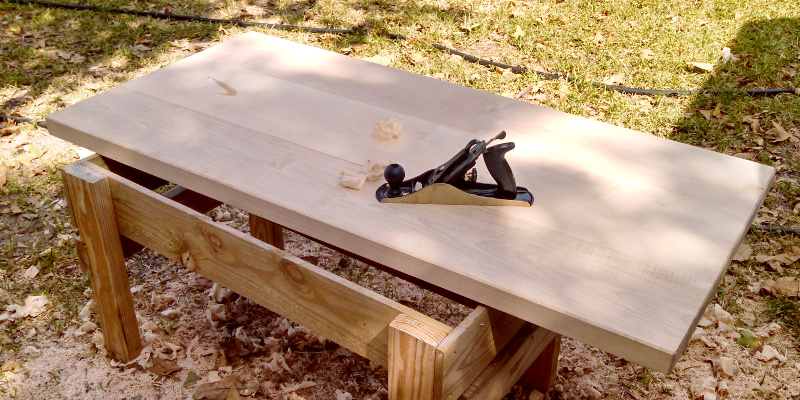
I planed the sides to remove all of the saw marks then used the plane to knock the sharp edges off.
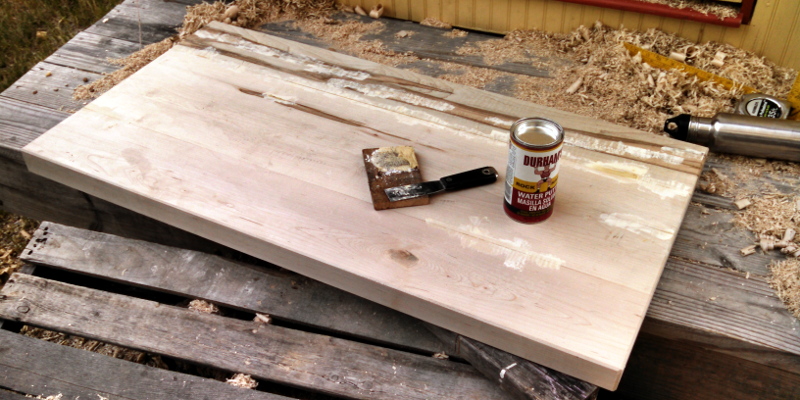
There are a couple of cracks and voids at the joints that I wanted to fill so I mixed up some rock hard putty and worked it into the cracks. This will contrast with the wood but that is the look I want. This is not a high finish table with stain and a bazillion coats of finish. I want the imperfections to pop out and be recognised instead of trying to hide them. I don't like fancy high finish stuff, it quickly gets a ding or two and then the whole look is ruined. Better to make something that looks good in the state it will live life in.
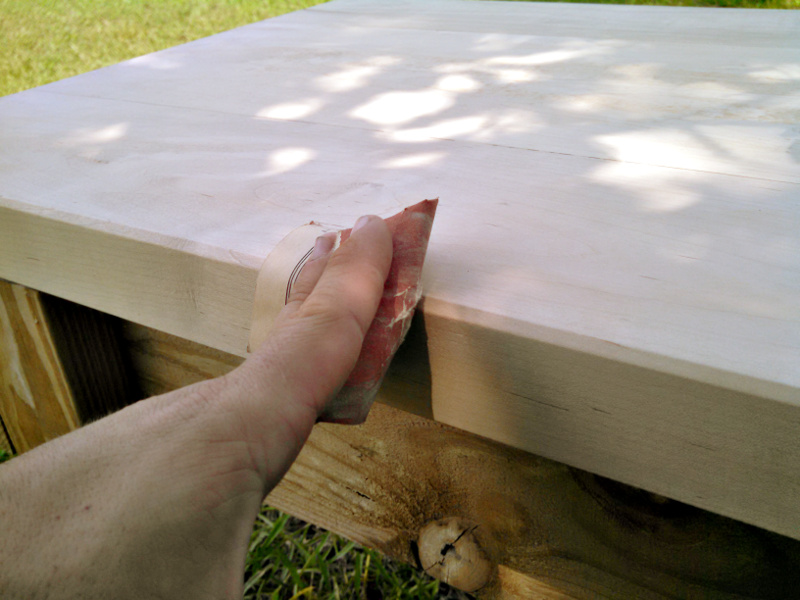
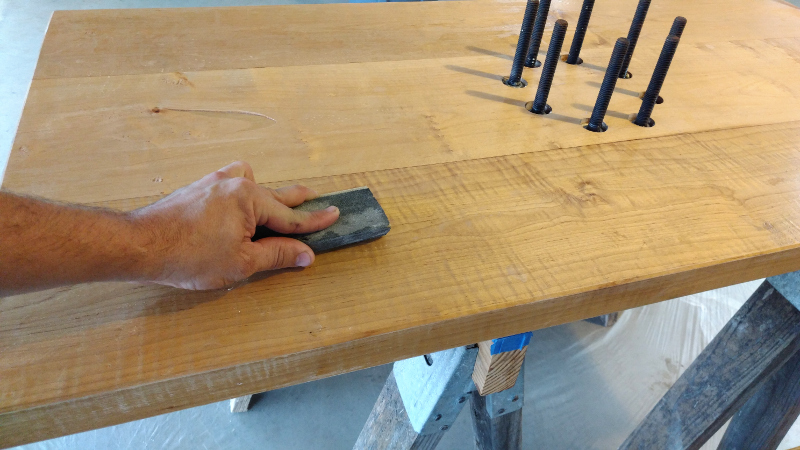
After the putty dried I knocked off the high spots with the hand plane and touched up some spots that the plane didn't clean up well with some 220grit sandpaper. Now I didn't want to go over the whole thing with sandpaper, I want an as planed finish instead of a nice polished perfect surface. I did go over the chamfered edges just a little though to knock off the sharpest parts of the corners since those will get dinged anyways over the life of the table.
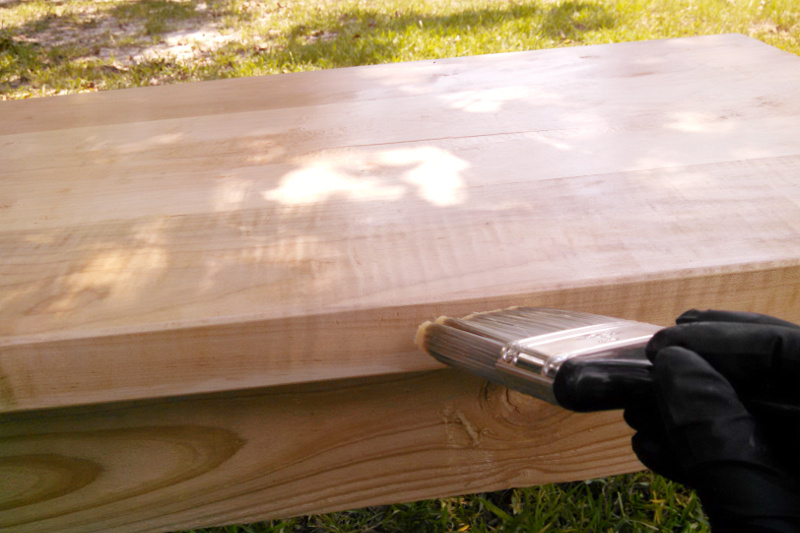
Then I applied a thin coat of satin polyurethane with a brush. As I mentioned I'm not going for a high gloss perfect finish but since drinks and such get set on coffee tables I wanted to do something that would be wipe-able. So, I will do two coats of satin polyurethane, one to raise the grain and let me knock off the rough spots, then a top coat.
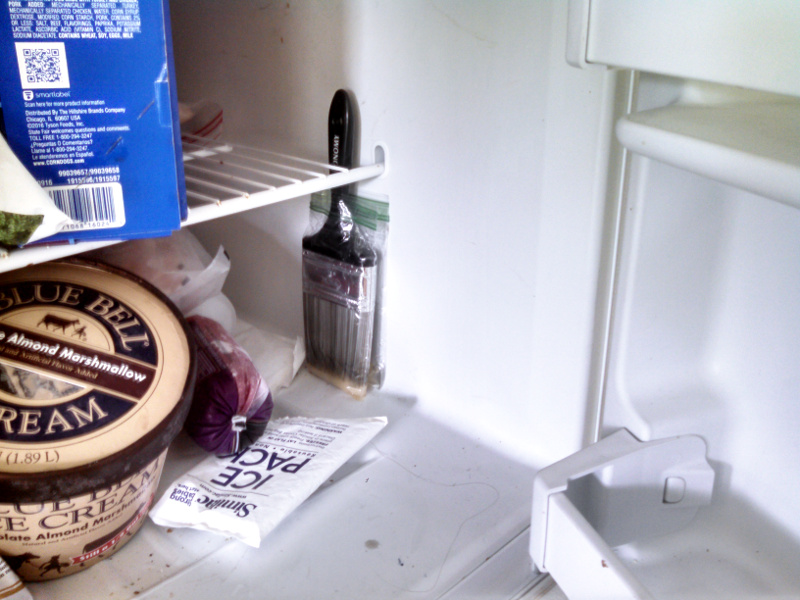
Because I was doing a lot of urethane that weekend and would be getting things out again and again I cheated and didn't clean my brush after use. Instead I put it in a bag with some mineral spirits then propped it up in the freezer. This does pretty good at keeping it ready to use without drying out for a day or two. I left the brush in a week once on accident and ruined it.
I still haven't really addressed the hardware that will go on this table yet. The top and bottom need to be bolted to my valve/flange stack and for the top I wanted this to be visible from above. I originally thought about using plow bolts (think flat head screw with a blank top) but decided that I wasn't going to get the depths perfect in the wood for all eight fasteners so the result would end up being annoying with either some of the bolts sticking proud or some a little too low. I decided to make a ring instead that would be inset and flush with the table top. Since it may get the finish knocked off I didn't want it to rust and found a 1/4" thick stainless steel round drop from a laser cutting guy.
Since I was going stainless and didn't want to spend on stainless bolts I decided that I would weld normal steel threaded rod on the bottom of the plate and completely hide the fasteners from above.
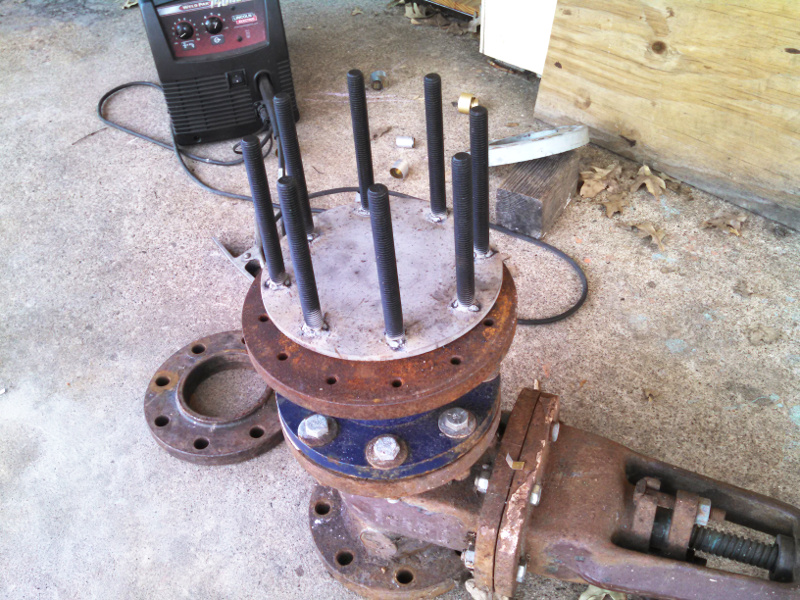
I purchased studs and started setting up to weld them on the bottom of the plate. My plan was to use the flanges I had to position the studs during welding and get everything lined up nice so assembly later would work. I didn't have any nuts with tapered ends to center the studs in the holes of the existing flanges so I settled on wrapping some aluminum sheet stock around the rods to center them in the flange bolt holes. After I got one right I cut out a bunch of strips.
And how I wrapped it around the studs to centralize them.
Putting in the last stud.
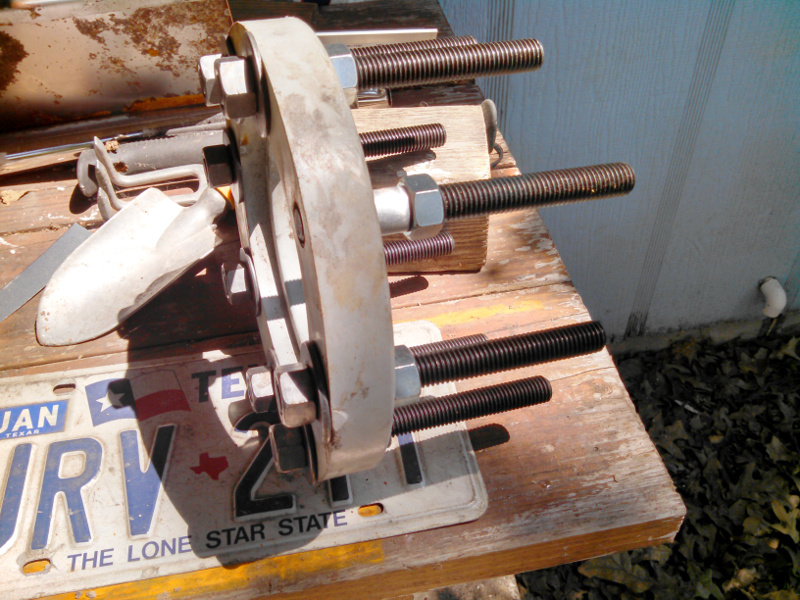
I added a second flange for good measure then positioned the stud assembly on the stainless disc I was going to weld to. I carefully tacked them in then checked the alignment with the plate.
Everything was good so I welded them out. They didn't tweak too bad and even though my welds look like poop I was pretty happy with how it turned out.
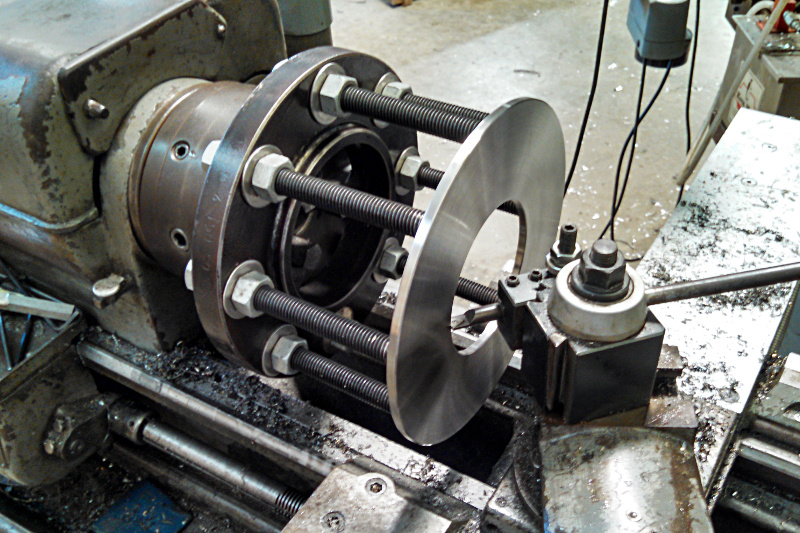
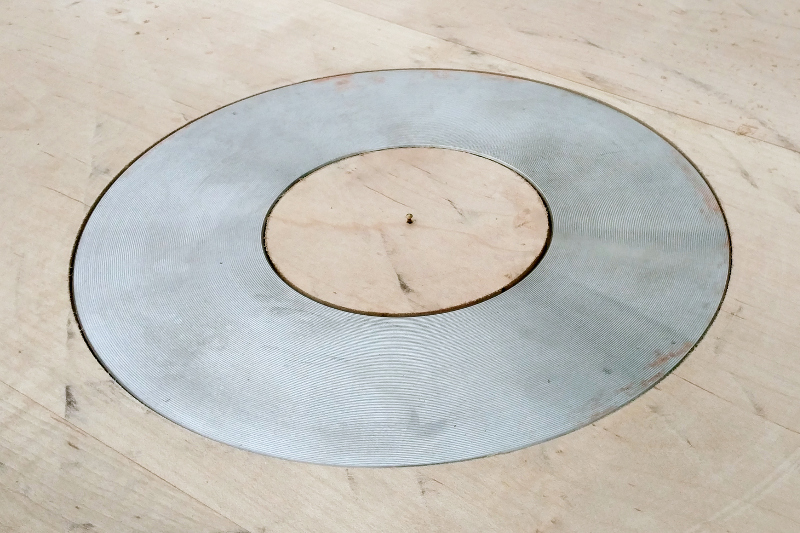
Welding wasn't the end though. This is a cool centerpiece of the tabletop and I wanted it to be as perfect as possible and look like a machined part, not something that got prettied up with an angle grinder and flap disc. So I bolted it up to one of the flanges and mounted it on the lathe to turn. I indicated the face in and got it running as true as I could (the disc was a little wavy from weld distortion).
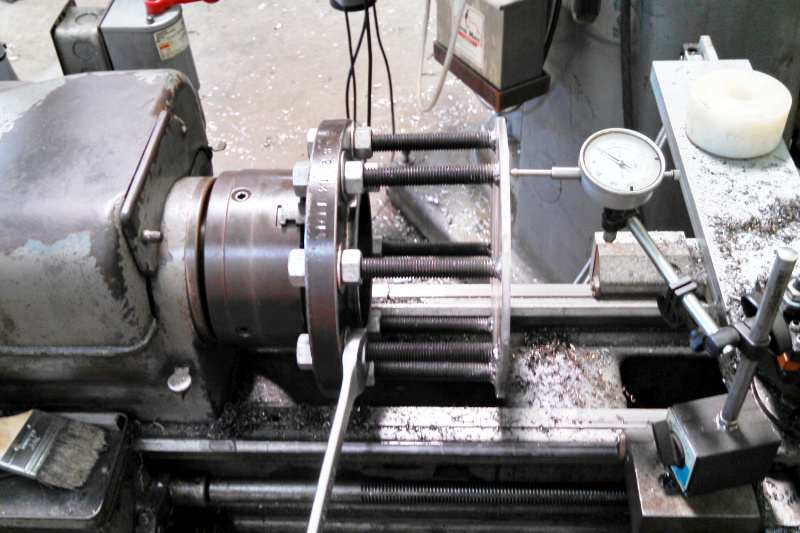
Then with a live center on it for extra security I got to cleaning up the face.
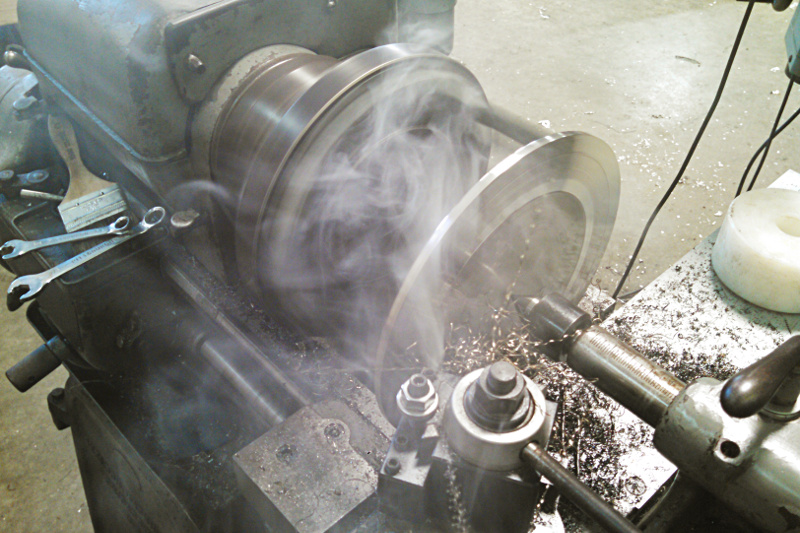
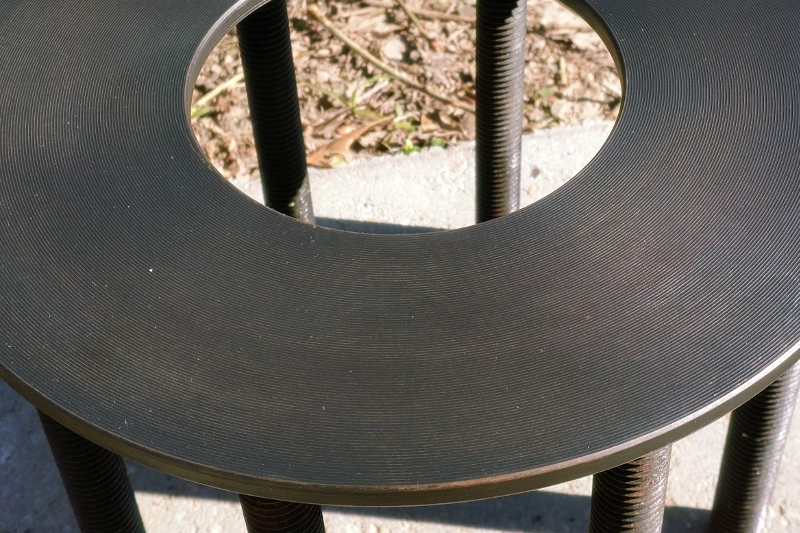
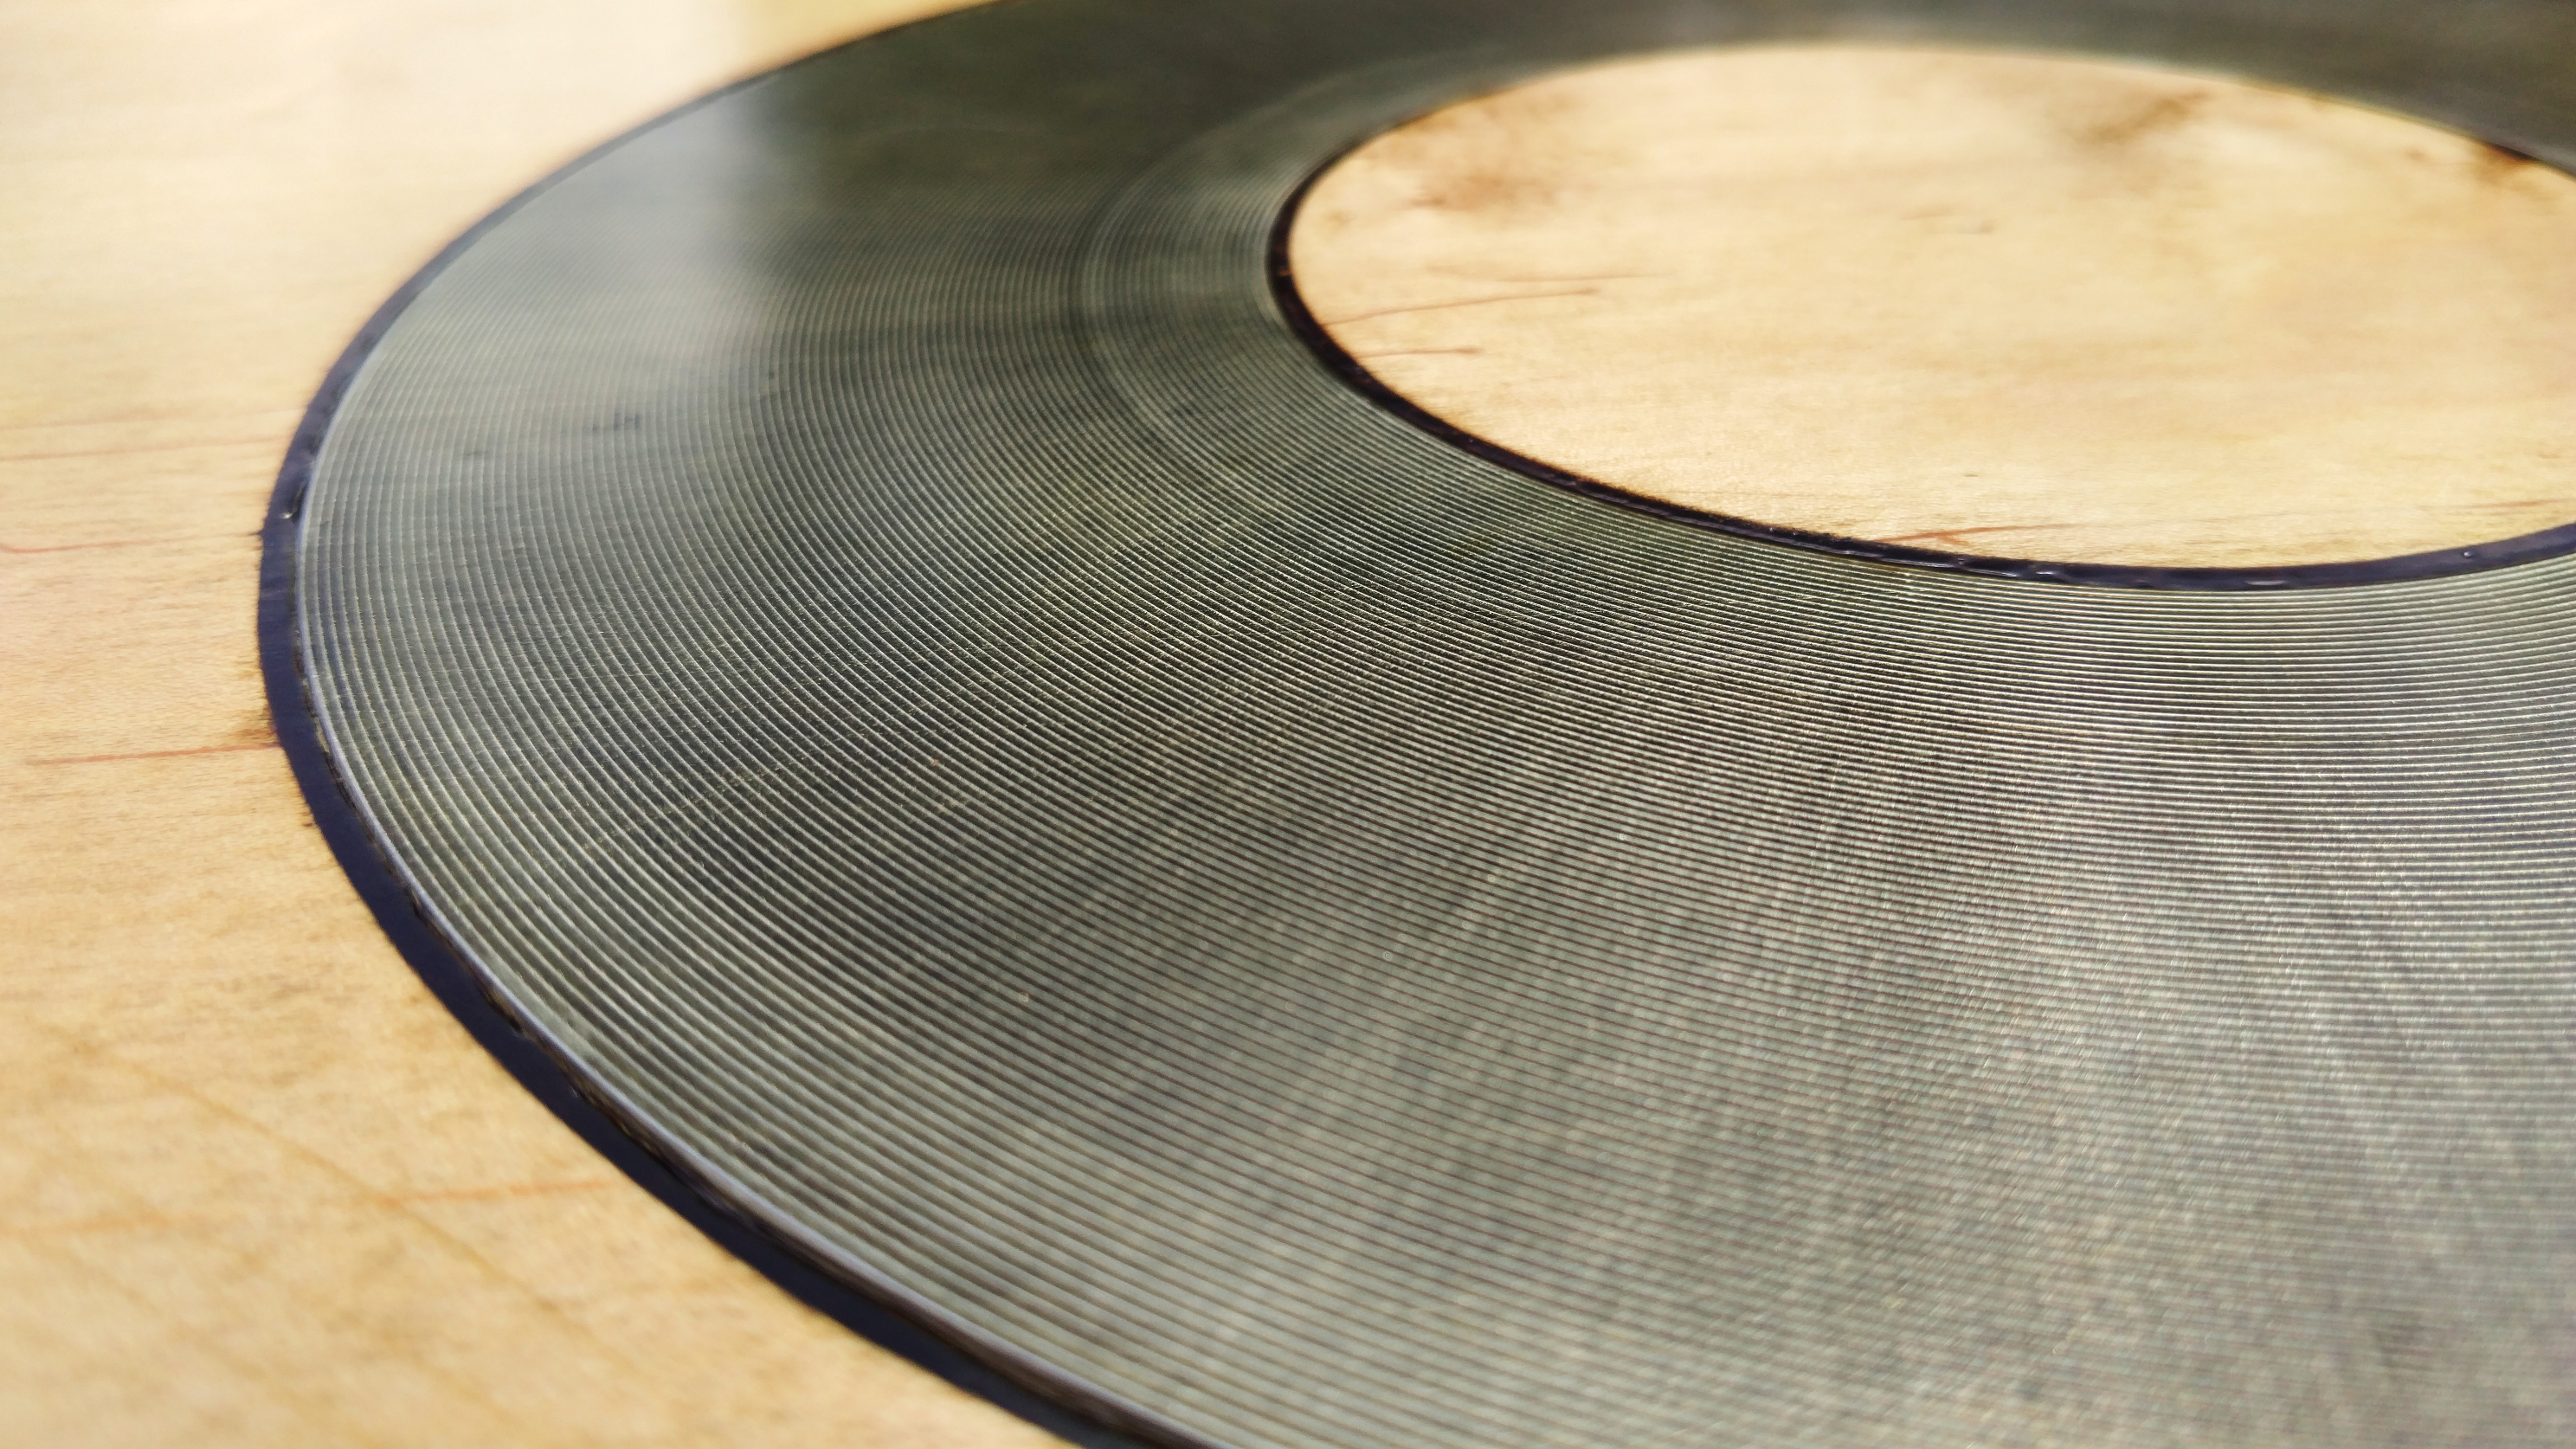
To really make the fact that this was a machined part stand out and give the illusion of a flange fitting I made a final pass with an extremely coarse feed rate and a large radius insert. Not concentric rings like a real fluid connection but good enough for the eye and rather attractive I must say.
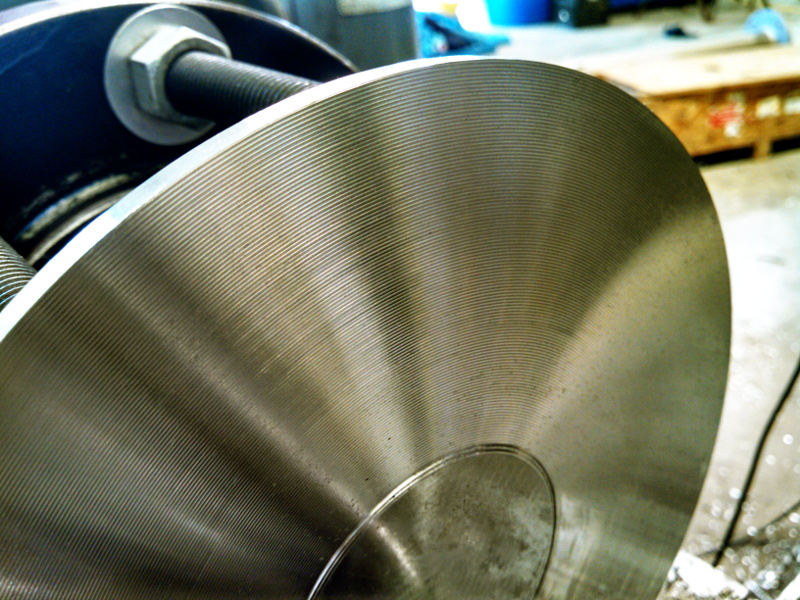
Then I cut a groove on the face to drop out a central slug and prettied up the new bore with chamfer.
Now one of the flanges I had was actually the wrong size and drilled for the wrong bolt pattern. I don't care that it is a little to large in diameter since it will be the one that mounts to the underside of the tabletop but the wrong bolt pattern is a killer. Something I like about non-critical mild steel though is how easy a few extra holes are to fix. I just went at it with the welder and plugged them all up, then ground down the weld bead back flush.

With the wrong holes filled in I marked out the correct hole pattern. I used another flange to mark them out with sharpie then did the math and scratched the exact hole centers with my "working" calipers.
I center-punched the holes then pilot drilled with a handy drill, I think about 1/4 to 3/8" dia before I hit them with the 3/4" drill. Quick note to anyone who might not know, a large part of the force required to push a drill through material comes from the point and the web thickness of the drill. If you have the muscle or the machine it will be kinder on your tooling and take less time to drill in as few steps as possible. I have seen people step up by 1/8" at a time and man is that troublesome and time consuming! That said, 3/4" drill by hand with a small pilot is still a physical exercise. It especially was for the poor dewalt. I didn't roast her but I had to stop and just run the drill fast with no load (so the fan can cool it) for a few minutes after each hole.

To pretty up the holes and keep me from cutting myself on them later I gave them a quick hit with the single lip chamfer bit. By the way, much easier and chatter free than the multi cutting edge style if you are doing this by hand.
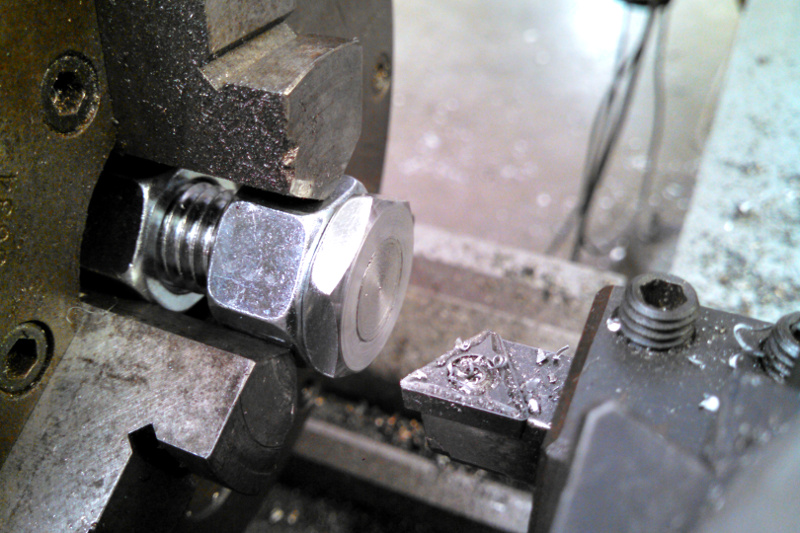
That concludes almost all the machine work to be done with the valve and flanges. That is except my lack of thin hex nuts and desire not to order a full package when I only need eight of them. So I took some standard height ones and cut them down.

To pretty things up I slapped them in the lathe and gave each one a facing cut as well as a chamfer to keep the flats from digging in. I'll get back to why I wanted these thin nuts later.
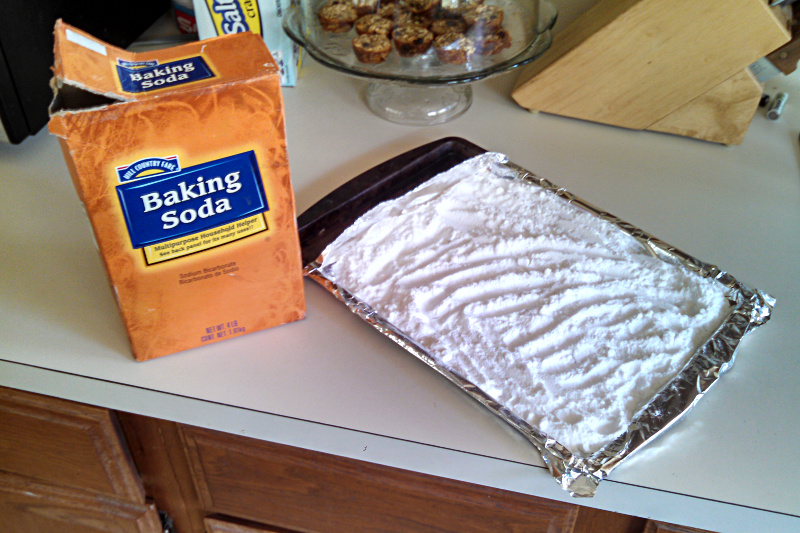
Now here is some interesting trivia. I've never actually done rust removal electrolysis before though I know what it can do and know some people who have. The trivia part is washing soda vs baking soda. I have read that both work to make the water conductive and allow electrolysis but that washing soda is preferred (I think because it makes the scale on the sacrificial part easier to handle). I didn't have any washing soda on hand and apparently it is a little harder to find but you can turn baking soda (Sodium Bicarbonate) into washing soda (Sodium Carbonate) just by baking it in the oven for an hour at 350deg F! It smelled like CO2 when I cooked it and when I dumped it in the tub with water it made it feel soapy which baking soda doesn't do so it seems to have worked.
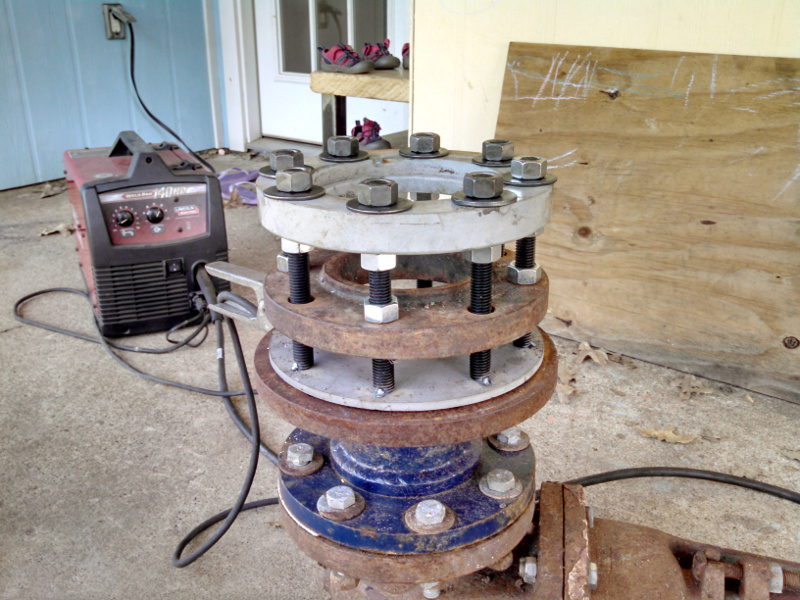
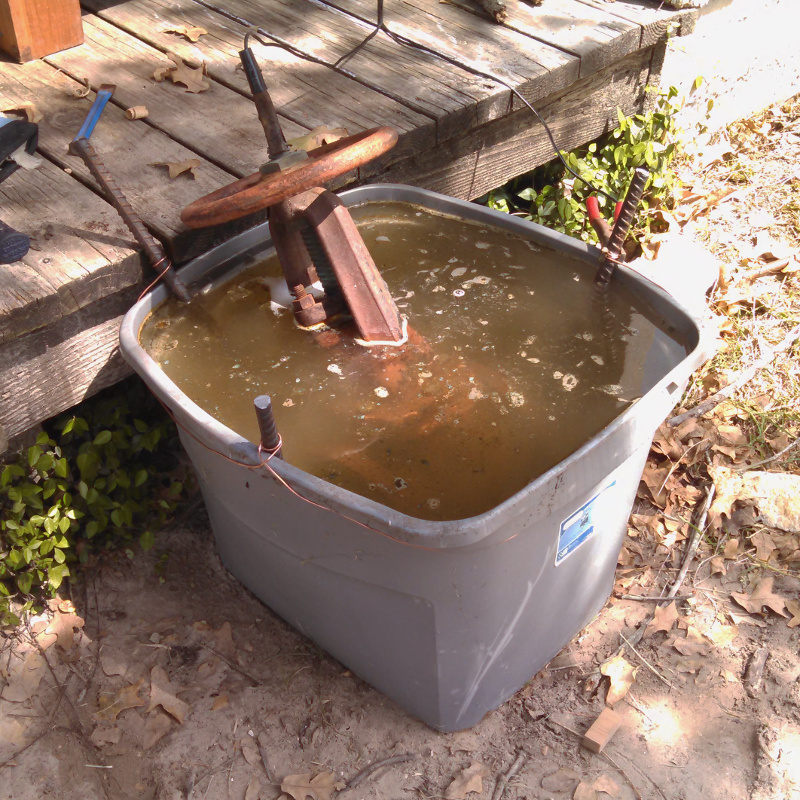
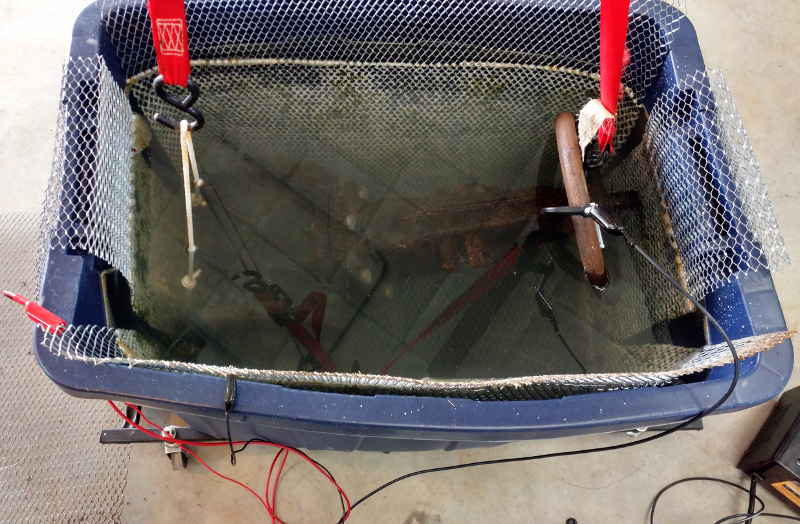
Like I said I haven't done much electrolysis before so my setup is kind of crude. I just dumped washing soda into a tub with water then applied the negative lead of a battery charger to the valve and the positive lead to some sacrificial rebar I had lying around. Seems to be going well, you'll find out with me what the final result will be.
While this metal work was going on I kept working on the wood aspects as well. I wet sanded the base to remove all the rough grain that stuck up (though much less with a planed surface than a sanded surface).
And I made the table top in the same way I made the bottom. Dowel, glue, power plane the majority of the stock off then finish up with the hand plane for the final surface.
So things are coming along pretty good at this point but the project will have to take a break while the day job takes me to Alaska.
Before I left for Alaska I took the valve out of the electrolysis tub and wire brushed it before putting it away for a month. Man does it look pretty to me. Makes me want to finish this project and see the final result.
Even though I want to finish this table it is going to be sidetracked by more than just a trip to Alaska. I really need to make a new dinner table for the kids, the original triple table is too small for them now and it really is becoming a necessity to have something else. So a momentary break on this table for a week or two to build the new kid table.
The break for the new kids tables ended up being a little longer than a week or two, more like a few months. I went to Alaska and Canada for work. I built another raised garden, a kid sized ladder and a router circle jig. I also lined up my financing and signed a contract for construction of my new shop and did a few weekends of small oddball stuff like fixing cars etc..
I finally got back to the valve table though. Cold weather ruled out giving the table top a first coat of polyurethane so I focused on the remaining wood-working operations I had left on the base and top.
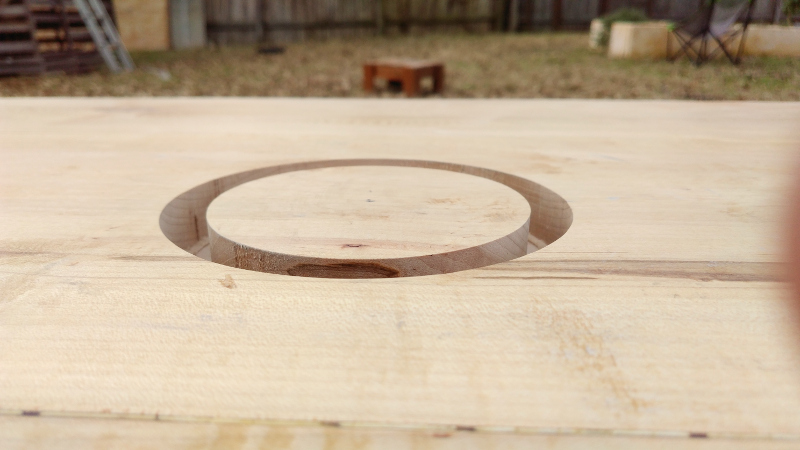
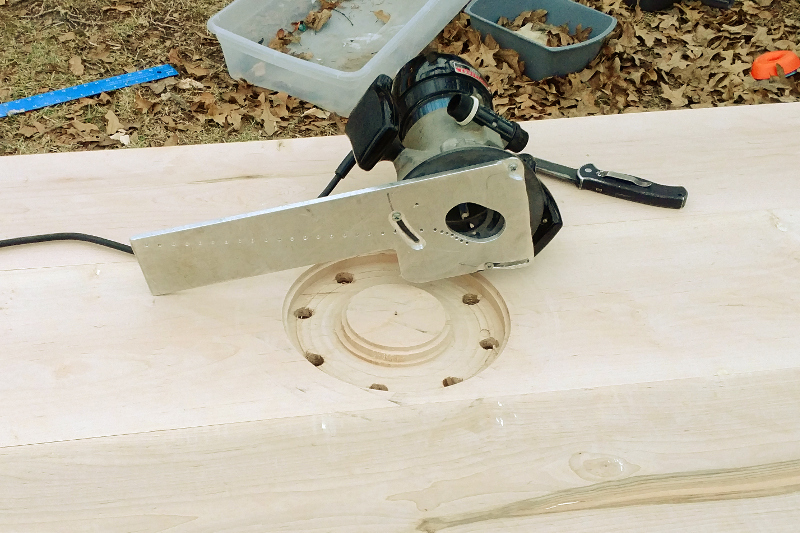
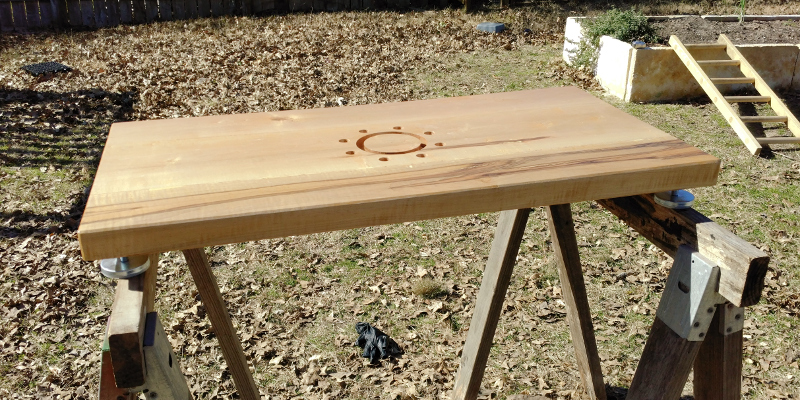
First up a circular relief groove for the bottom spacer flange that needs to sit flat on the base. I pulled out the router circle jig this project spawned and adjusted it to the size I needed.
Then I put a pin in the middle of the top side of the base and routed out the circle. It doesn't really matter but I ended up making the groove deeper than I intended because my router doesn't have a good depth stop which stays put. Oh well, like I said it doesn't matter and no one besides me (and whoever reads this) will ever know.
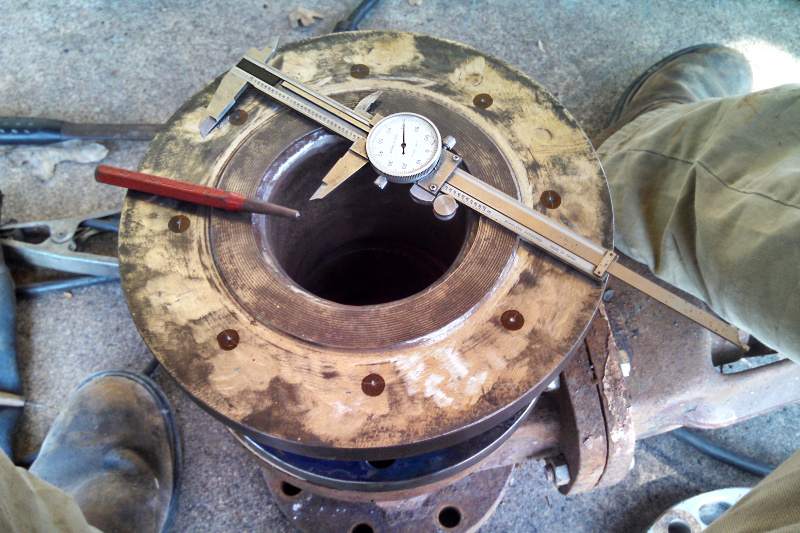
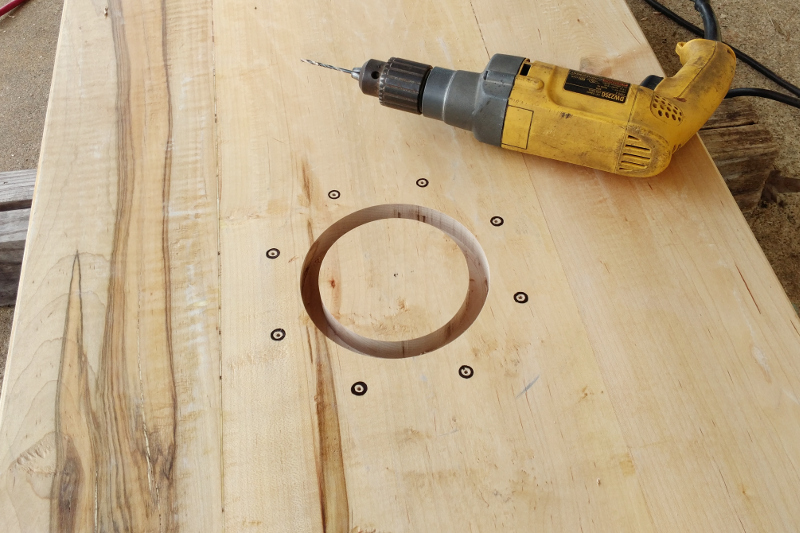
Here is the spacing flange that I wanted to sit flat. It fit in the groove perfectly so I lined up the bolt holes the way they need to be and marked the holes. (This picture is a little out of order, you can see the adjustable feet underneath that I'll add later).
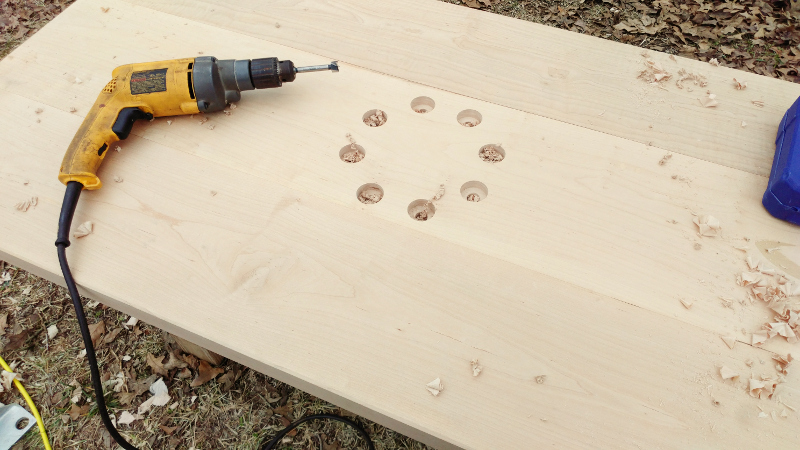
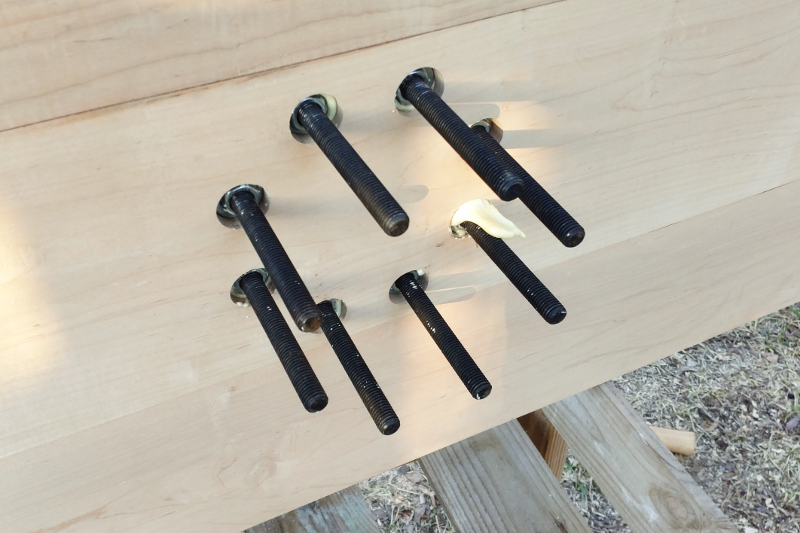
I then drilled at the center of each hole all the way through with a small drill. I did this so that the hole pattern would come through on the other side of the board.
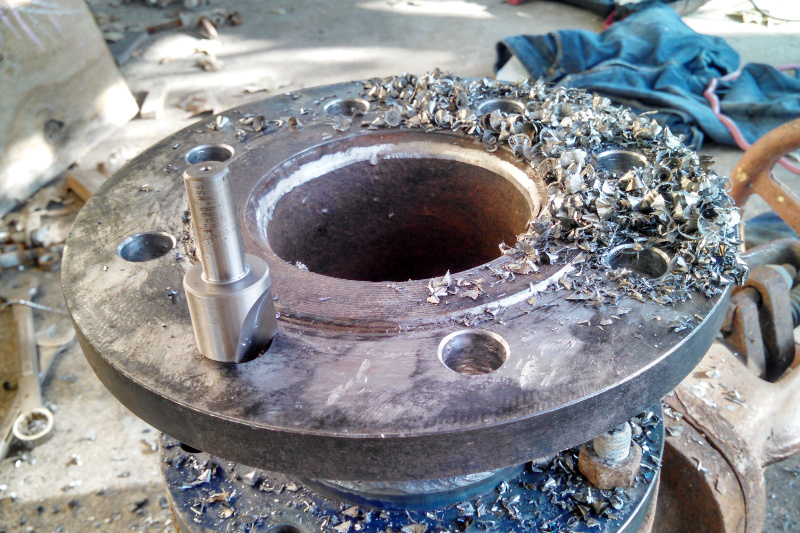
The reason I needed the hole pattern to come all they way through with only a small pilot hole was so I could use a forstner bit on the back side to counterbore for a bolt head before. If I just drilled through all the way with the 3/4" then I couldn't counterbore. If I just laid out the hole pattern on the back I might not have lined it up with the circle groove on the top.
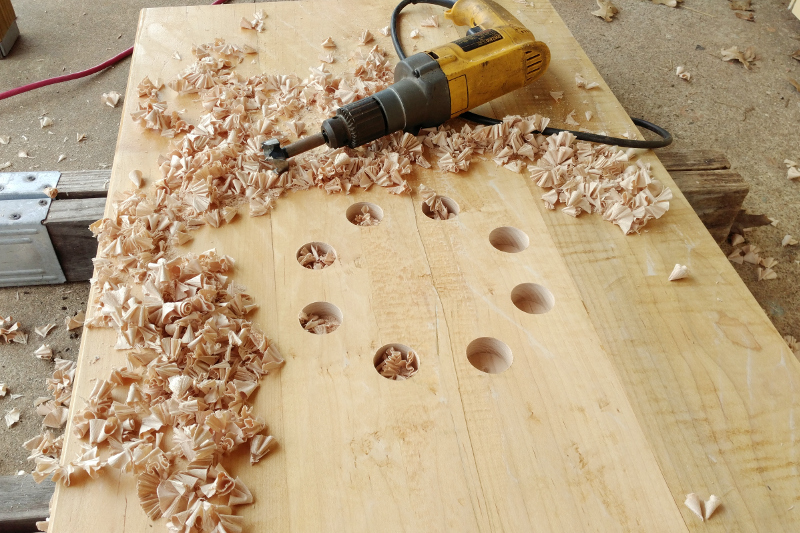
After I drilled the backside to depth I flipped the part back over and drilled through with a clearance hole for the bolts from the top side.

The base would do it's job now but it would probably end up rocking around on the floor. To make it adjustable I wanted to include some leveling feet so I set about installing a set of heavy duty feet and some threaded inserts I ordered from McMaster Carr. This is a place where hard maple really shines and makes you smile while working with it. It is predictable and easy to drill to an exact depth just by using a bit of marking tape on the drill shank and then you can tap it with standard metal taps. The thread obviously isn't perfect but it is more than adequate for installing an insert.
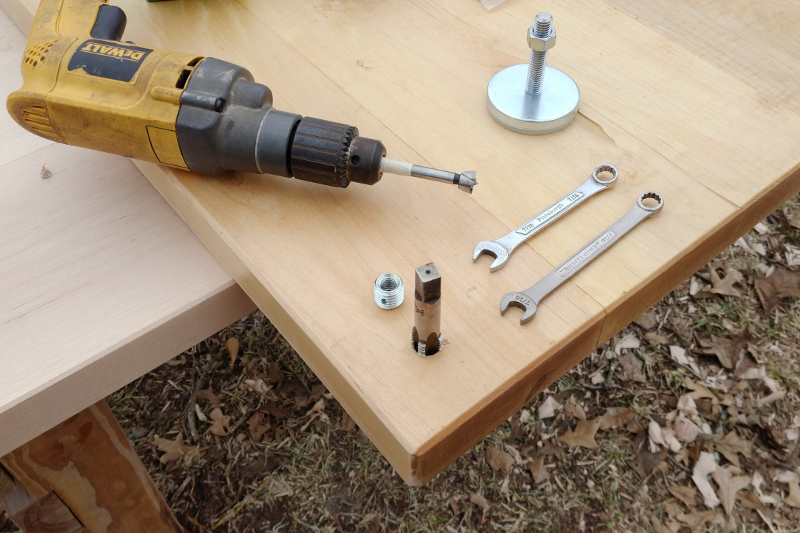
After I tapped the holes I whetted them with some cyanoacrylate adhesive (superglue) and just threaded the steel inserts in. It would probably work without the glue but why not?
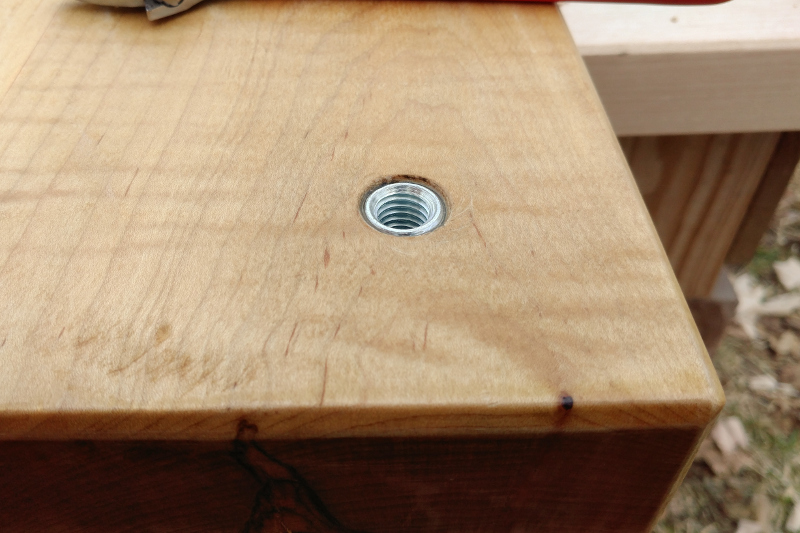
So there is the upside-down base with all of the drilling and routing done and the leveling feet installed. A second, final coat of polyurethane and the bottom will be finished.
Now the top was again similar to the bottom. I marked out the flange hole pattern, pre-drilled through then counterbored the bottom. This time I did something slightly different, I started drilling the bolt clearance holes from the bottom as well and then flipped the top over and drilled them the rest of the way through from the other side. This kept the holes from chipping out at all on the bottom of the counterbore. Not really that much of a problem and definitely not visible but why not?
Another thing I did different was to do the routing for the top after I drilled the holes (so I could have an easy place to start the router and the chips would clear better).
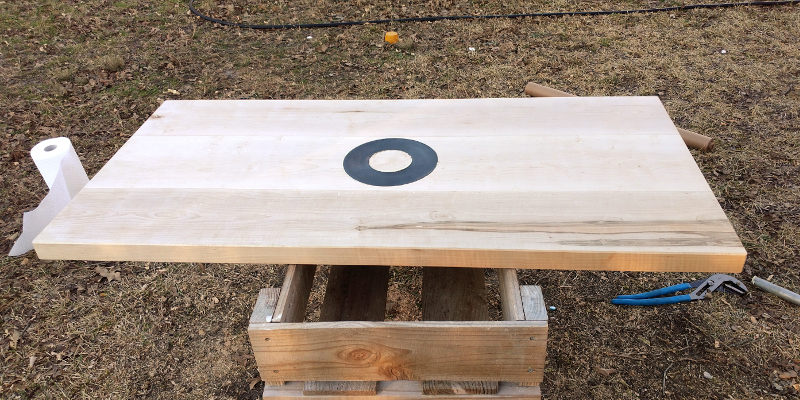
This routed circle on top is the real reason I made the router circle jig. I wanted this bolt plate to sit flush with the surface of the table so it could be seen and point out what was holding the table top up but wouldn't affect usage of the table.
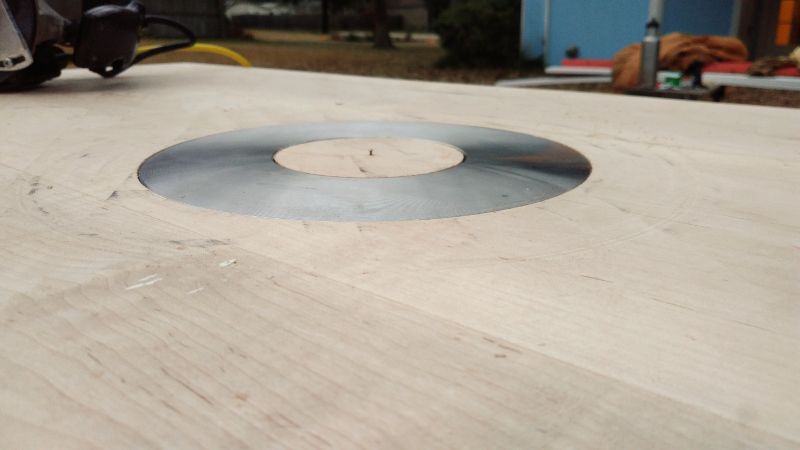
I'm pleased with how it fits. There is a small clearance on the inside and outside diameter but the depth is just right and once this gets two coats of urethane things will slide right over the flange.
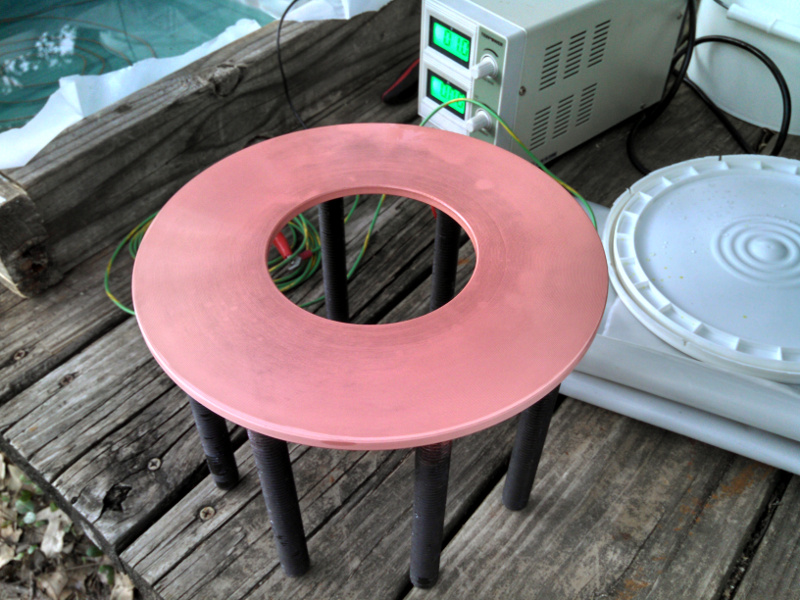
You may have noticed that the flange is shiny stainless again and not copper colored. Well, I messed up my copper patina and had to strip it off so I could do it again. I got back to it after I did the rest of the wood work and needed to have it completed before I moved on with the project. I re-plated it just as before but this time went with something that I knew would work to get the patina I wanted.
--Edit, I forgot to actually post about the copper platting like I thought I had.--
Anyway, copper plating is both hard and easy. In its most basic form you can do it with a single AA battery, some salt water and some copper wire. I had done this as a child but it honestly doesn't make a good coating, it is just a fun science experiment. What I do now is still very primitive and not perfect but only requires chemicals you can easily source at home depot and is good enough for my occasional need. Here is my setup, a cheap variable current/voltage power supply, some copper wire, and a solution of water/copper sulfate (plumbing root killer)/hydrochloric acid (muriatic acid used for concrete etching and cleaning). The hydrochloric acid helps etch the part surface and conducts electricity and the copper sulfate provides free copper to help plating the part surface.
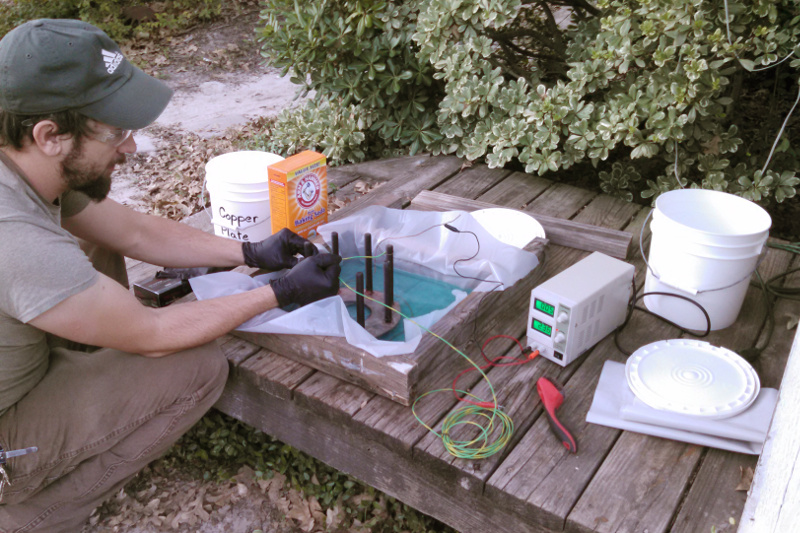
To plate the part clean it thoroughly then attach the negative electrode to the sacrificial copper wire and the positive to the part that needs plating. Set the power supply to low voltage/amperage and then dunk the part into the plating solution. Swirl it around to make sure that bubbles don't collect anywhere. If a lot of bubbles form fast then there is too much current. After the plating looks like it has started good you can turn up the amperage to grow the coating quicker. Don't go too fast though or the plating will be fragile and not adhere well.
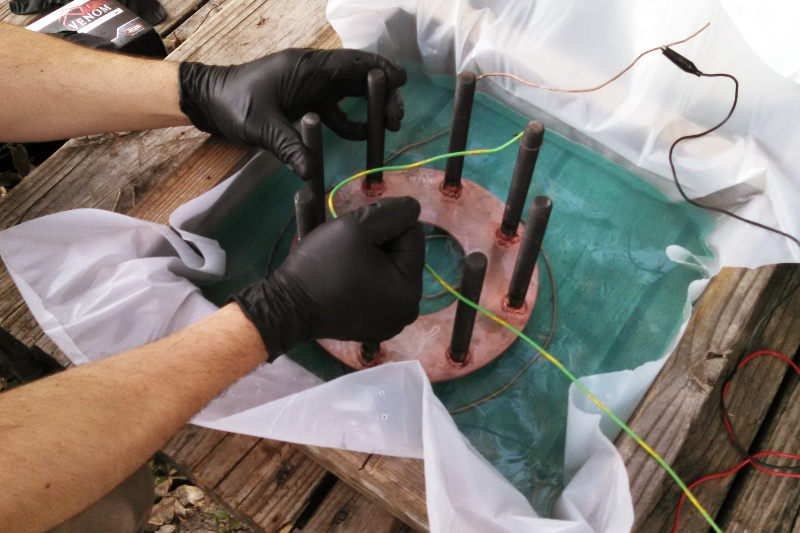
Now plain low carbon steel is easy to plate and if you are just careful with your cleaning and voltage/amp settings you can make a functional coating with no trouble at all. Stainless steel is more difficult though, the chromium oxide skin which makes it stainless inhibits the growth of a good plating. To help with that I like to run in reverse polarity (copper wire positive, part negative) and then positive a few times to etch the surface and provide a good bite. This still won't be perfect though and there will be patches that don't adhere well. To test the adherence and remove faulty plating I brush the surface with a stainless brush. This removes loose copper crystals and scratches the chromium-oxide skin.
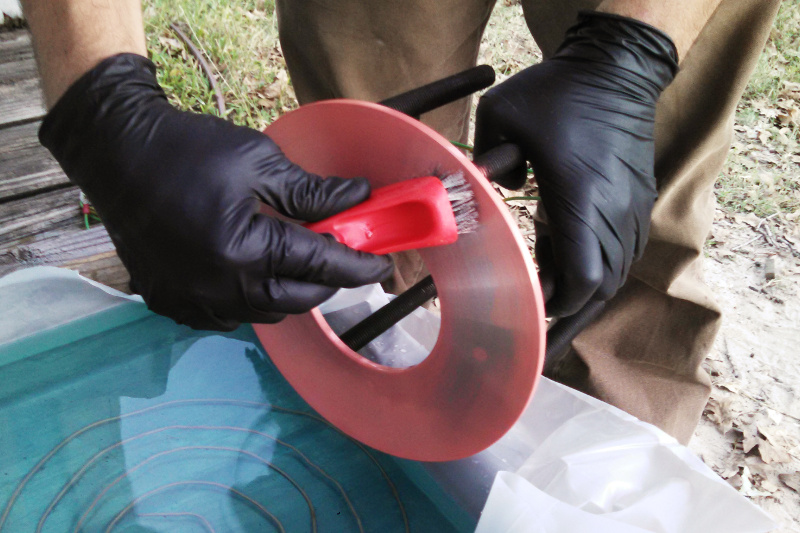
After a number of plate, wire brush, plate cycles you are left with a firmly adhered thin copper layer on top of the stainless. You have to be careful with it because it isn't very thick (although you could probably grow it pretty thick if you had patience) but you can polish it up to make it shiny or give it a patina or clean it and plate over this copper strike with another metal that sticks well to copper.
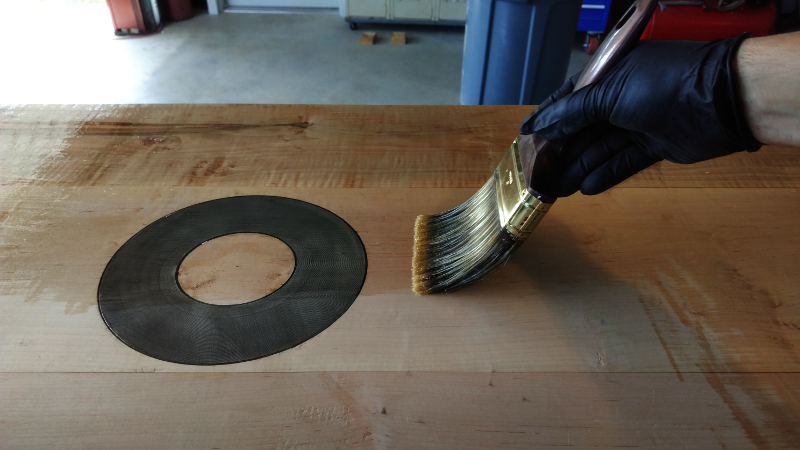
Now back to the patina: Sulfur makes copper turn black. I had used this to help patina the columbarium when I was finishing it. That time I used it in combination with paste wax immediately after cleaning the parts with bar keepers friend (oxalic acid). I didn't want to wax this part though so when I first messed it up I tried using just water and sulfur which didn't do the job. This time I made some "high sulfur" oil by just crushing up sulfur and mixing it with oil (happened to use Vactra #2 because that is what was handy).

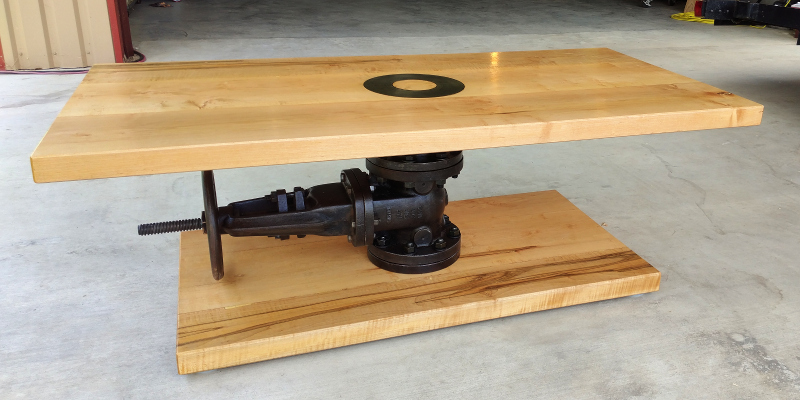
That oil and sulfur mixture worked great, even better than normal high sulfur cutting oil does (for comparison, you can find some unintentional sulfur oil patina on my spot welder build). After I washed the oil off with soapy water I had exactly what I wanted in the first place. A nice blackened face that won't look too shiny in comparison to the valve but will still show off the fact that the ring is made of metal. I anticipate the crests having the copper worn off which will show off the groove pattern.
The next chance I had a good weather window I put a final coat of polyurethane on the base. The first coat was semi-gloss but the second coat is satin applied with a rag and then after drying given a scrub with steel wool. The goal here is not a shiny smooth finish but a dull one that looks more natural and won't change with time as it gets scratched and rubbed on.
Before I could do the top I needed to install the bolt plate. Well, I couldn't find the cheap, large hollow socket set I thought I had (I probably finally got rid of it) so I determined I didn't actually have a way to tighten the nuts on the back side. I thought about running out and getting a socket to weld onto a tube but then I realized I had some conduit that was just the right size to fake it. I flattened the conduit a little until I could fit a nut inside then I started beating it into the shape of the socket I needed.
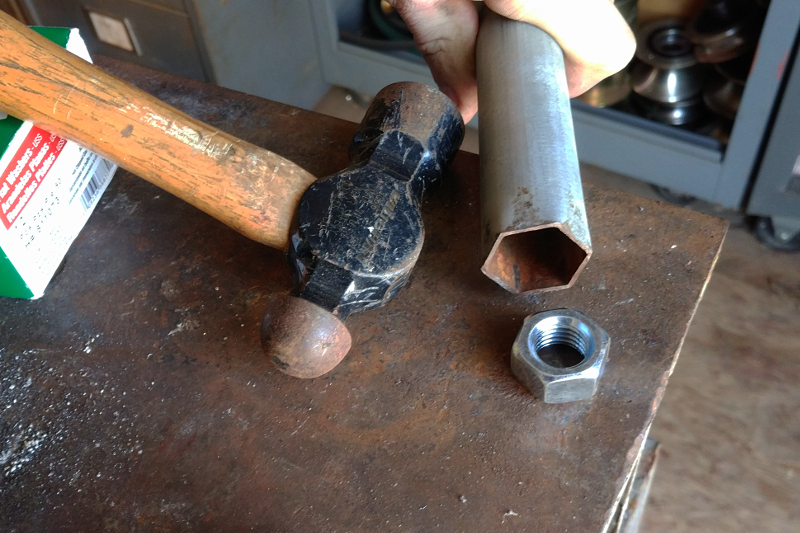
The field expedient socket worked perfect. Not something you could really torque on a fastener with but more than enough to tighten up all the nuts on the backside of the bolt plate. Incidentally, this is where I needed those thin jamb nuts I had made a few months ago.
And here the bolt plate is from the top. You can see some foam leaking out on this side too. I filled the gap between the bolt plate and the table top with expanding foam as I assembled it to glue everything in place and keep the bolt plate from ringing with the hollow space bellow it.
Then because the weather was too cold for finishing I started on the last part of the table, the spool piece that will go between the valve and the table top. I had previously hid it in a damp place underneath a tub to make it grow a layer of rust. Now I could dunk it in the electrolysis tank to remove the rust and leave a blackened, rough surface that would match the valve.

Continued - June 2019
Interruptions are a fact of life and this project dropped off for more than a year. Some of the delay was work and of course there were some other projects (Camlock Water Bottle, Retaining wall / fence, Master Fan, Commissioned Puzzle, Driveway Demo)
Anyway, this table was nagging me and I knew that I wasn't very far from finishing it. When I left off the valve was stripped, my spool pieces were complete and clear coated, the base was complete and the top was mostly done. I decided I needed to get it knocked out and off the list.
Of course since it had been over a year the valve had grown a layer of rust again so I had to dunk it in the electrolysis tank again. This time it was a little easier because I had a pick point and chain hoist in the new shop to suspend it exactly where I wanted.
This time as soon as I was done with the electrolysis I immediately wire brushed it, rinse with fresh water and then cleaned with acetone in preparation for a semi-gloss clear coat.
The other part that needed finishing was the top. The woodworking was done and all that was lacking was an application of urethane. Just like the base I started with an initial application of semi-gloss.
Then I wet sanded with a flexible sanding pad to remove the fibers that stick up after a first coat. One of the things that I like about a planed finish is that if you stick with the planing only and use steel wool to just go over it a little there isn't a huge amount of fibers that need to be dealt with. Much different than a sanded finish where there are tons of broken fibers on the wood surface that rise up as soon as they are dampened. As a result the sanding at this stage is minimal.
After the top coat dried and some matching grade 8 black oxide nuts, bolts and washers came in all I had to do was put it together!
Now I knew this wasn't going to be a light table at all but it felt pretty heavy while I was bolting it together. I decided to weight it. I took a bathroom scale and supported one side, then the other.
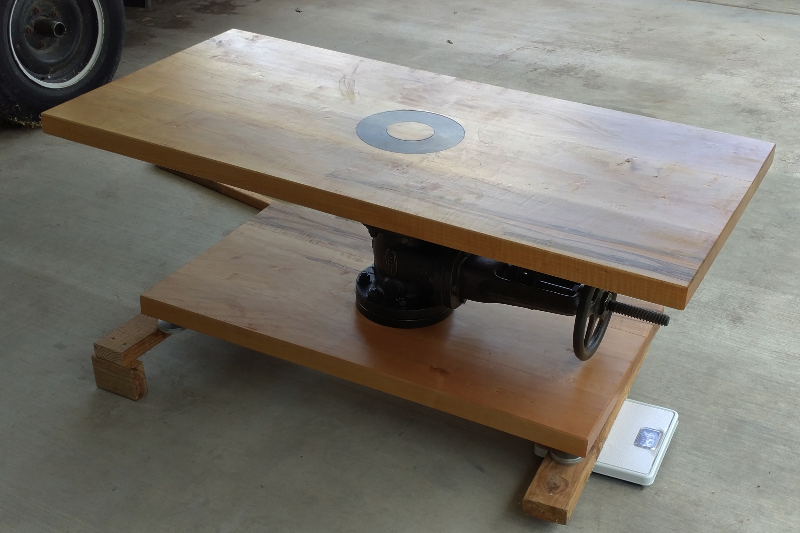
Result is 254lb (roughly). Definitely not a table that will just get moved around on a whim.
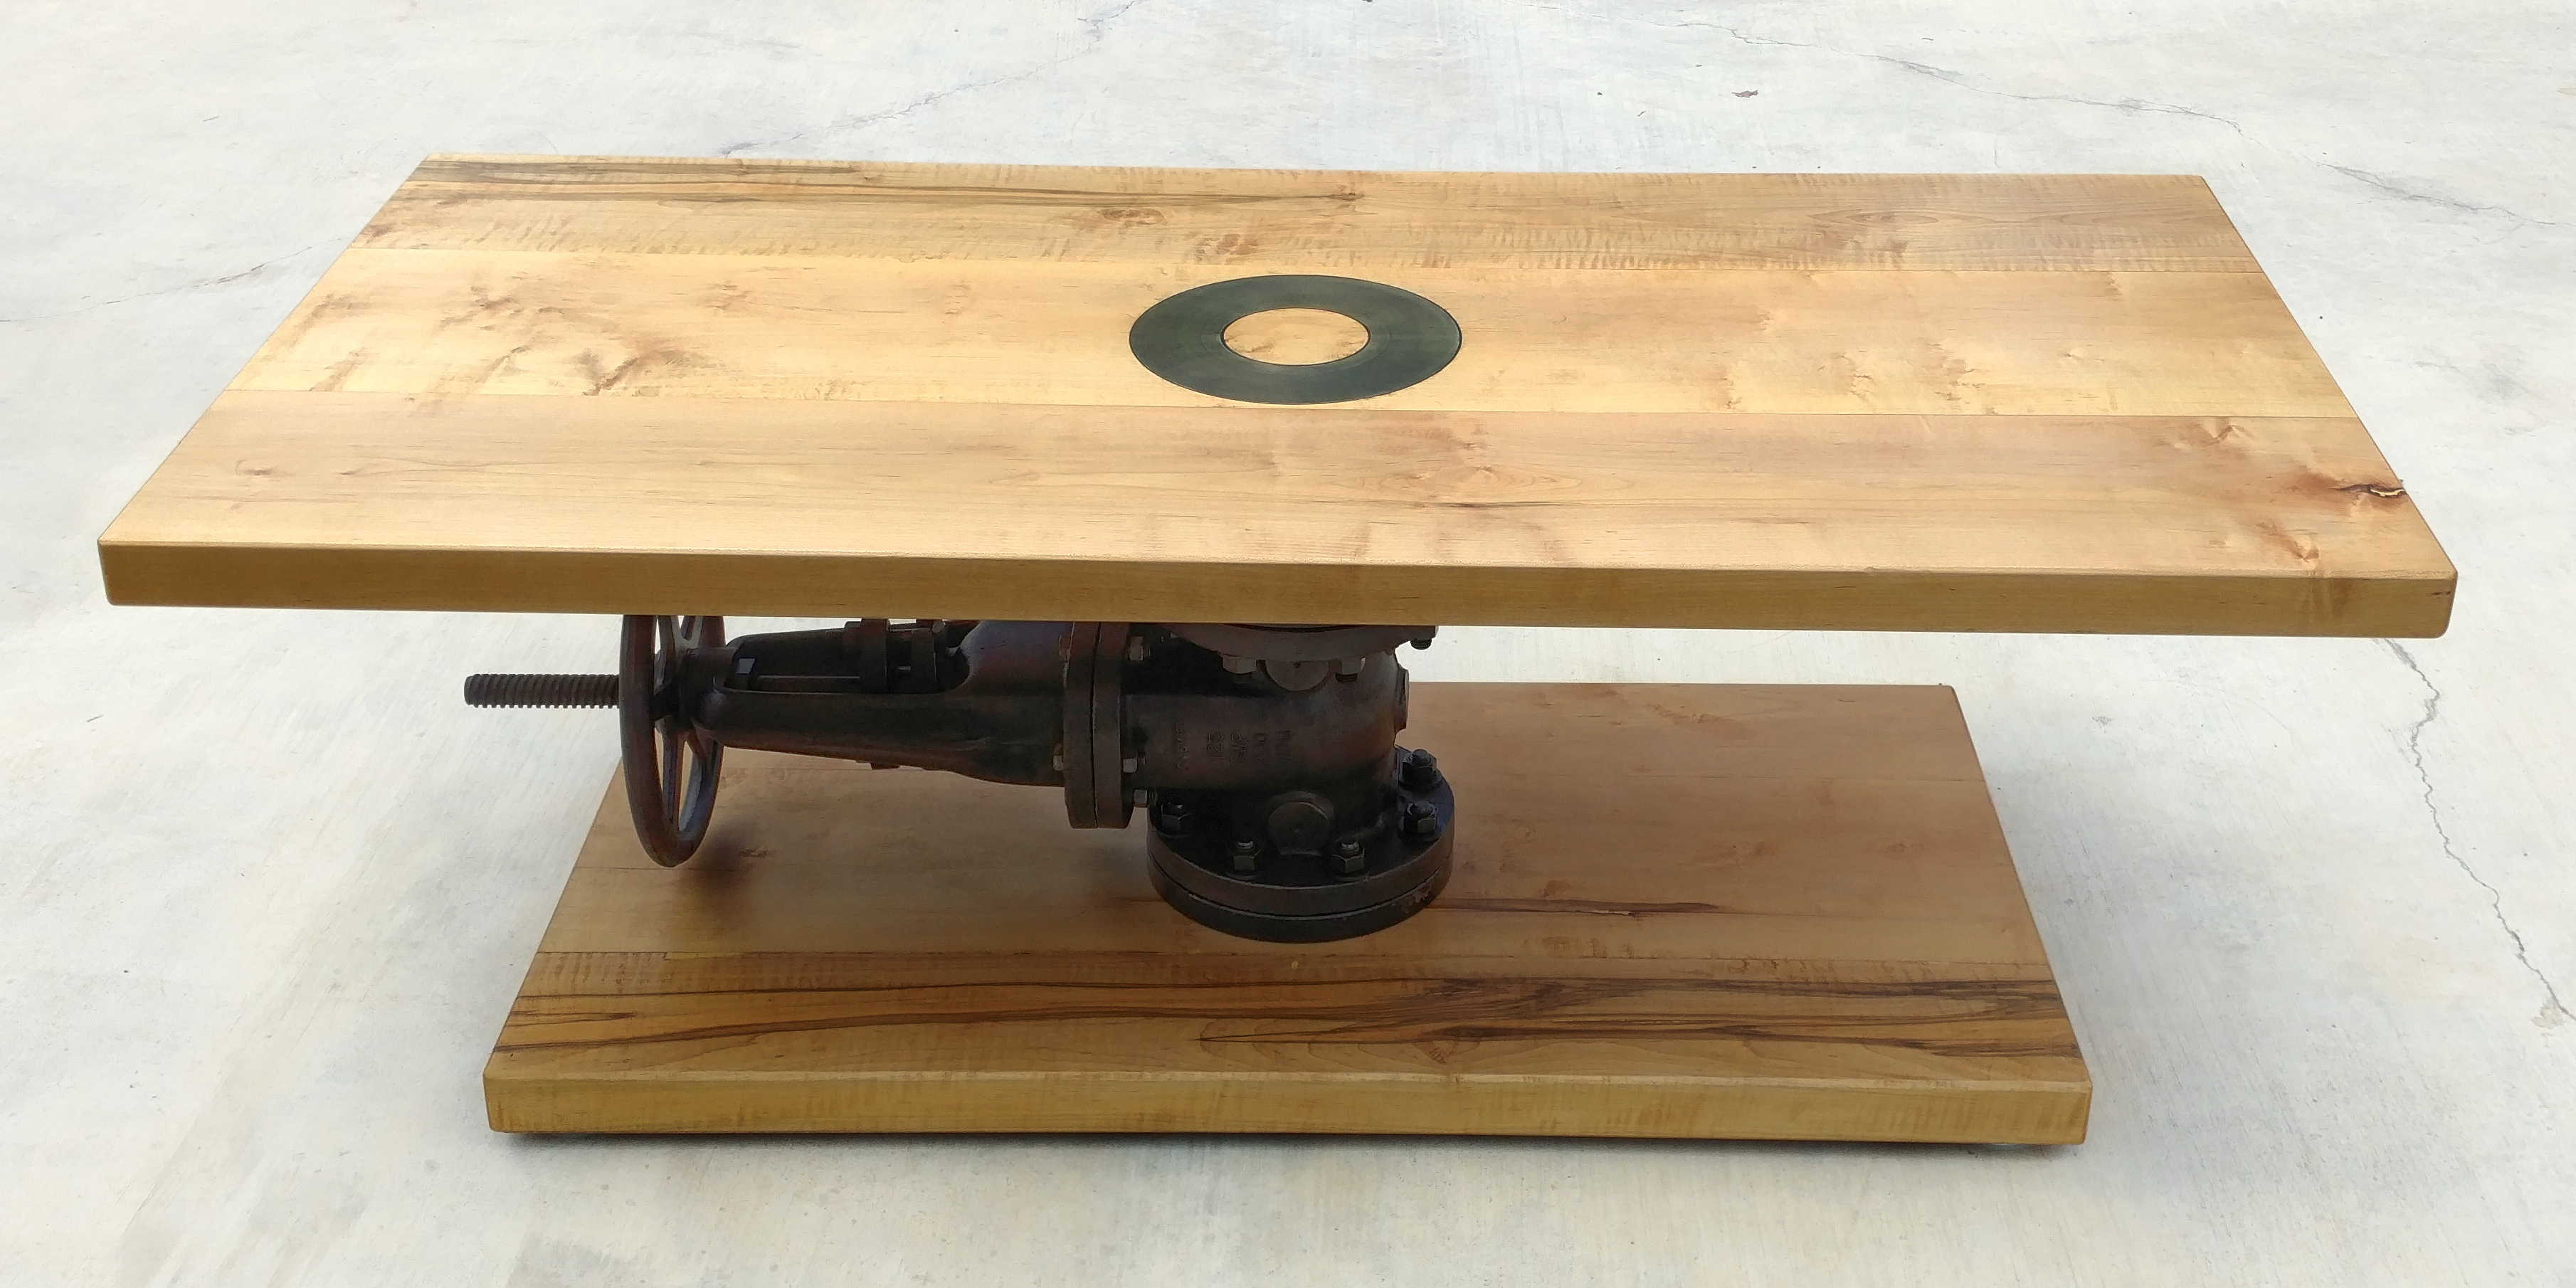

So the table is finally done. Do I have a place for it to go? No, no I do not. I have the saw table in my living room and will never part with that. I don't have a big house that needs multiple coffee tables either. Yep, I started making a table that I knew I would never use just because I thought it would be cool. Not the smartest person at times am I?
Sooo, anyone want a table that costs more than any sane person should spend for something of it's size?