


Austin Garden
December, 2017
Disclaimer, as I mentioned in the other garden build, don't trust anything I say about gardens. I do not tend any plants myself and would be a very unreliable source of information on anything related to them.
That said making physical things is well within my abilities and the last garden seemed to work so when Elizabeth came up with giving a raised garden to a family member for Christmas I said I'd make one instead of getting a wooden kit that would rot out in a few years.
The first time I used 6 slabs of 2inch thick 2ft x 4ft limestone to make a raised garden by burying them into the ground so they would stand up by themselves. This time though I didn't want to do that much digging and take quite as much time since I would have to get it done in a day or two while we were visiting Austin for Christmas. I thought about maybe making something out of steel that I could get hot dip galvanized and just bolt together as well as maybe a combined limestone/steel construction. I settled on a straight limestone look again though but done in a different way. This time instead of half burying a bunch of slabs I decided I would cut them in half and place them on top of the surrounding ground.
Since that meant I only needed to obtain 4 slabs they were barely within the capacity of my Ford Ranger (cargo capacity 1000lb = me (200lb) + stone (4x200lb-800lb)) I picked them up at lunch one day. When I go home that night I cut them all in half as I unloaded them.
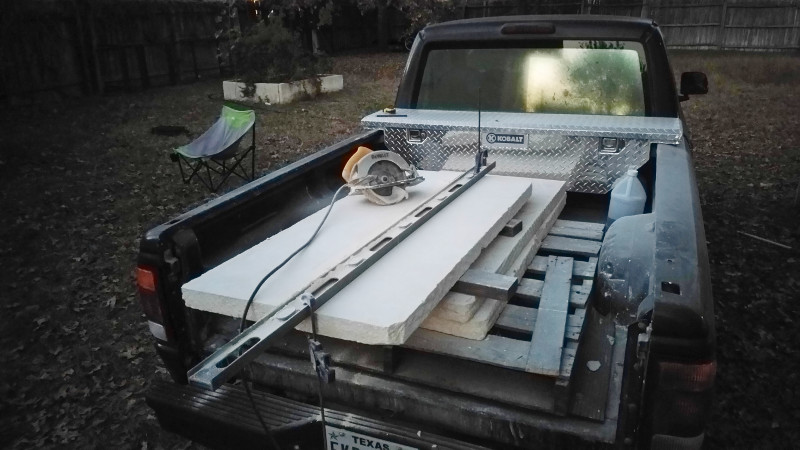
I stacked them to the side and started collecting other materials: some Loctite PL 500 landscape adhesive, stainless steel corner brackets, stainless screws, a cubic yard of bedding soil and six bags of mushroom compost. I loaded it and my tools onto the trailer and towed it to Austin on Christmas weekend.
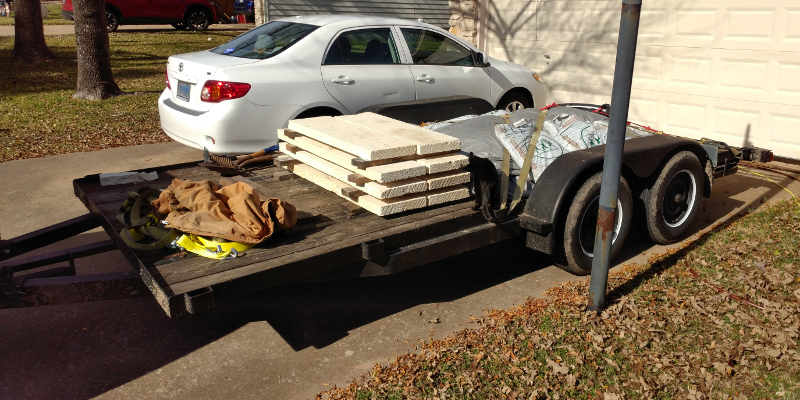
Unfortunately I was too lazy and not careful enough while strapping the stones down on the trailer and broke two of them. I should have taken the time to cut some 2x6s longer than the stones and shimmed them up off the top slobs so I could crank down on the straps without loading the edges of the stones. It was rather disappointing because now I had more work to do than I originally anticipated.
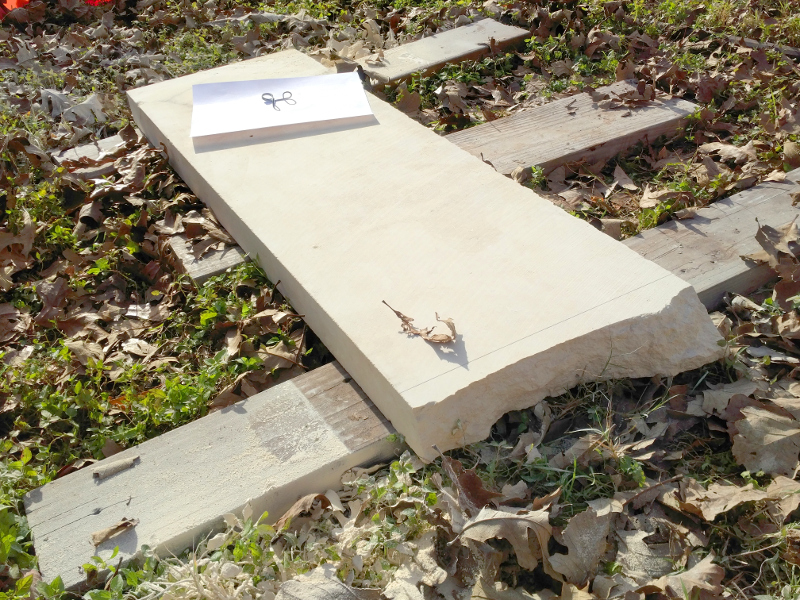
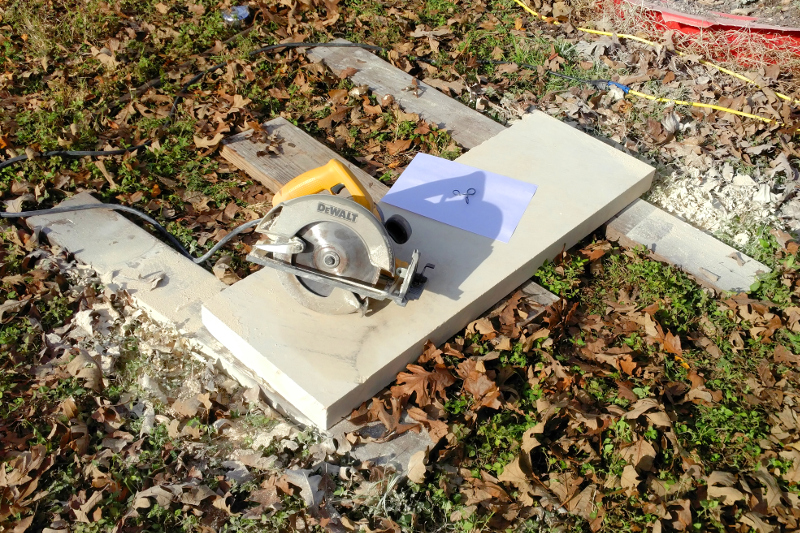
Luckily since I broke the stones at the house I threw the saw in the van and took it to Austin with me. I didn't come prepared with a square though so all I had to mark my cuts was a piece of printer paper and my tape measure. That was good enough to make it work though and except for the fact that I got super messy with stone dust again it wasn't that bad. I just cut four of the slabs down to the same size (39in).
After I cut the stones that needed trimming I was ready to prep the site.
I didn't need to dig down like on the first garden but I still needed to do a little. I took a few inches off the top of my location to hopefully remove all the existing grass and move most of the weed seeds that would be in it out of hte new garden. Then I dug down a little more on the high side to level things off. When I thought I was getting close to what I needed I move some of the rocks over to see if I was ready or needed to do more digging.
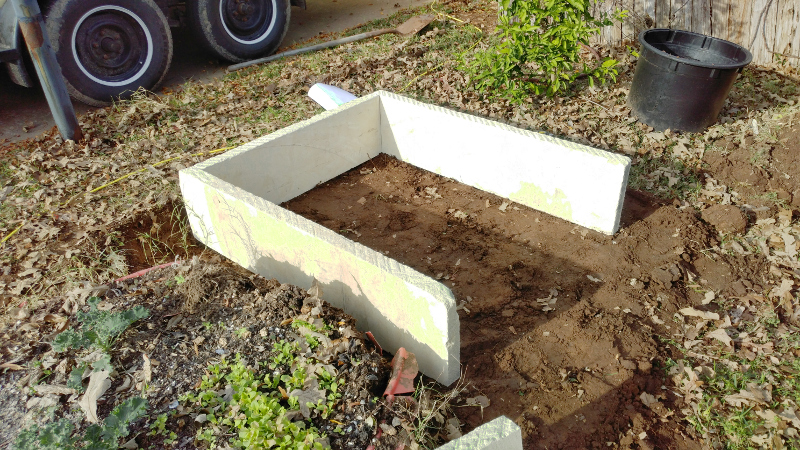
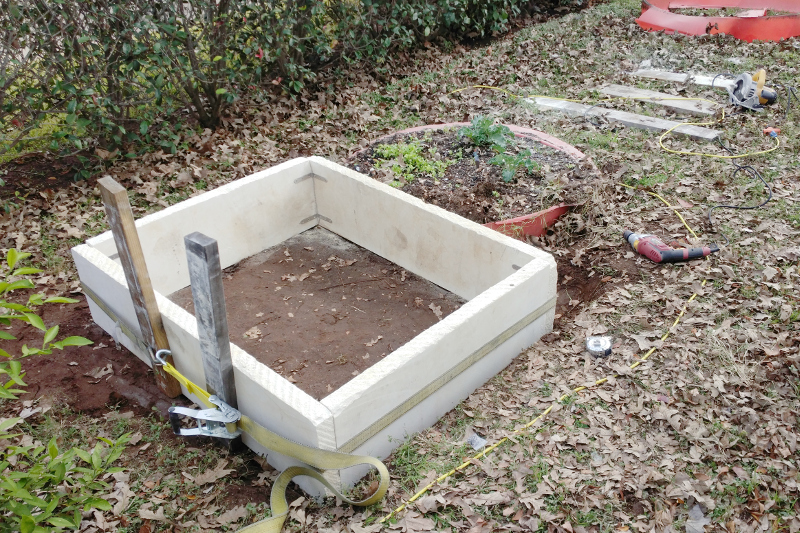
I had to do a little more adjusting but not much, I was ready to start putting the first half of the garden together. I propped the stones in the right places and then clamped it together with a ratchet strap. I measured across the corners to check if it was square and measured to the driveway to make sure I was parallel with it then I undid the strap and laid the stones down. I then thoroughly brushed the mating surfaces off and applied a bead of masonry adhesive on the inside edge of the mating faces. I moved the stones back into their places, propping them up with 2x4s as I went until I had all four standing up in position again. Then I cinched them all up with the ratchet strap again.
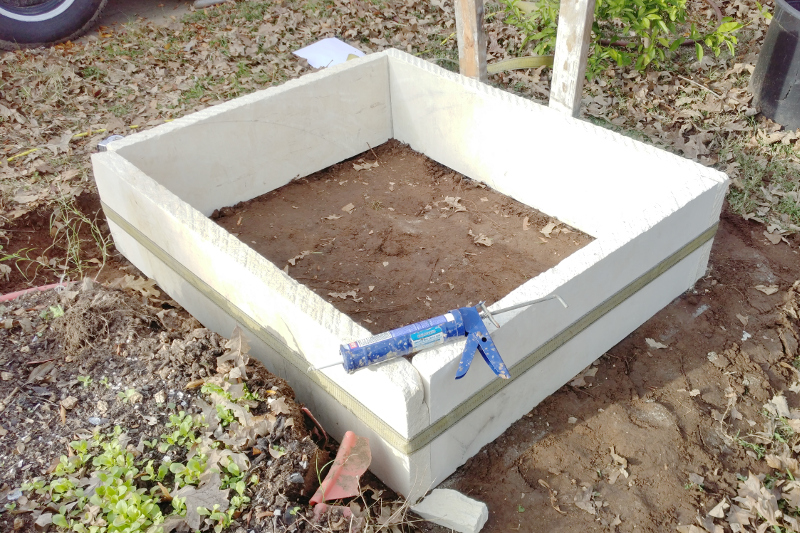
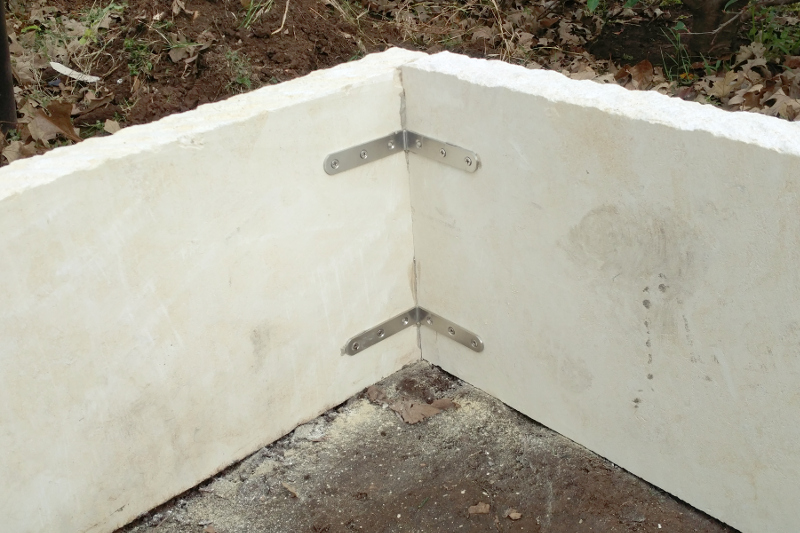
After I checked the measurements again and decided it looked right I started installing some corner brackets. I just held them in place by hand roughly where I thought they should go while I drilled the screw holes. Then I blew out the holes and brushed the dust off the stones so a bead of adhesive would stick. I squirted some in each hole and ran a bead where the corner bracket would sit. Then I put the screws in and moved on to the next bracket.
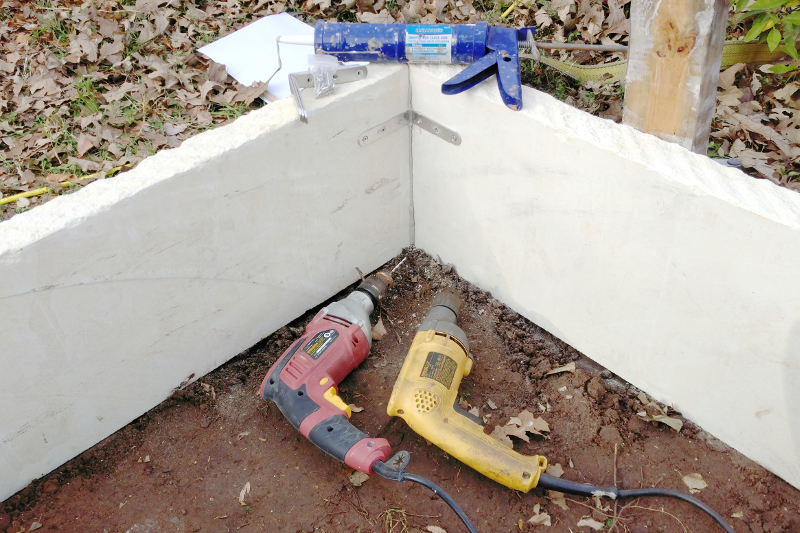
I put two brackets in each corner, on toward the top and one toward the bottom. I put the bottom one about as low as I easily could without shoving the drill motors into the dirt and put the top one as high as I thought I could without it being visible after dirt is added.
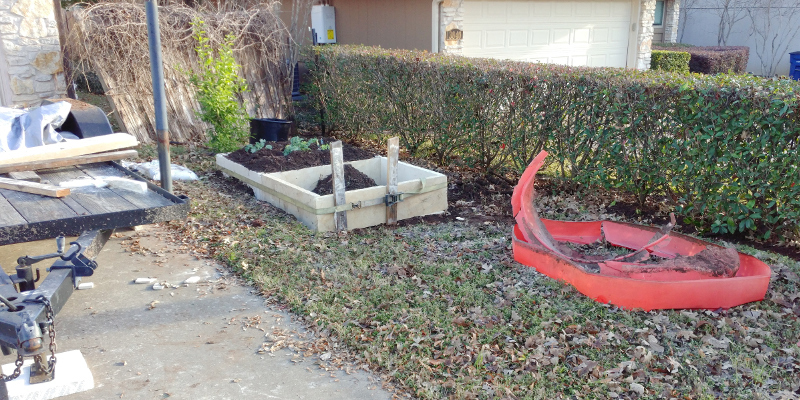
So then I had one planter box. and was ready to start filling it up with dirt and moving the existing plants over to it.
I got the plants moved over that day and got all of the digging preparation done but wasn't able to finish the second half before dinner that night. I strapped the stones for the 2nd half in place and left the whole garden that way for a day while I went to go visit some other family.
Here is what I had when I got back on Christmas day. Definitely more than half way but still some work to do.
The second half was the same as the first except it went even faster. I had a brother in law helping me so we got the slabs all bracketed and glued up then I shoveled over the bedding mix while he mixed it with the existing garden dirt and extra compost.
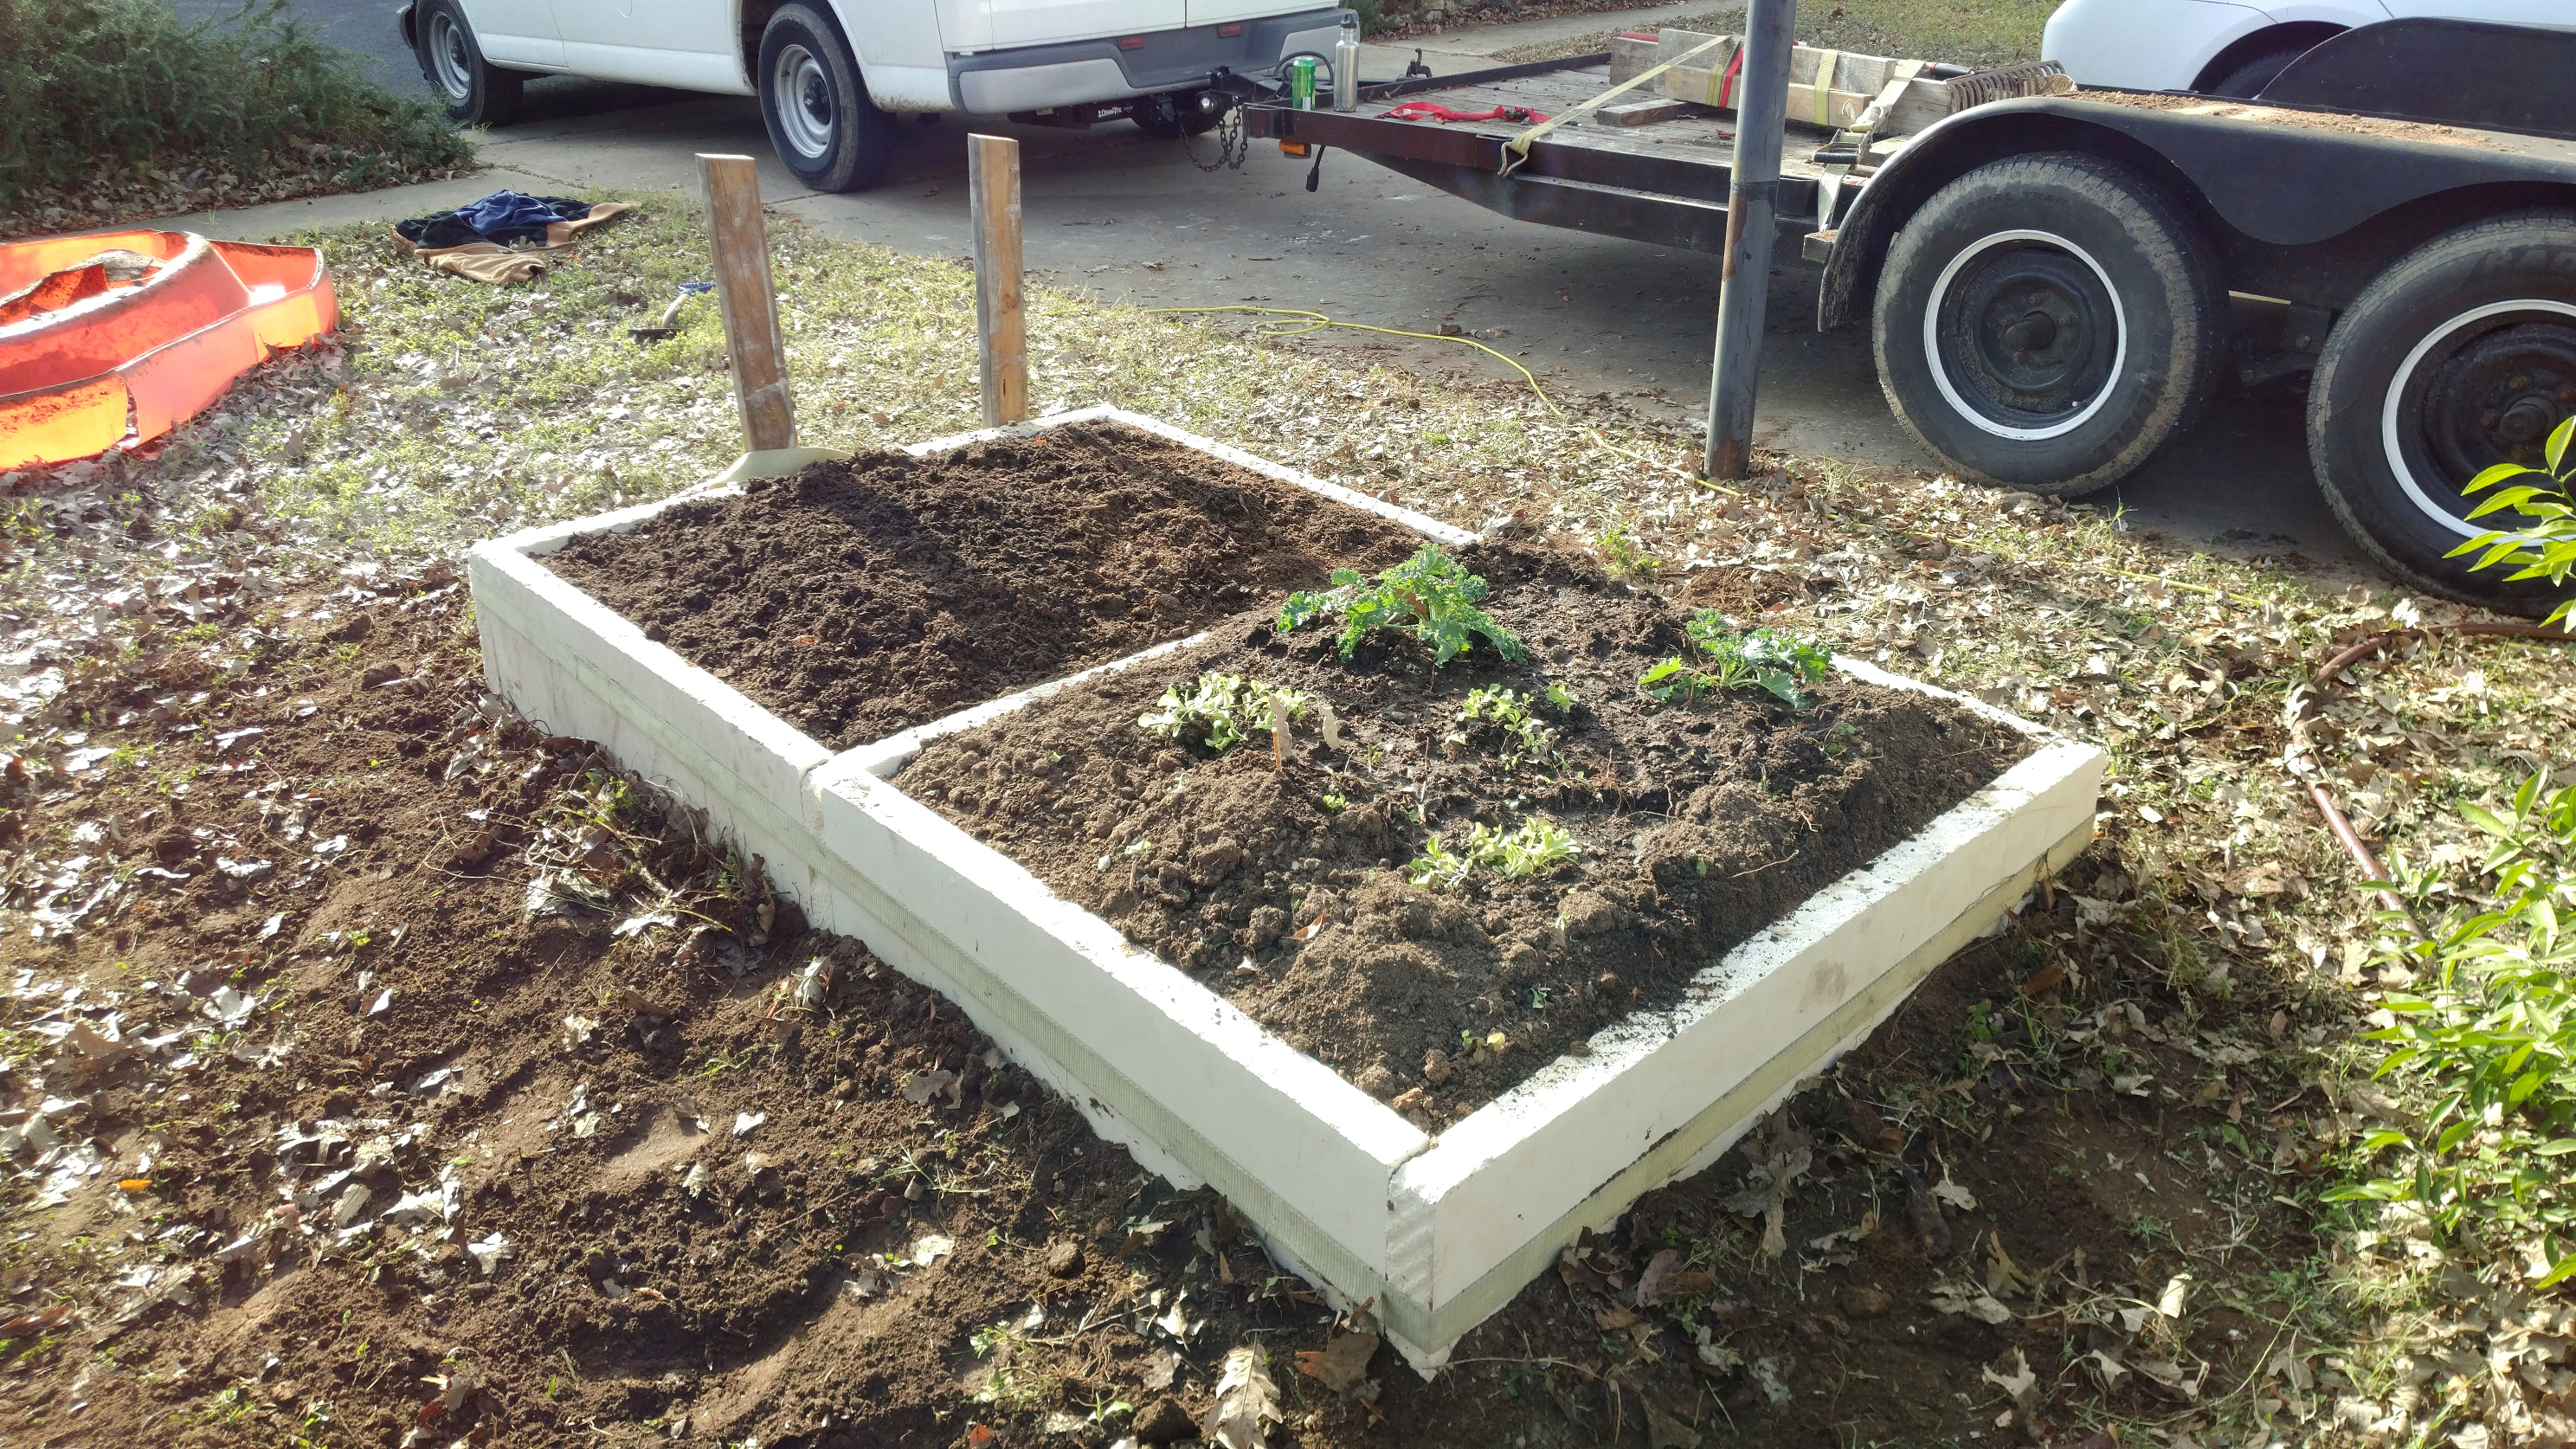
I left the straps on until after dinner when we had to leave so that the glue and brackets could have as much time without load as possible. Probably not really necessary since the brackets are screwed in but it couldn't hurt.