


Kid Table
So the kids have outgrown their triplet table and it is time to do something else! Boosters seats or some such solution just sounds like a disaster for us with three kids so it is either make some kind of kid seating solution that brings them up to our level or make them another table. I did consider making some kind of platform with built in seat or something like that to bring them up to us but in the end I decided to just make them another table.
I considered many possibilities but a key driver pointed toward picnic table style with fixed seats. When we have seated them at little tables with little chairs before they eventually end up pushing the table back and forth at each other which leads to spilt things and tears. A fixed table built into the wall or a really heavy one that just didn't move would solve that problem but they still make messes so having to move their chairs after meals but not being able to move the table just seemed like it would be more difficult to live with than a solution with the seats built into the table.
I sketched a variety of designs and even modeled a few while I was offshore in Alaska for my professional job. Here is one that ended up being similar in layout to what I decided on (though execution is obviously different as you shall see).

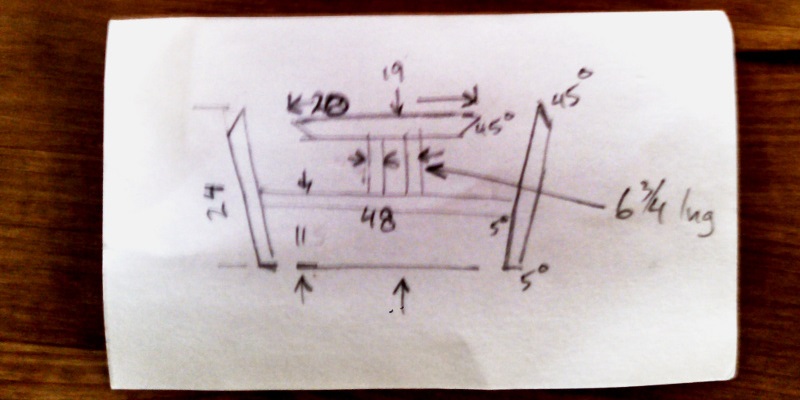
When I got back from Alaska I measured the kids and figured out what sizes things needed to be (it will be a little big for them so they can grow). Sometimes my figuring and sketches can be pretty crude, I have most of how it will work in my head. I just need to work out some numbers and have a place to record them since I'll forget those.
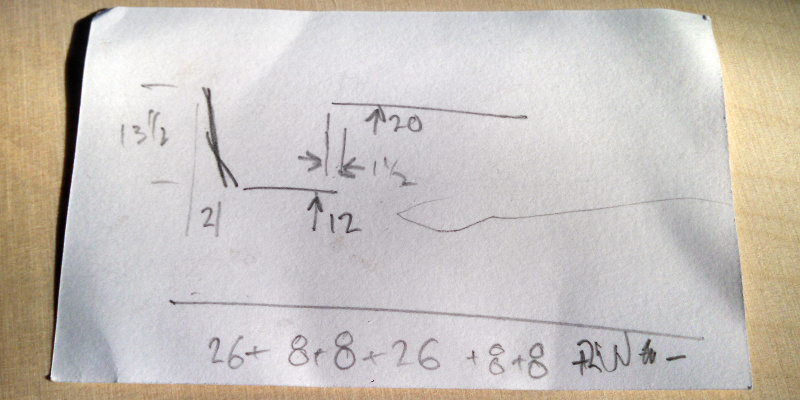
At this point I knew that I was going to go with a light plywood and metal tubing construction (not heavy like I usually do, I wanted to be able to push this around to clean under it). It was going to have a plywood top, plywood bench seats with backs and two steel tube frames that would hold it all up. I sketched out the general tube frame layout and a cut list for the plywood before heading out for materials.
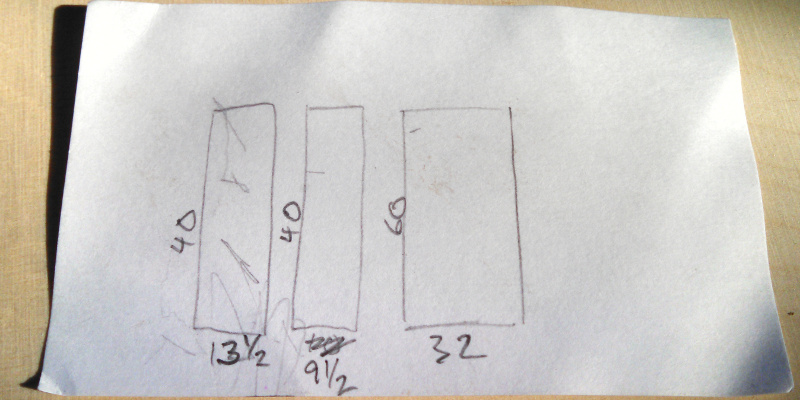
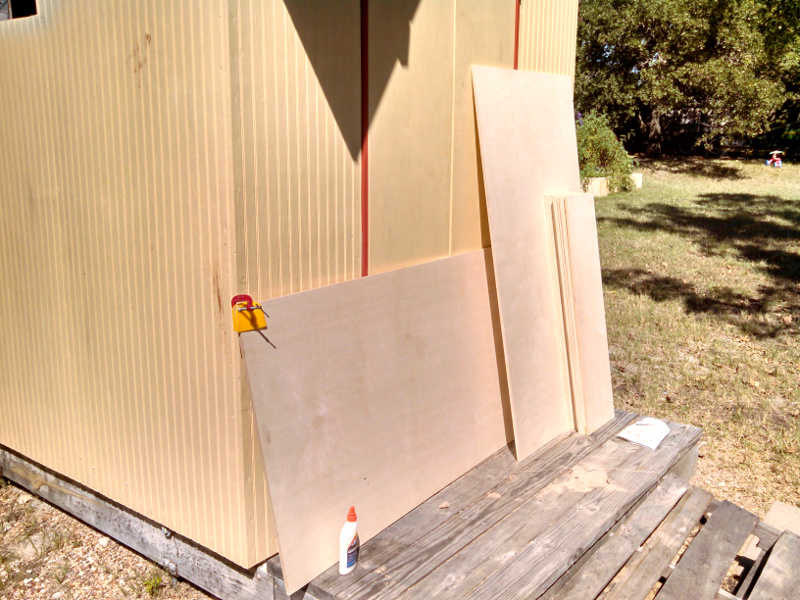
I had a little trouble deciding if I wanted to go with 1/2" plywood or 3/4". I wanted 3/4" but I don't have a convenient source for good stuff in town (at least not that is open anytime I can drive over and pick something up) so I would have had to settle for big box store hardwood plywood which really isn't that great. I ended up deciding to go with the better quality birch plywood that I could buy at McCoy's. In addition to being 1/2" thick instead of 3/4" like I really wanted it comes in 5ft x 5ft sheets. One 5x5 sheet isn't enough material for a single table and 2 sheets for one table is just wasteful! I bought 3 sheets and cut out enough parts to make two tables.
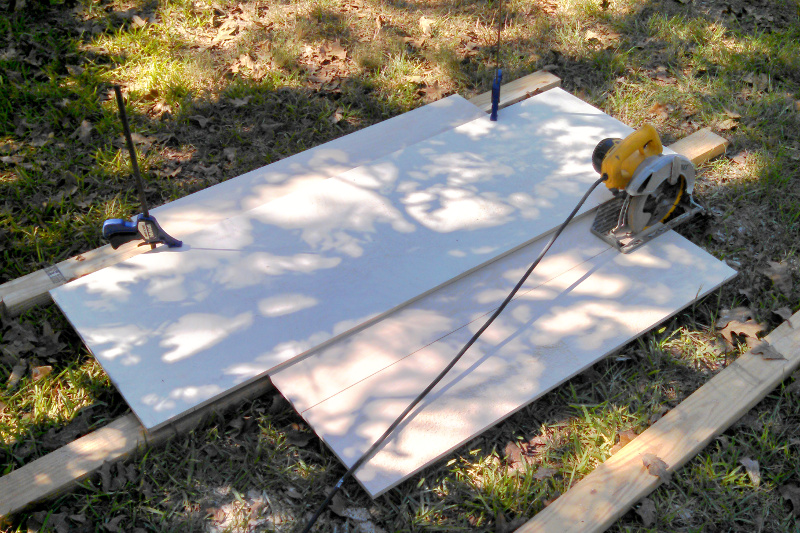
This really is a good application for a table saw but I still don't have one so I just dialed my blade stickout to about 3/4", clamped on a guide board and ripped it all up with the circular saw.
After I cut all the panels up I used the belt sander to pretty up all the cut edges and gently round the corners (not pictured). Then I used some sandpaper to give a slight radius to all the edges by hand but didn't sand any of the faces. Baltic birch generally comes with a nice finish that is ready for your coating of without sanding and it would just mess it up.
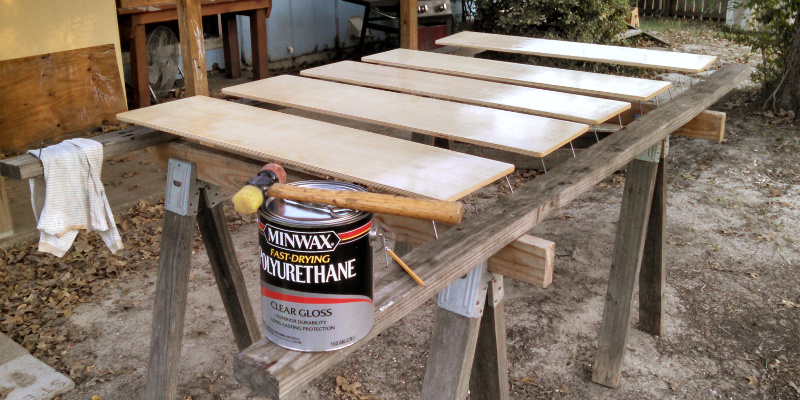
Since everything was ready now I started putting a first coat of gloss polyurethane on. For a base coast especially I like to do both sides in one session. Paint the side I think I am most likely to hide first, then flip it over and support it with nails while I paint the other side. This often results in a better job than doing it one side at a time because I am much better at catching all the drips on the edges. Many times it is even suitable for a final coat.
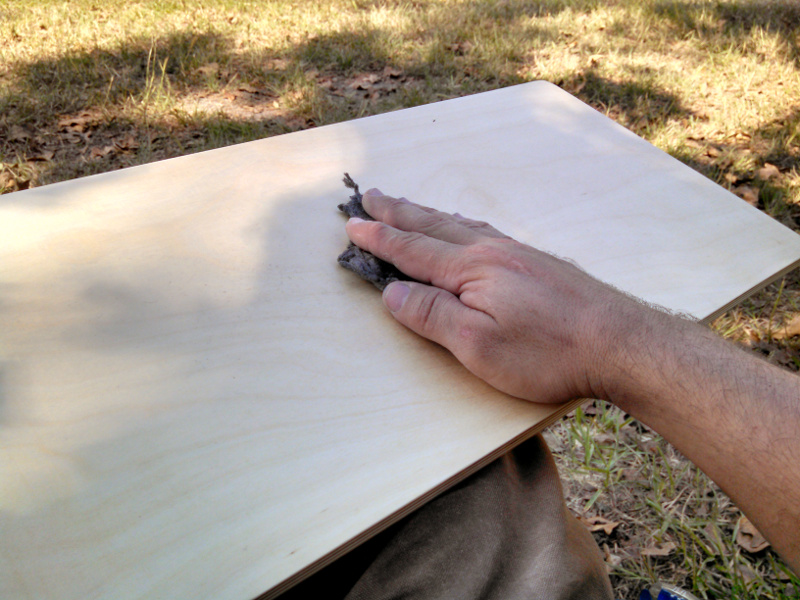
After the first coat of poly I went over all the seat parts with steel wool to catch the grain raised from the first coat. After that they are ready for a second (final) coat.
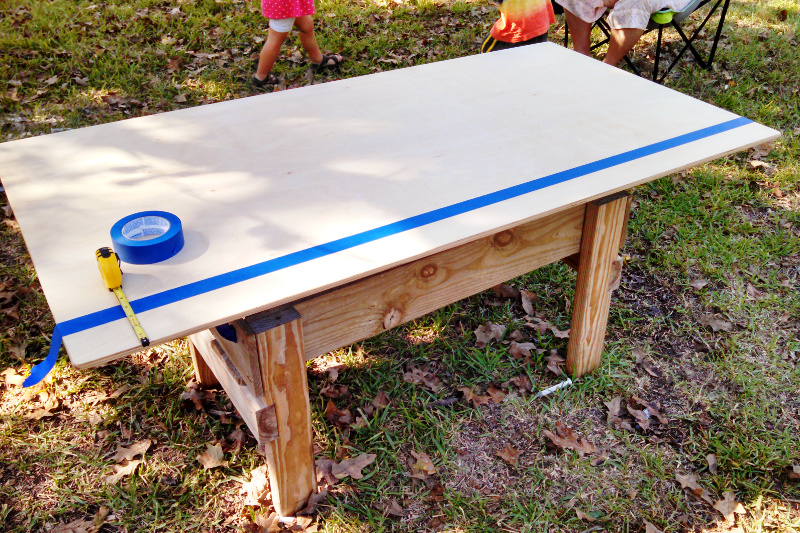
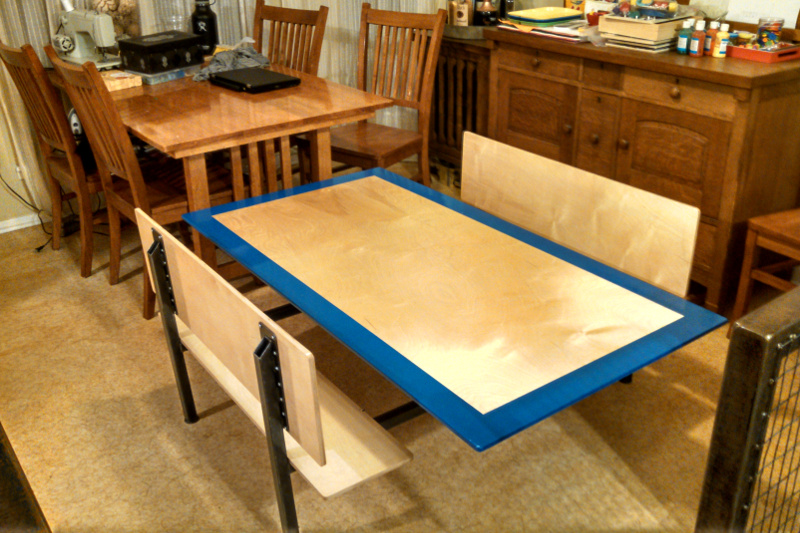
The table tops got the same treatment except instead of going straight for a second coat of urethane I decided to add a decorative touch. To give the table a little more fun and color I elected to paint a border around the table.
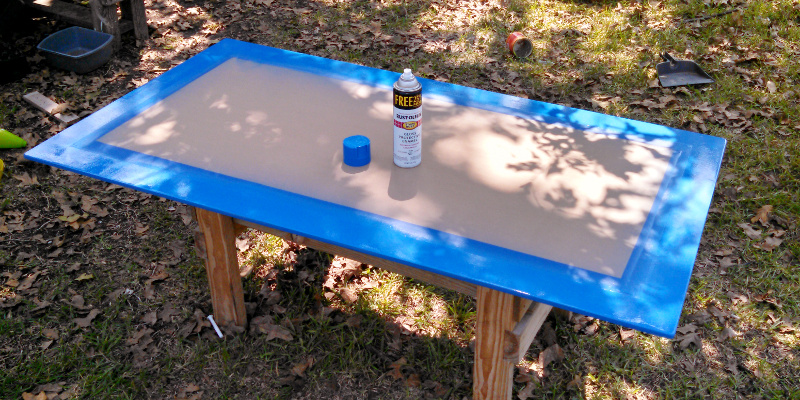
I measured in 3 inches from the edge and taped all around.
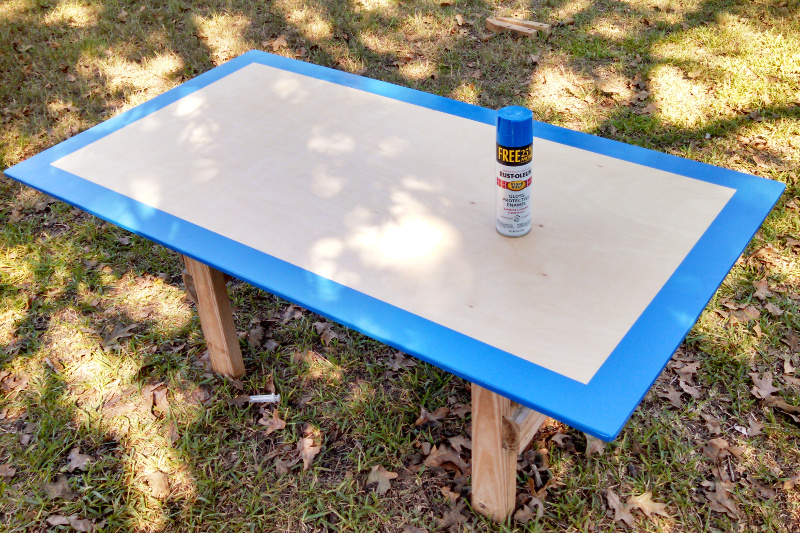
I did this to the top and bottom and covered the middle of each side with some kraft paper to keep the overspray off. Then I applied some glossy blue spray paint being careful to spray away from the masking so I didn't blow any under the tape.
Immediately after spraying one side I flipped it over and sprayed the other side. Then while everything was still wet I ripped off the tape and kraft paper. I find this helpful because it doesn't give the paint as much time to wick underneath tape and more importantly the tape doesn't get stuck to the part and possibly damage the nice crisp line when you take it off. Not a huge problem when you have good adhesion but useful with more iffy circumstances than this project.
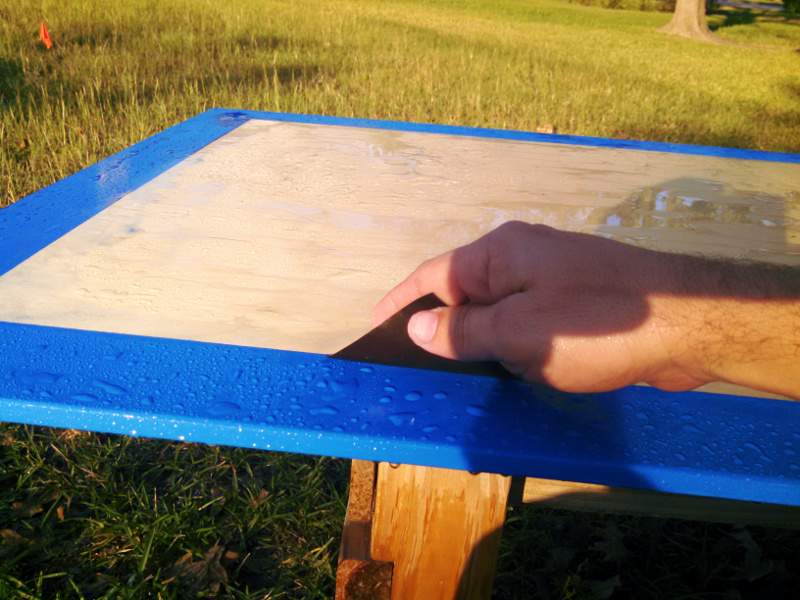
Another useful thing about ripping the tape off immediately is that the paint edge doesn't seem as "sharp" to the hand afterwards because the paint has some time to flow back instead of being sucked up onto the tape. Anyway, even with removing the tape there is still a line you can feel with your fingers that would be really annoying if you were using this table so I carefully wet sanded the transition down to eliminate it. After that I could apply a second coat of polyurethane to protect everything and the transition becomes undetectable to the fingers.
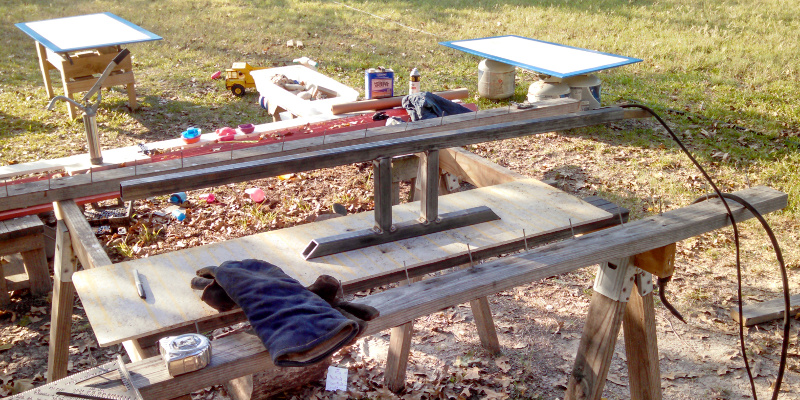
Simultaneously with the wood parts of the table I was working on the metal frames when convenient. Like the wood I bought more metal than needed to make a single table. I actually bought enough to make 3 sets, one for my kids table, one for the second set of plywood parts and one for someone else who doesn't have welding equipment to use for a quick project with them doing the plywood working.
Anyway, I started cutting up all of the tubing according to my plan.
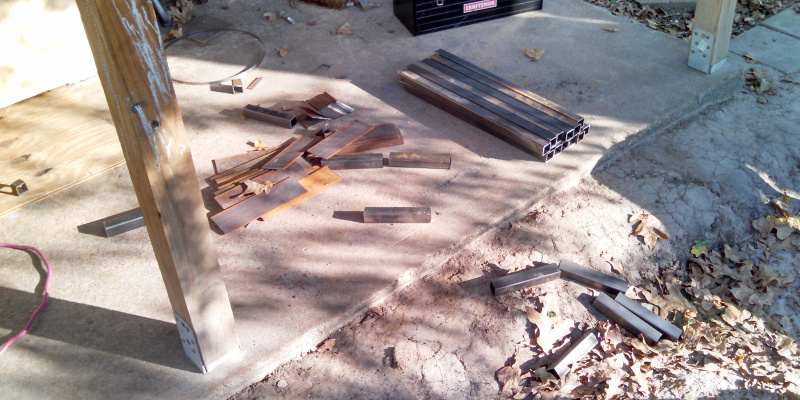
After I cut up all the tube I started putting one frame together. I knew that I wanted to use this frame as a template for the rest so I held off on doing any welds that would stick up proud of the surface when I stacked subsequent frames on top.
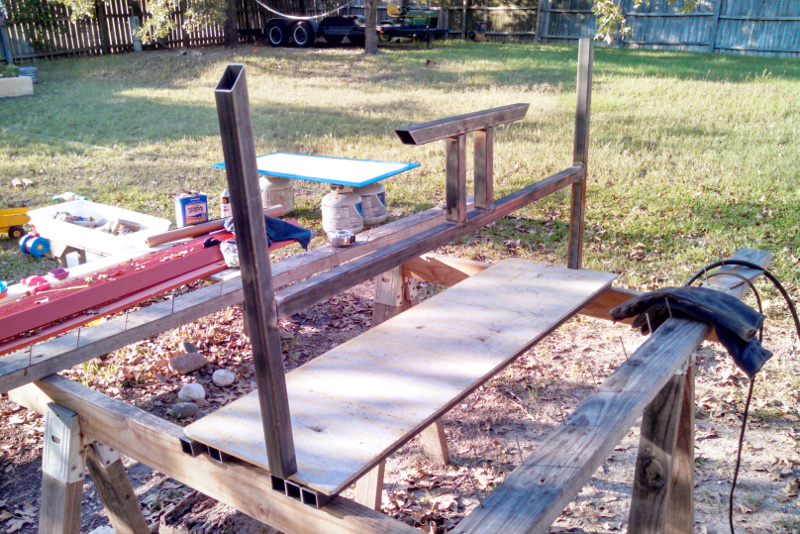
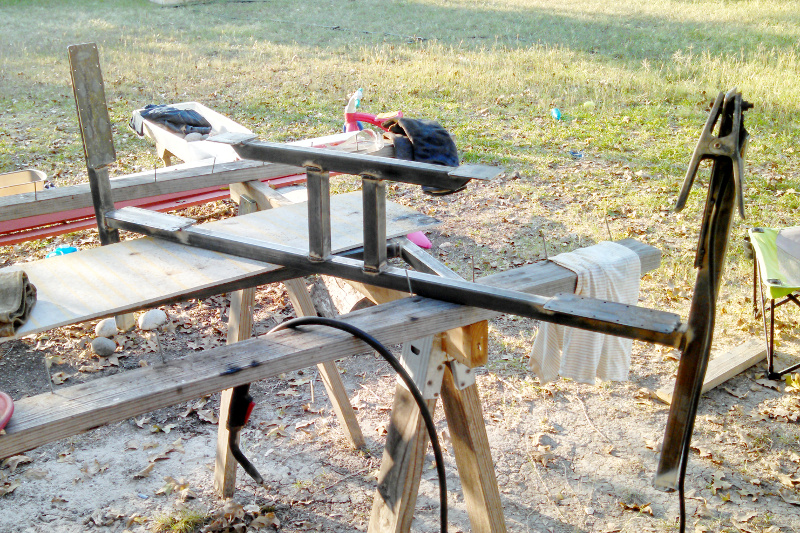
Here is the first frame all ready to duplicate. I stood it up and measured everything as if it were in use to check that it was good before I finished welding it out.
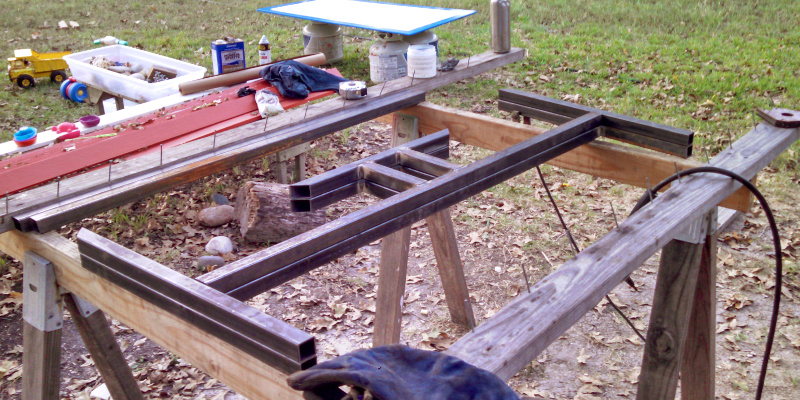
When I was happy with the first one I started duplicating it. I stacked the next frame on top and tacked it all up then repeated the process until I had all 6 frames welded out.
I had the basic frames all welded up but still needed to include some way to fasten them to the wooden parts. I had roughly worked it out before while cutting out the parts but I didn't figure out the holes until now. With only 1/2" plywood I knew I couldn't put in big fasteners but I knew I needed a lot to keep the thing together because this design actually depends on the seats for structure, the wood doesn't just sit on top.
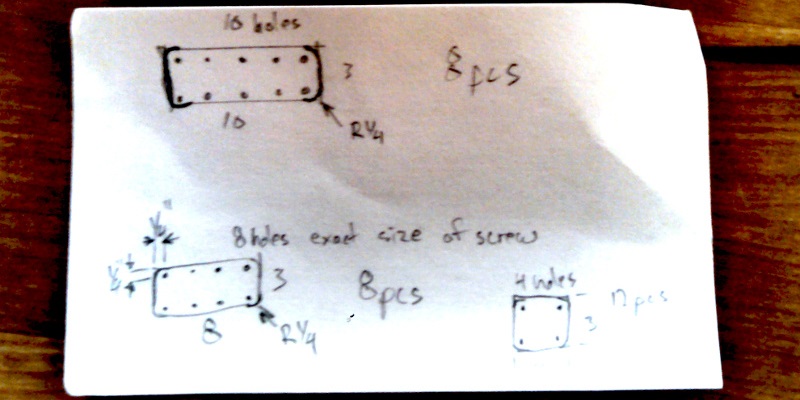
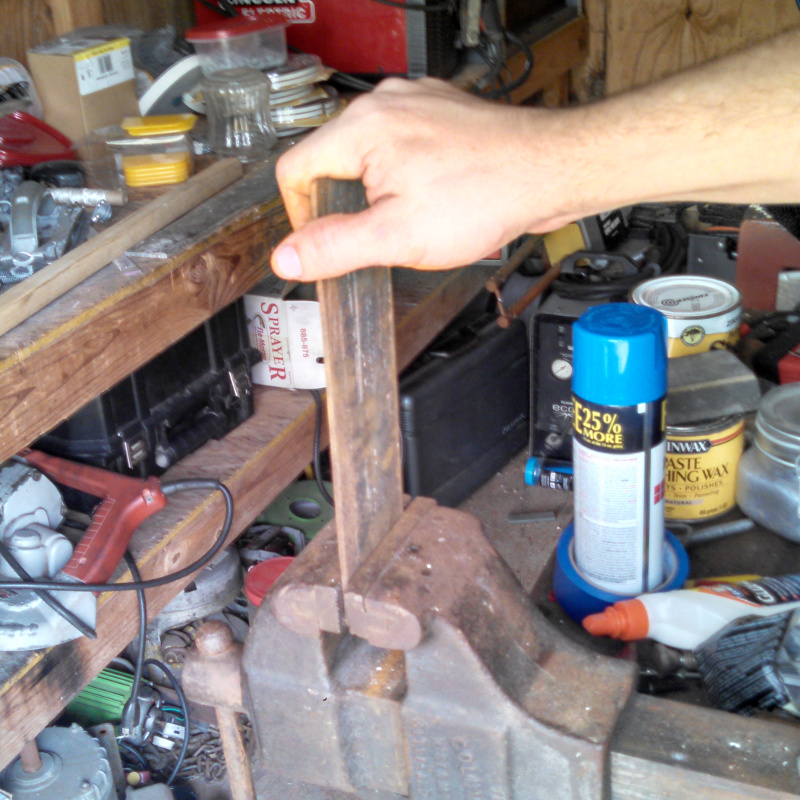
So I cut them all out when I was cutting out the tubes but I wasn't very careful about straightening the flat bar before I cut it up so some of the plates I had were a little wonky
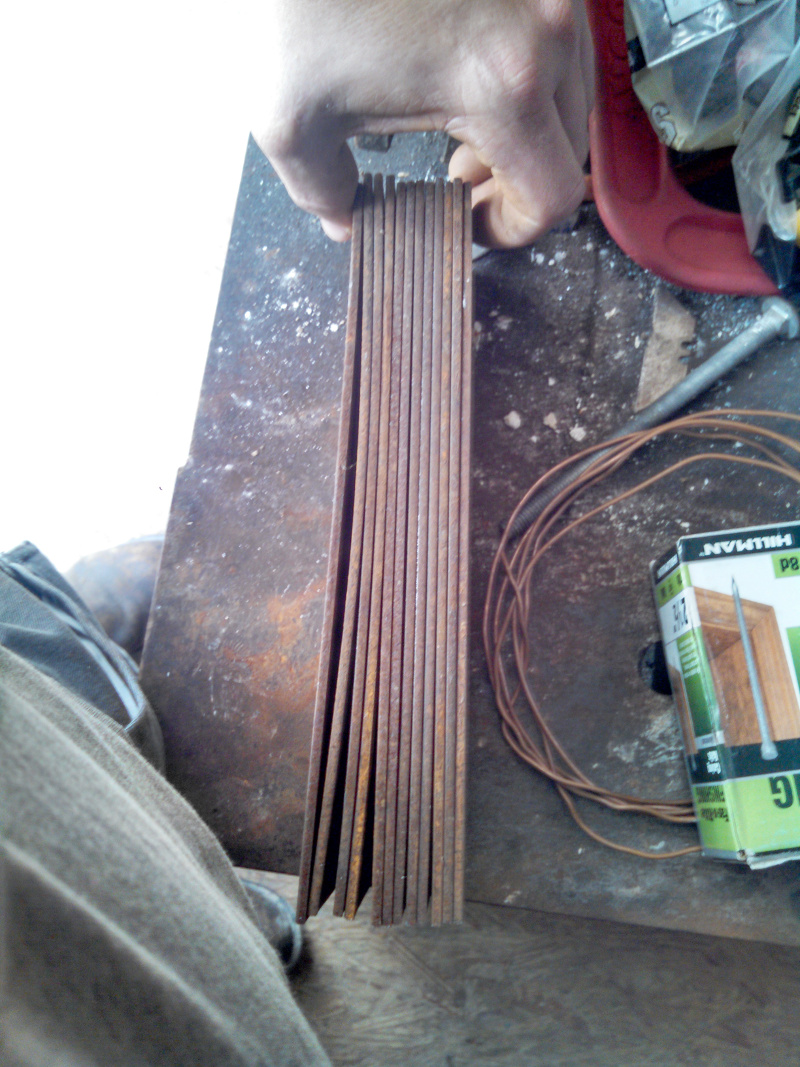
I put the bent ones into the vise and straightened them by hand, not actually that hard.
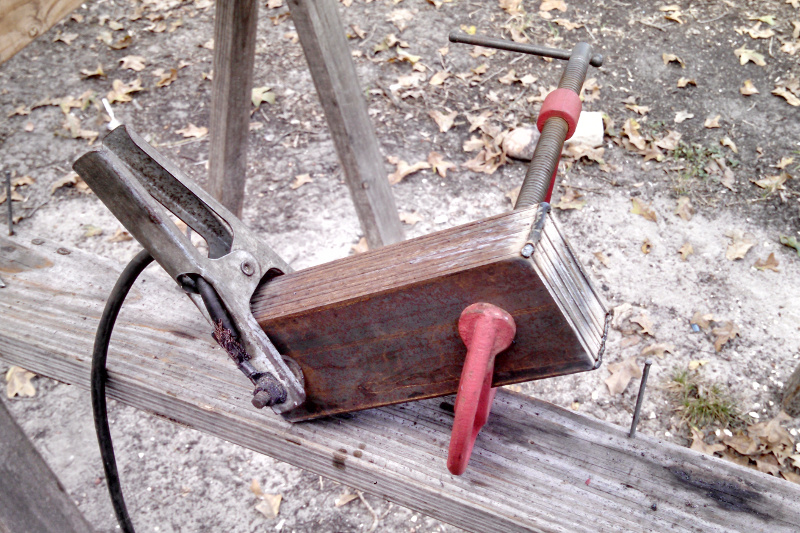
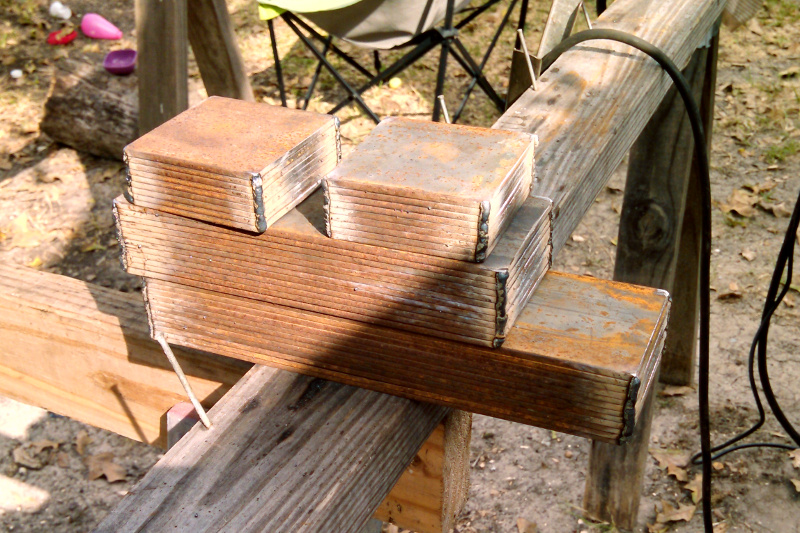
After I straightened the stack out I clamped them together into a couple of stacks and welded them together on the corners.
Now you might ask why I welded them together and the answer is simple, I don't have my iron worker up and running to punch the holes so I would really rather layout and drill 26 holes instead of laying out and drilling 288 holes. While I use this trick sometimes when it is useful like this I can't claim it as my idea, it is a pretty common practice for fabrication shops.
See, so much easier than drilling each hole individually. It also has a side effect that might not be obvious if you haven't done it before. The often sharp and messy backside of the hole is only present on one of the parts since the others are backed up by each other. As a result of this drills last longer too since that is one of the rougher parts of a drills life and often what wipes out the corners.
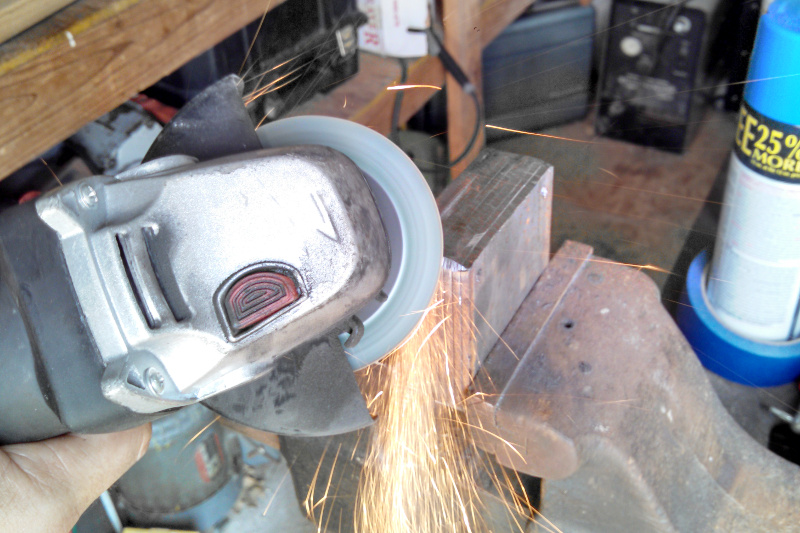
Obviously after drilling the holes there is a step you wouldn't have if you didn't weld. You have to grind the weld off. In this case it doesn't even add much time because I wanted to round the corners off anyway and it is easier to to it with the stack all clamped together nice.
After I finished drilling all the holes it was time to weld the plates onto the tube frames.
While / before I did this I wire wheeled and prettied up all the components of the weldments. It is easiest to do everything you can before welding it together and keep things cleaned up as you go because it only gets harder to fit your grinder in where it needs to be. While I am talking about grinding I should point out that I like to keep a few angle grinders on hand. You need at least one good one with some oomph to use as your main tool for the heavier tasks (the red one) but it is also helpful to have a few others (even $15 harbor freight jobs) that you can leave set up with whatever else you are using instead of switching wheels every time you need to do something different. This day I had a standard grinding wheel, a 120 grit sanding disc and a wire cup in use.
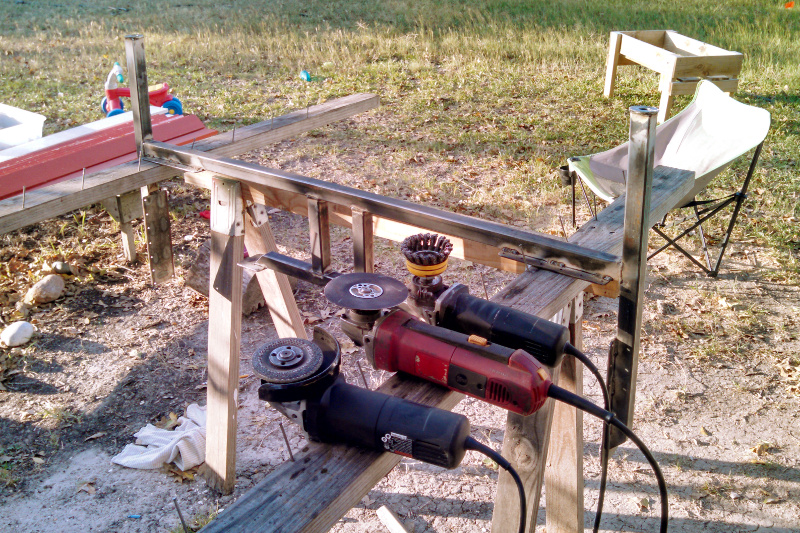
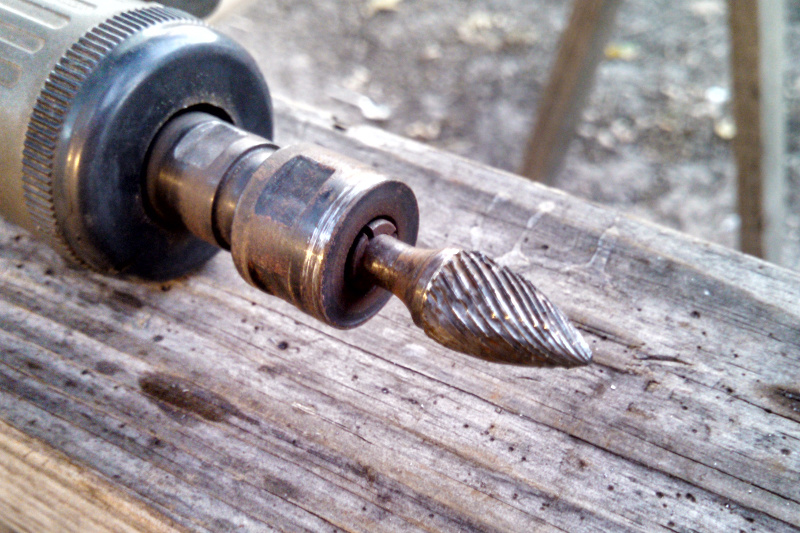
In addition to the angle grinders I also broke out the air so I could use the die grinder to help out on the sharp interior edges of the tube. I highly recommend picking up some flame shaped carbide burrs, they are one of the most useful shapes I think (I have a couple of chips in this one, need to get another).
After each frame was all prettied up I wiped them down with acetone to clean them and gave them a clear coat of acrylic enamel to keep them from rusting.
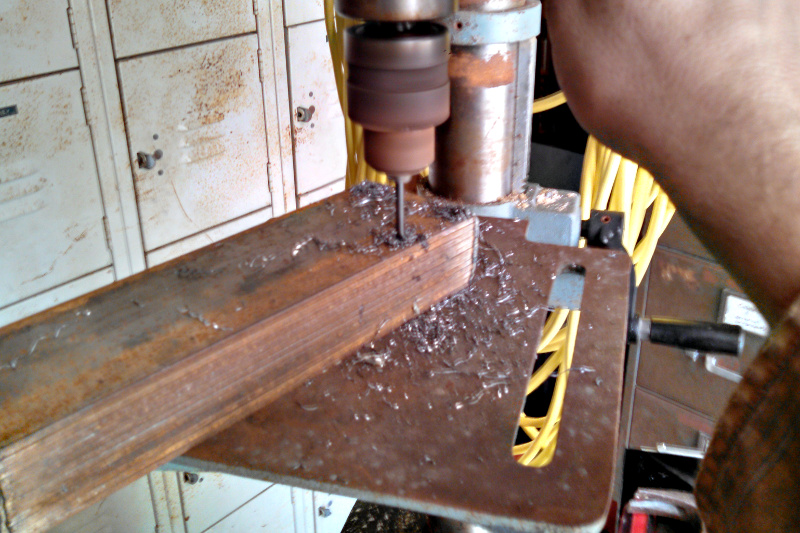
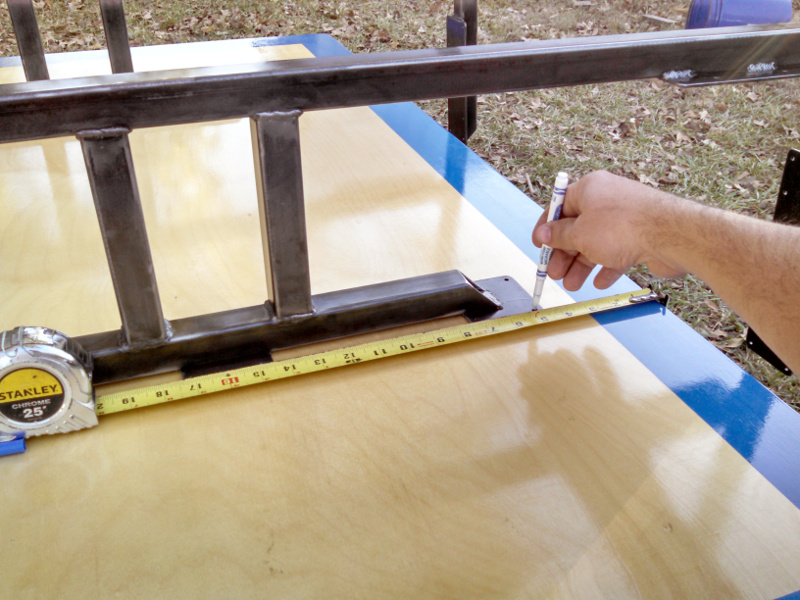
By the time a pair of steel frames was finished I had already completed one set of plywood parts so I was able to start assembling. To reduce the chance of splitting or causing issues I decided to pre-drill each screw location. I measured out where the frames need to be then marked each hole.
I didn't take a picture of the drilling but I taped a mark about 3/8" up on the appropriate drill bit (one a smidge smaller than the minor diameter of my screws) and carefully drilled down to the mark. It would have been a disaster if I had drilled through any of the panels!
While I had plenty of screws built into the design the wood is, like I mentioned earlier, a structural component of the table and not just sitting on top and I am paranoid about the screws getting loose and the whole thing working itself into a rickity, broken mess. Obviously I could go with a serious glue and really stick it together good in addition to the fasteners but then I would be out of luck if I ever wanted to take it apart for moving or some other reason. I elected to just go with PVA (aka wood glue / common white craft glue). It will grab onto the wood plenty good and will hold onto the screws more than enough to prevent them from working out but should be weak enough for me to unscrew it all and still leave useable screw holes.
To really get it into each holes I used a syringe without the needle and squirted it in.
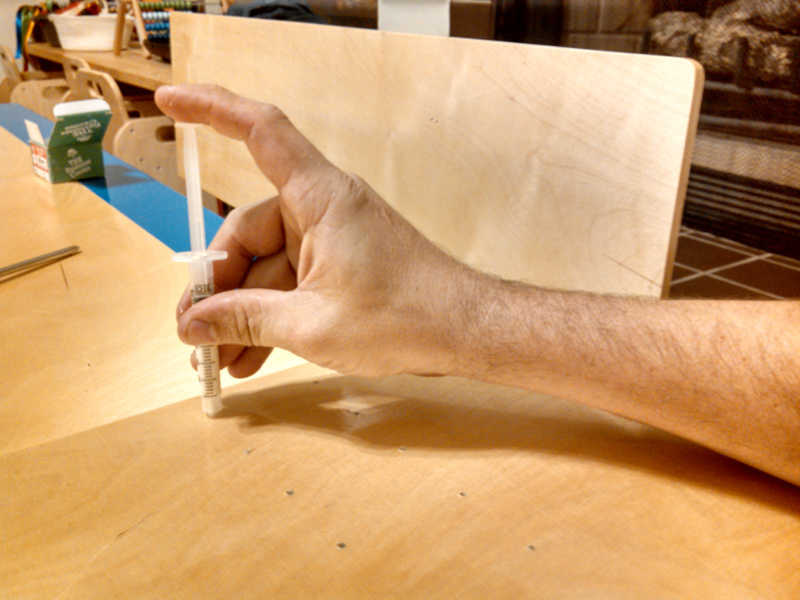
After I got a drop in each hole on the top I screwed the frames one
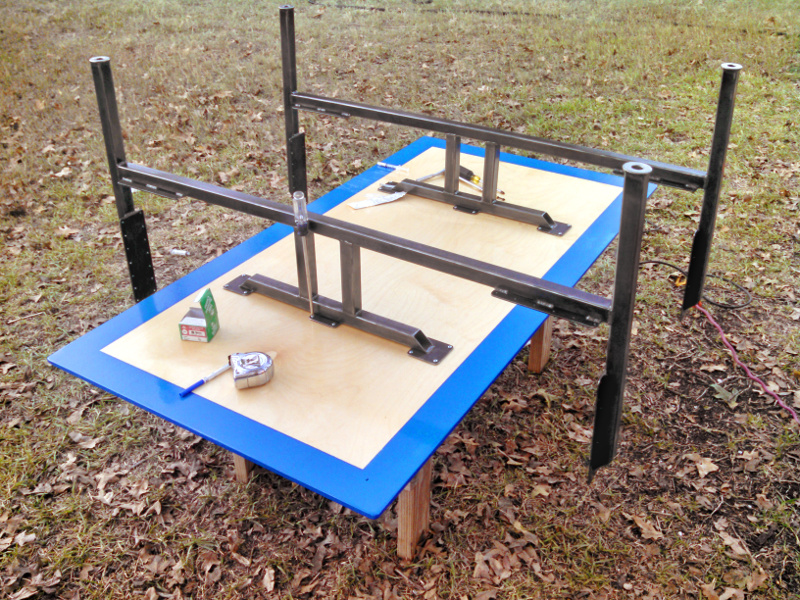
Then I repeated the process for the seats and seat backs. Voila, a finished table!
Now I've only finished the one so far. The wood panels for the second complete table are 85% ready and the remaining two sets of frames are about 70% done. I just need to keep some discipline and finish those! Whenever I do I'll throw them over on the store page (another project I need to finish) and you can have one also if you like.