


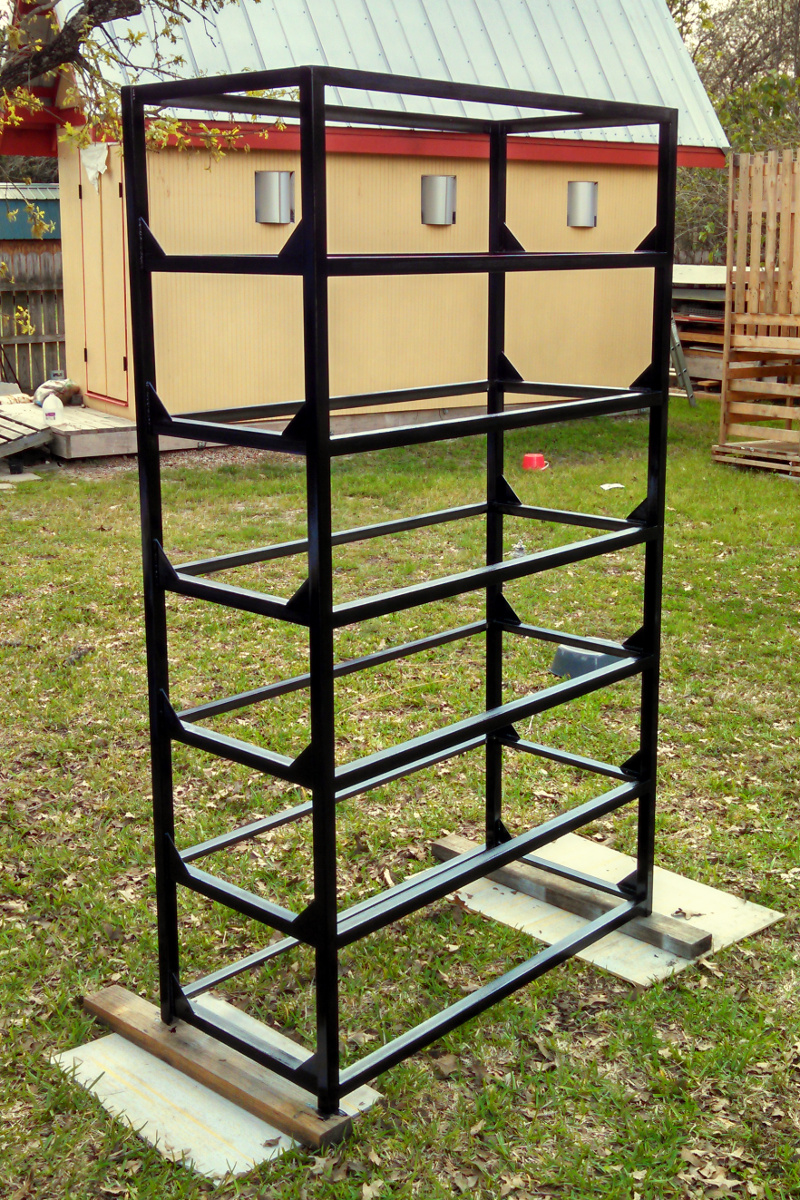
A storage bin shelving unit
So shelving units with bins seem to be a fashionable home storage solution right now. On the cheap end you have plastic tubs which look like crap and on the high end you have wicker baskets and such.
I refuse to tolerate the plastic crap or anything with MDF and none of the expensive stuff looked good enough to spend the $$$. As a result I keep doing what I shouldn't do and add another project to the pile.
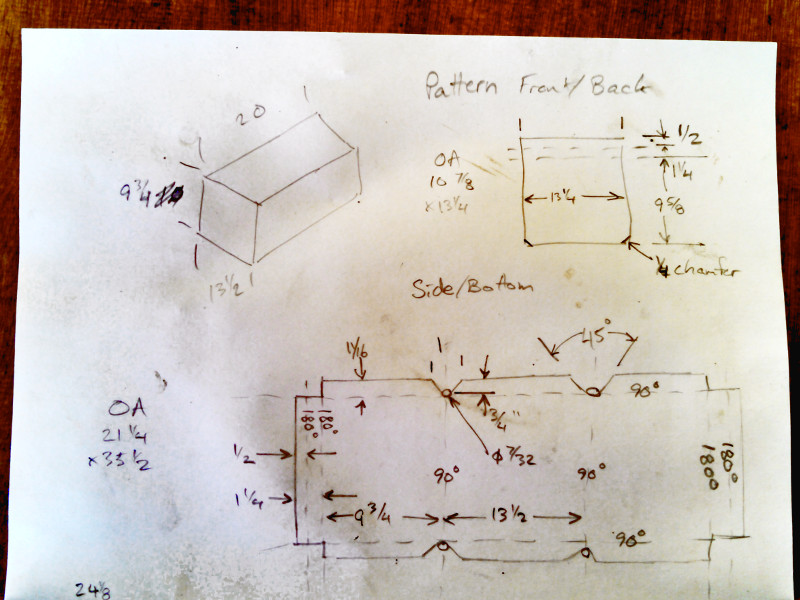
The first thing I tried to do was find some bins that I liked and then I would design around that. I couldn't find anything I liked though which had the right dimensions or wasn't stupid expensive so I resolved to make the whole thing from scratch. I thought about wooden boxes but the material cost isn't insignificant and what I really wanted to do was going be a lot of work and expensive. So, I know that sheet metal fabrication is one of the least expensive methods of creating things and started planning out some bins made out of readily available 26 gauge (.022" thick) galvanized steel.
I didn't have any kind of sheet metal brake even though it has been on my want list for awhile now. A nice old Diacro unit would be great but unfortunately sheet metal stuff is something that is always in demand and holds it's value extremely well. So, I don't have a place to put the brake that I really want right now and I don't have a couple grand to spend either so I decided to just go super cheap and try to get away with a small import tool for now. Just buy something that has enough capacity for this project and sell it off when I can afford to go for a "final" machine. I saw that a 4' wide finger brake could be had for $150 more than the 24" brake but I told myself no, don't spend the money, this isn't a forever tool, just a single project tool. Buy the cheapest 24" unit.
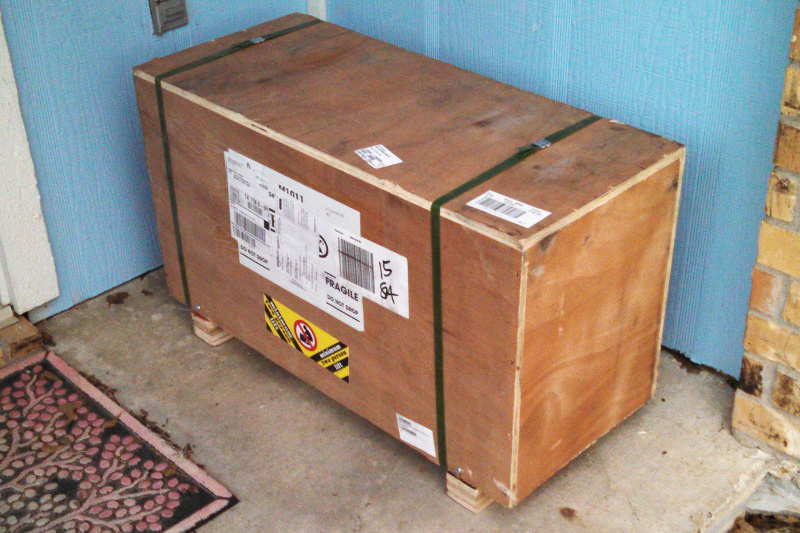
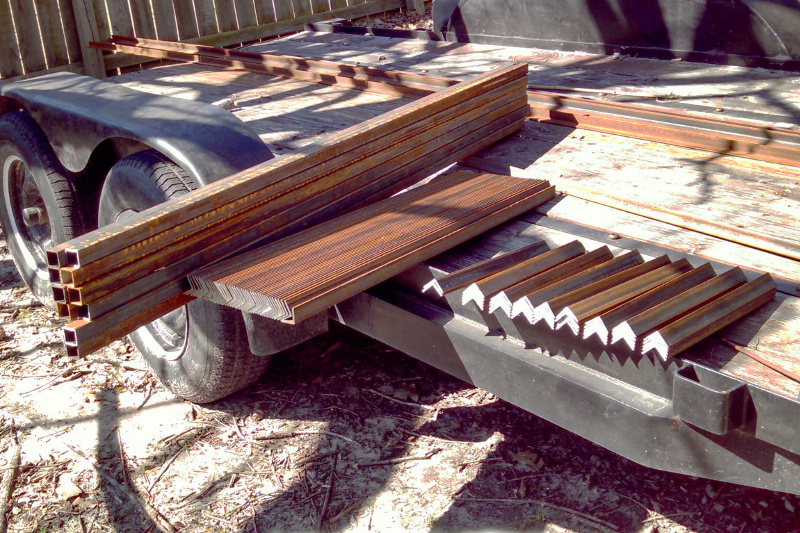
USPS, UPS, FEDEX, all the delivery drivers probably hate me with all the heavy packages I get. This time 99lb of import steel.
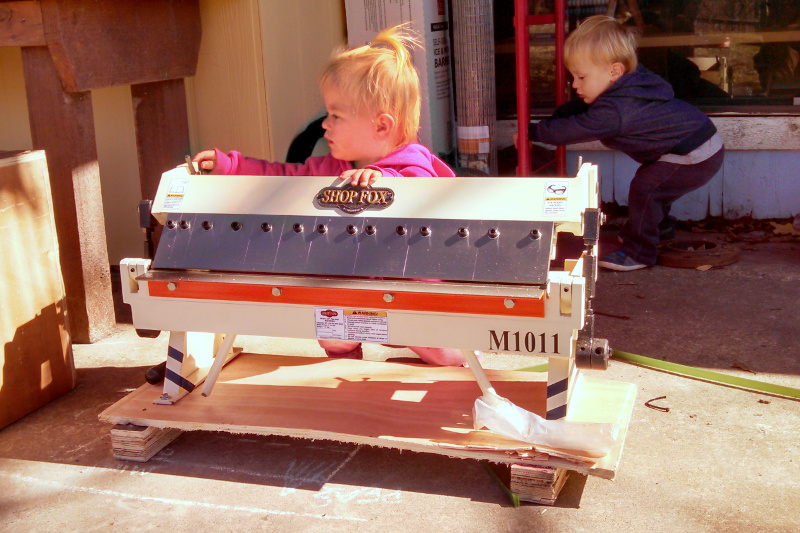
The kiddos helped me open it up.
Then I started bending up some test pieces to finalize exactly what I was going to do. I immediately ran into a problem:
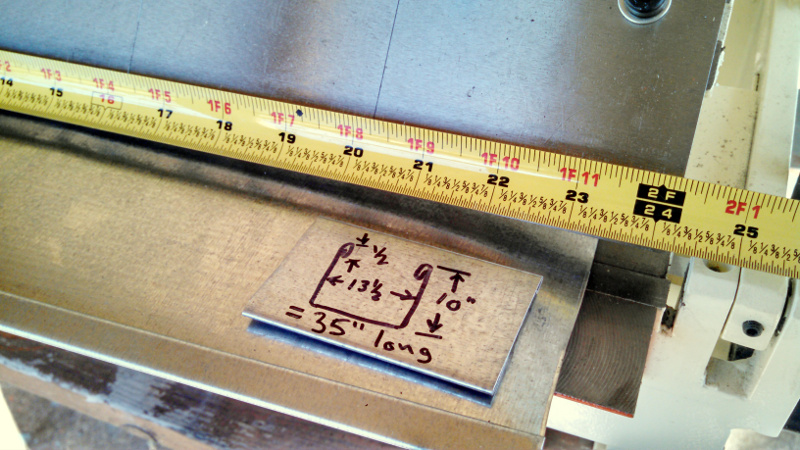
Doh! Let me tell you I have been kicking myself non-stop about that. I contemplated trying to return it and buying the bigger one but not only is shipping prohibitive, I removed all the crappy decals and threw away the manual already. I was especially pissed that weekend because I decided to not waste the good weather and wrap up the porch roof. That pissed me off because I realized I really wanted to make some sheet metal bends I couldn't make in order to progress further on that project too. So a solution to this problem immediately jumped to the top of my priority list and I made what I'll call an edge brake / bender.
When I finished that edge bender I made a sample box that was full depth but 5" shorter and 5" thinner.
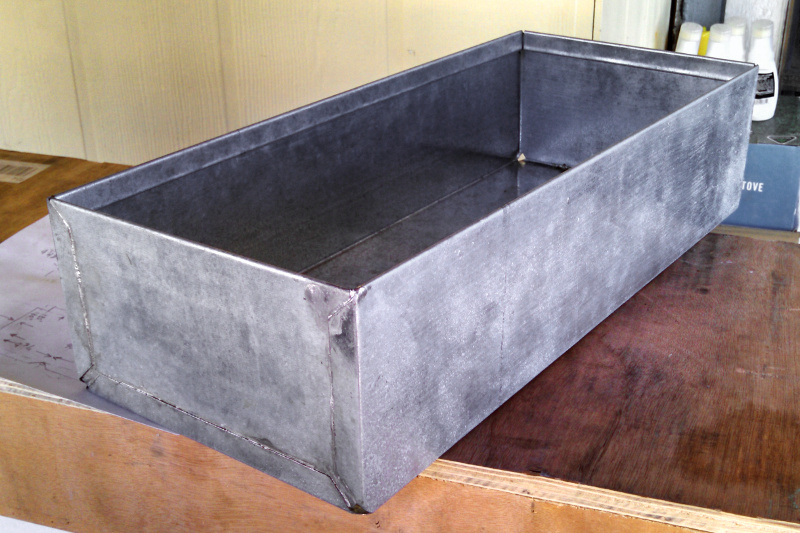
My figuring did actually make a box that was the target dimensions and I am pretty happy with it overall. Almost. I didn't like how the soldering went and could see that over the whole run of boxes I wasn't going to be happy with the results every time. Spot welding is really the most suitable method of joining for these boxes but that isn't something I have the equipment for yet. That means another incidental project: my spot welder.
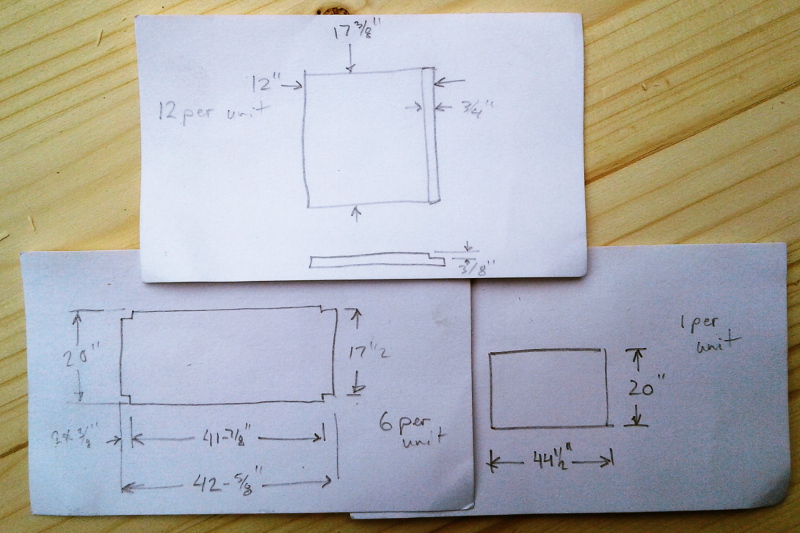
Like I said I was happy with the sample box and the dimensions came out right so even though I can't make the boxes without the spot welder I have enough information to start on the shelves. Here is my final sketch of the frame:

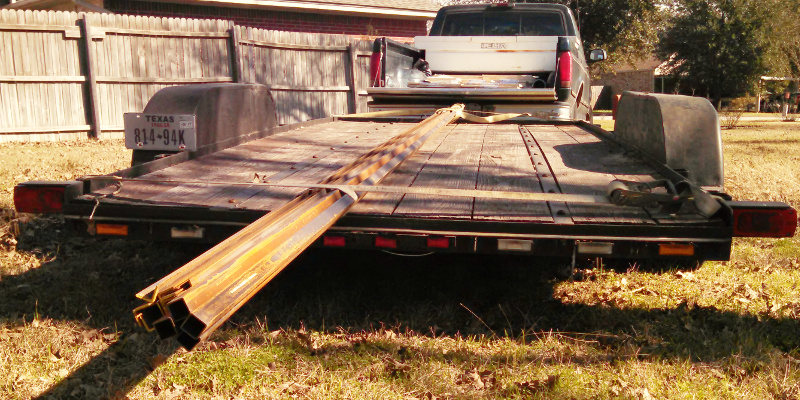
Add all the pieces up and then make a trip to the steel yard for material. I decided to get material for two shelving units as part of my policy to make extras of any project I work on now.
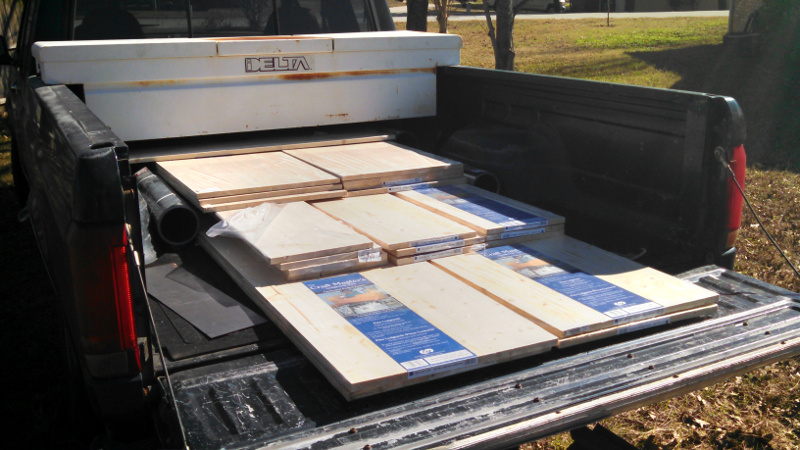
I also picked up the wood for two shelves. I am going with 3/4" thick glue laminated whitewood boards since plywood won't look nice wit the edges showing.
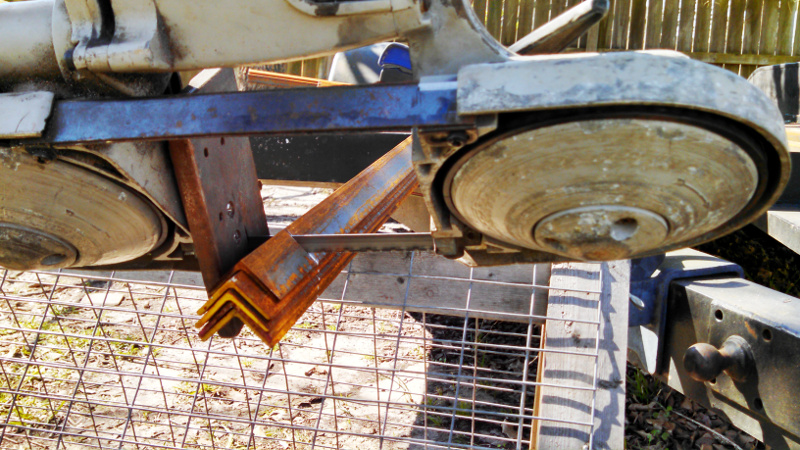
I stacked the wood in the shed for now and started cutting up the steel. At this point I realized that I over purchased. I bought enough rectangular tube for 3 units and enough angle for 4!!! I don't know how I did that but even though I don't mind having extra steel on hand I decided to roll with it and chop up enough for 3 units.
I cut 5 pcs of angle at a time to speed things up but even then it took me an entire day to cut steel up and wire brush each piece (I always try to do as much finishing as possible before assembly). It is a pretty big pile of material, about 90lb per unit.
I welded up the front and back of each unit first.
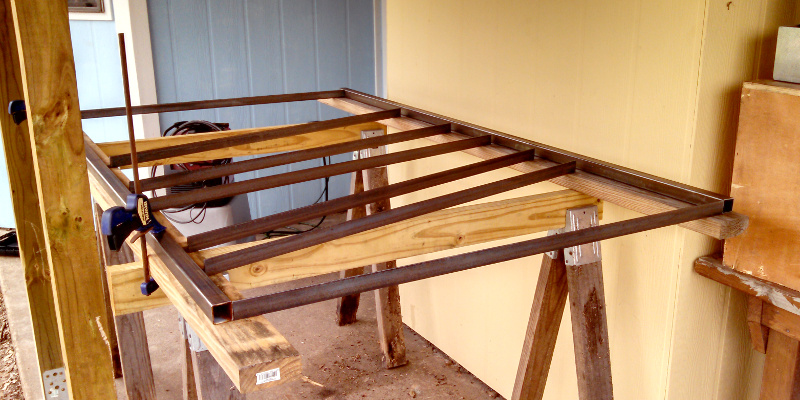
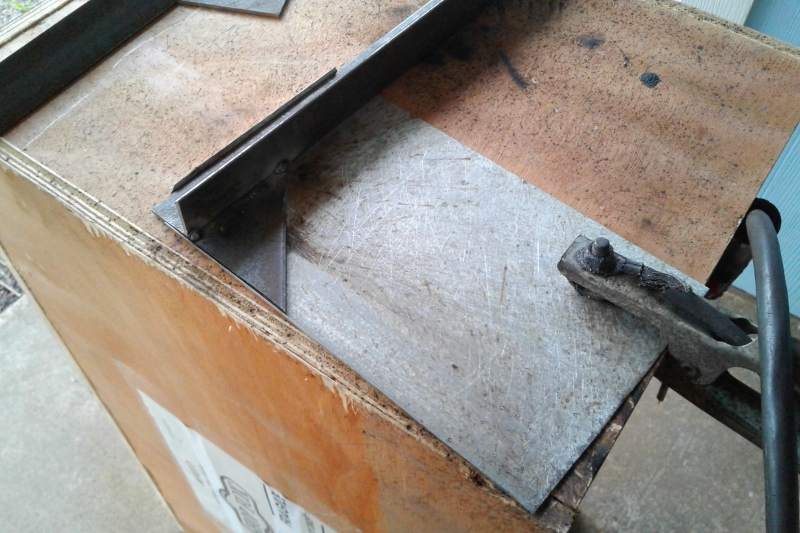
Then I whipped up a quick jig to position some brackets on the side angle parts and welded them up in preperation for creating the final weldment.
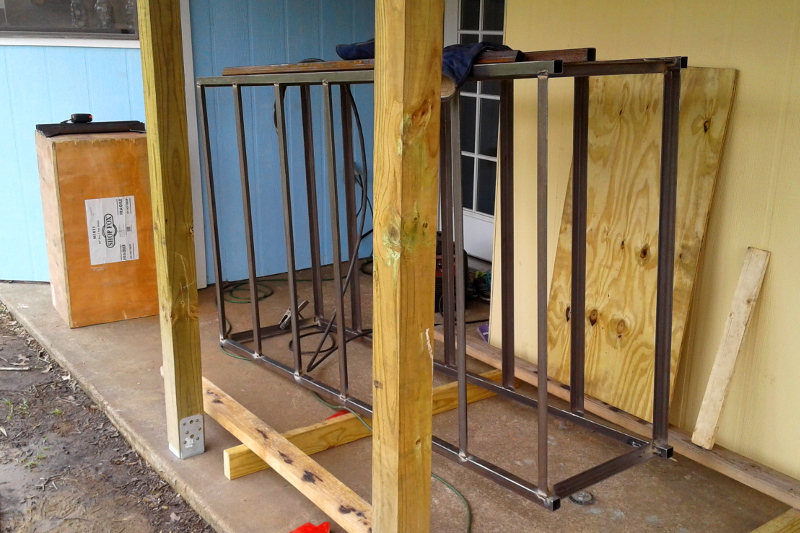
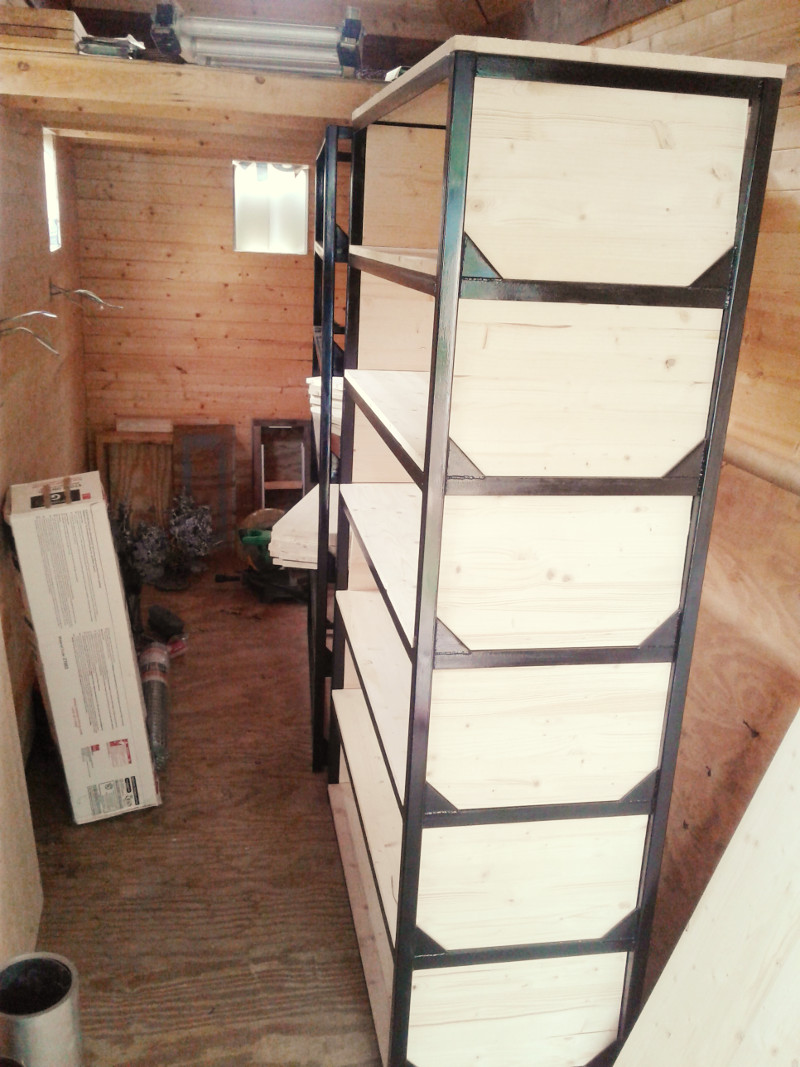
Put the two frames together with all the side pieces and you have a complete frame.
To be continued................. painting, woodwork, sheetmetal all to come.
Update --- I finished welding two of the frames together and painted them gloss black. I first went around and painted everything with the frame upside down, then cam back and cave it another coat sitting right side up. Good thing I did because on both frames I missed a couple spots that I probably wouldn't have seen if I didn't flip it over.
I had a single day weather window the next weekend I was free so instead of welding up the third frame and painting it (paint right before rain, no thanks) I decided to do some of the woodwork. Even though I knew what I was going to do I didn't have the exact dimensions sketched out for the boards I needed until that day.
So I knew what I needed to do and decided to it would be easiest to take my pile of boards over to my brother in laws house to cut them up on his tablesaw. That makes three times I've borrowed I think which bumps me into my personal rule of if I use someone else's tool 3 times then I need to go get my own. Problem is I need to build the shop before I can start scheming on a table saw. Anyway, I cut all the boards to length.
Then I set up a dado stack to put a 3/4" wide by 7/16 deep rabbet on the side board.
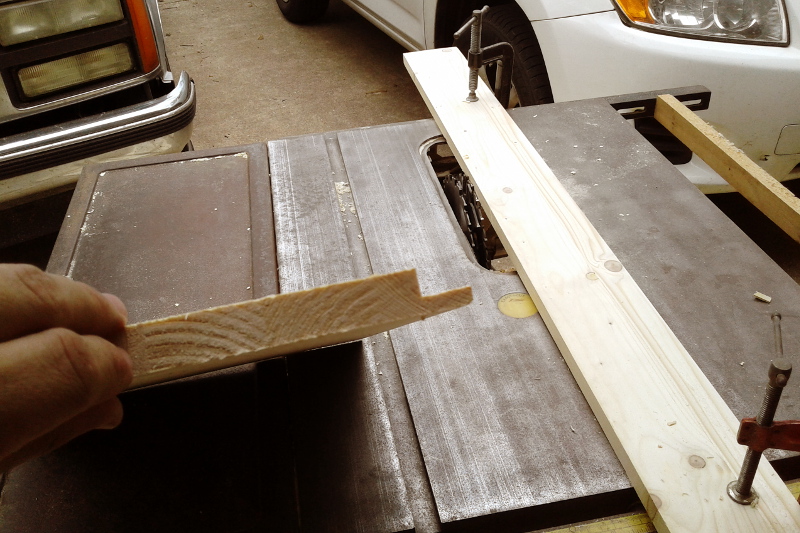
You got to love how quick a job the tablesaw makes of the rabbet.
After I cleaned up from using the table saw I took my boards home and started on the notches in the shelves. First I marked the notches out on three of the shelves.
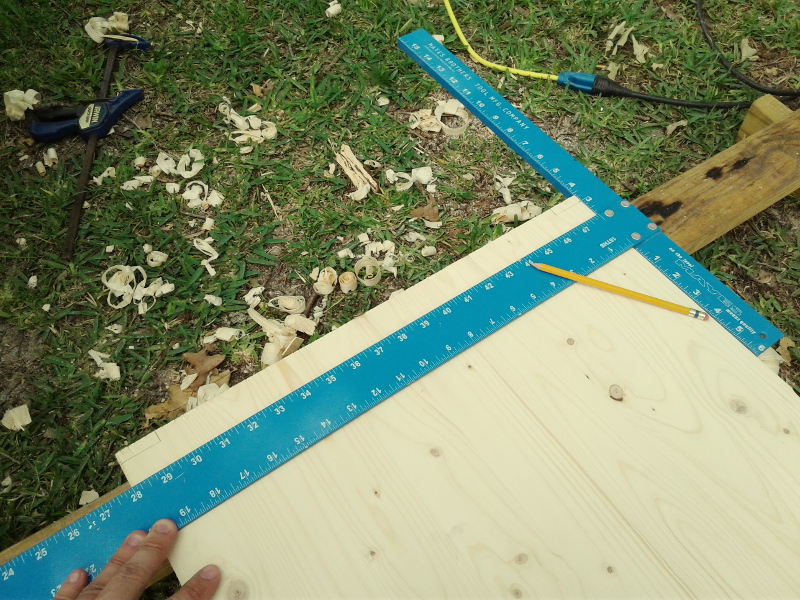
Then I used those three marked up boards as a guide to cut three stacks of 6 boards. Using the circular saw to gang cut a bunch of boards for a notch is super handy. Just set the depth, hold a speed square in place to guide the innermost cut, and take it all out.
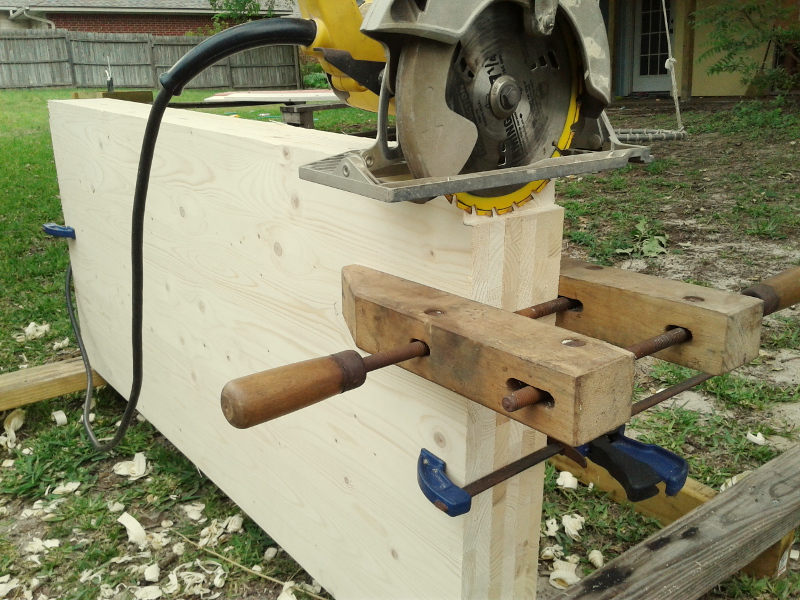
After I cut out the notches I test fit everything on one of the shelves. The notches on the shelves hold them in place once they are set in the frame and the rabbet in the side boards slips over the end of the shelves and hides the ugly end grain cut. I am pretty happy with that solution. It is always nice to avoid work with a little planning to hide the ugly parts that will be difficult.
Next I need to sand the boards and decided if I am going to apply a stain. At first I was leaning away from stain but after seeing how white the boards are against the frame I am leaning towards it. We'll see what I go with when I get to that point.
To be continued.........