


Custom Hydraulic Clevis End
Summer, 2017
Existing machinery is usually a mix of off the shelf parts, custom items and modifications over time. A winch I was working on needed a small hydraulic cylinder replaced and fortunately the majority of it was NFPA dimensionally compliant. The clevis end wasn't though and I couldn't find one on the shelf so I whipped one out real quick.
This really isn't much of a project, just an example of the kind of every day things for me that make a mill and lathe indispensable.
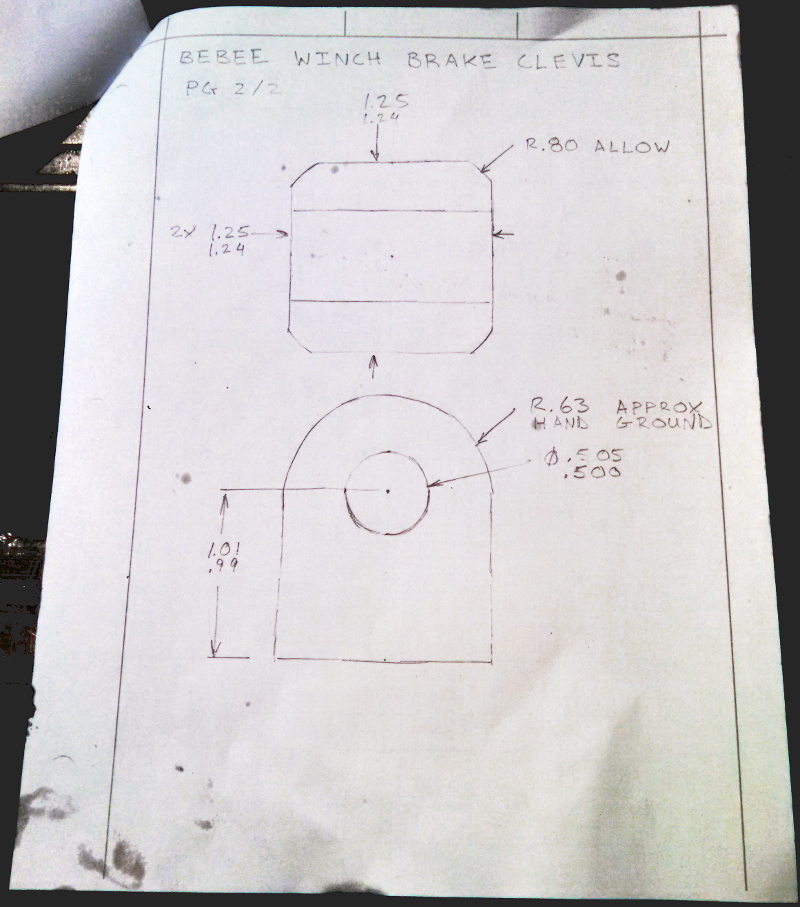
First I took the measurements I had on the unit and drew up what I needed. Since I have a pile of 1.600in DIA drops of 17-4ph stainless from a long running part of mine I drew up a plan based around using a slug from one of those.

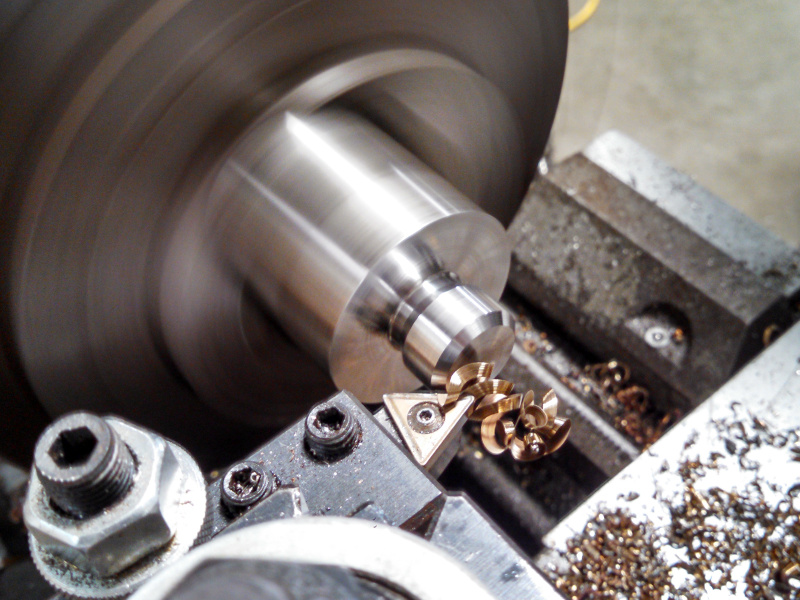
Cut off a piece of one of those bars a little longer than I need.
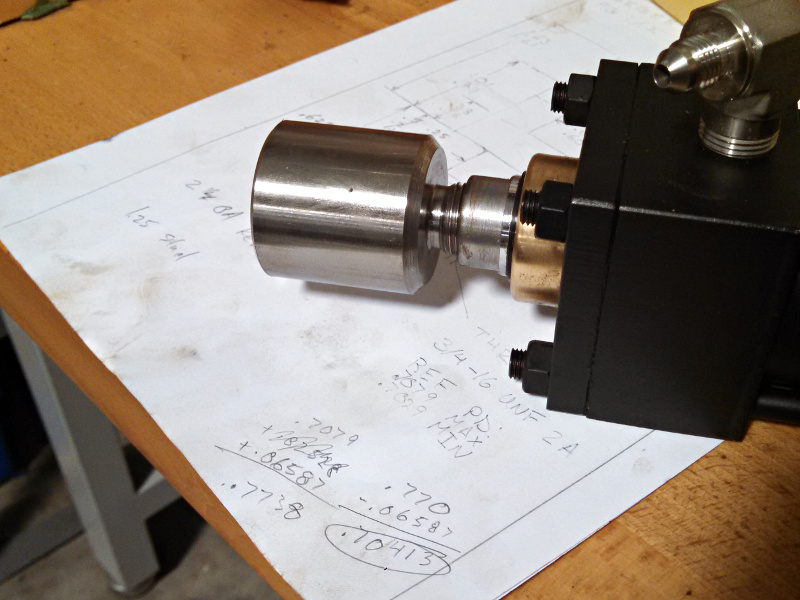
And start turning the threaded end. The diameters listed on my drawing are ones that I already looked up in Machinery's Handbook for a 3/4-16 UNF so I didn't need to look anything up while doing the turning. The chamfer on the lead in and lead out of the thread really help with the burrs and make less hand work for me later.
Now I did have the cylinder this clevis was going to handy to check fit after machining but it wasn't practical for in-process gauging so I had to break out the thread measuring wires to check pitch diameter as I went. The handy table which came with my PeeDee thread wire set lists a .0400in wire for 16tpi 60degree threads with a constant of 0.06587in.
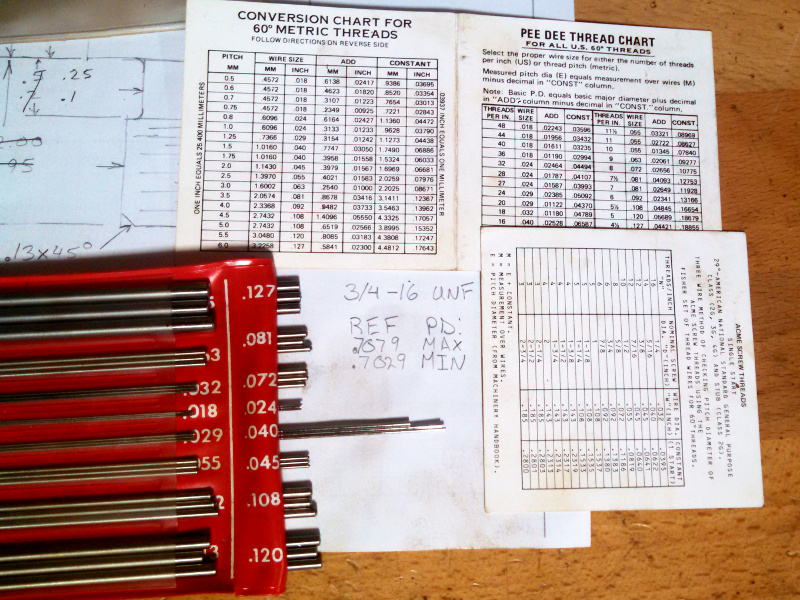
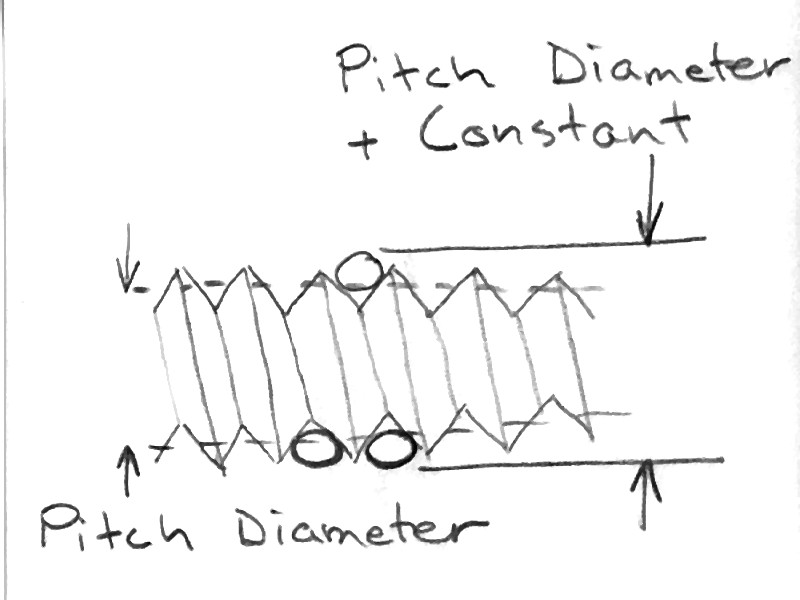
Now measuring pitch diameter with three wires isn't easy, it requires three hands and like most people I was only born with two so taking a picture while I was doing it was totally out of the question. If you aren't familiar with the method the concept is pretty easy (I won't cover the math though it isn't complicated). Put one wire in the groove on on side and two wires in the grooves on the other side, then measure across the two and subtract the pre-computed constant (0.06587in this time) from your measurement to get the actual pitch diameter.
I pre-determined what across the wires measurement I was shooting for (0.7738in max) and then kept taking passes until I got there. I finally ended up at a pitch diameter of 0.704 which was within the 0.7079 to 0.7029 tolerance for a class 2A thread fit (looked up in Machinery's Handbook and written for reference on my drawing). So I took the part out of the lathe and test fit it on the cylinder, all good there.
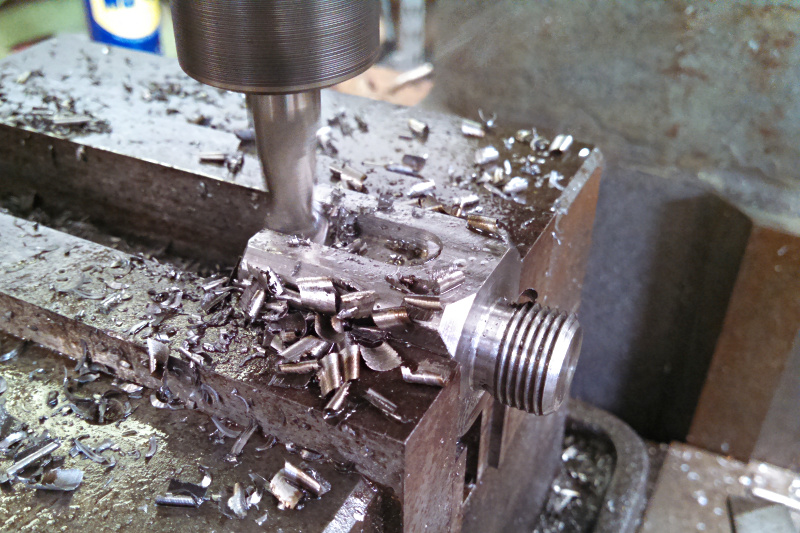
Next up the milled features. First I needed to start making it square. I slapped it in the vise and supported it with a set of parallels then raised the table until my end mill jut started to skim the surface. At this point I knew the the rod was a precisely ground 1.600in so to hit the final width of 1.25in I would have to take 0.175in per side.

Easy enough to take 0.175in, I went straight to final depth with my roughing end mill and made three passes. This clevis is going on an old winch which isn't going to win any fashion contests so going straight to depth with the rougher was good enough and I didn't feel like wasting time with finishing since no one will ever see this part and it wasn't important to function.

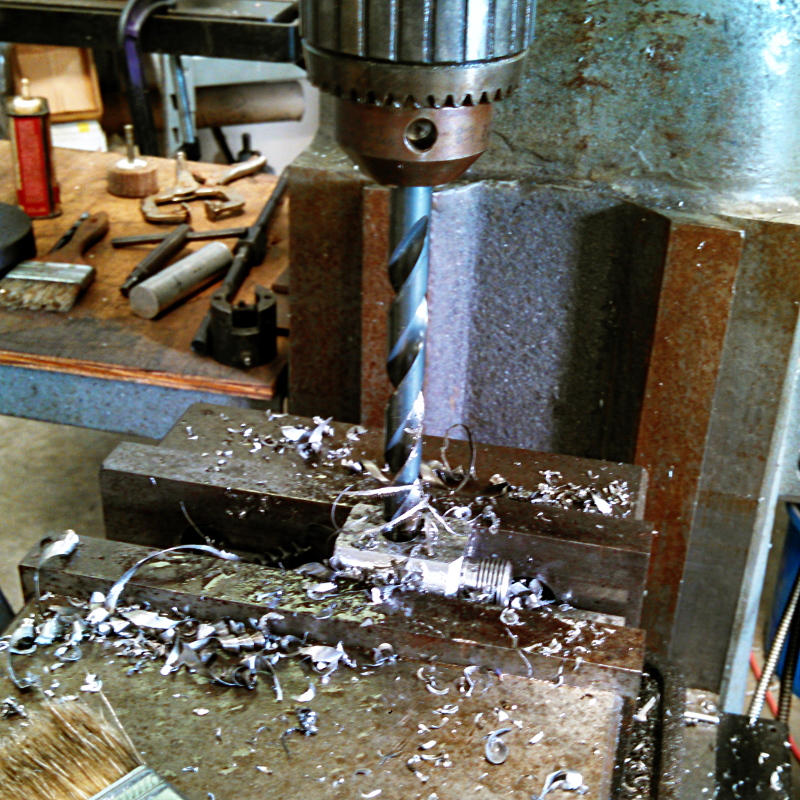
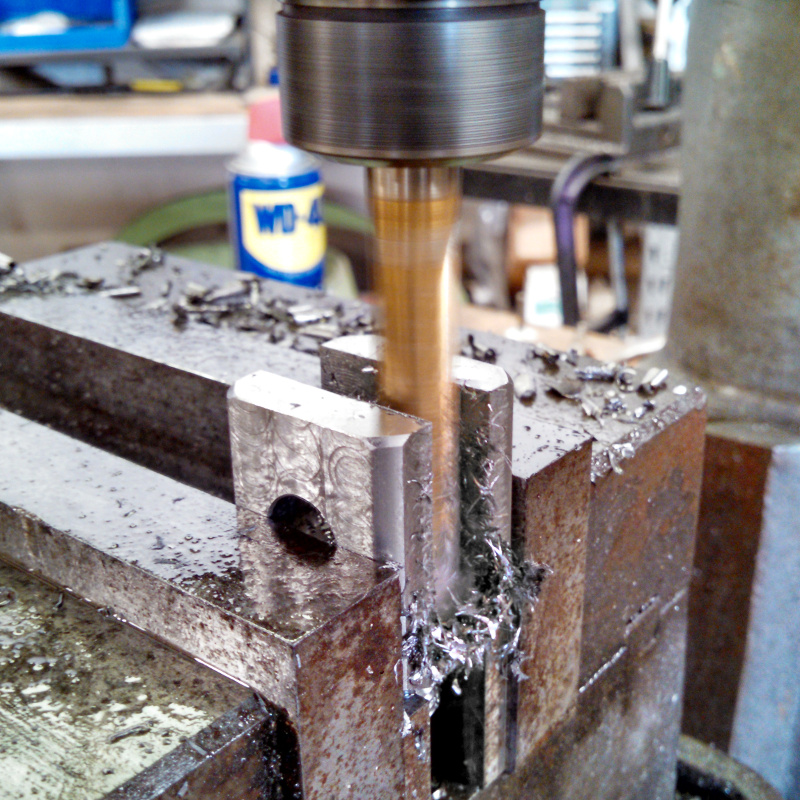
For a previous job I had already indicated in on the fixed vise jaw so I knew that .800 over was the center of my 1.600dia part. To determine the location from the shoulder though I needed to touch off. The exact distance wasn't really critical so I just bumped up with the drill I was going to use to the spot the hole and moved over the appropriate amount from there (1in + drill dia/2).
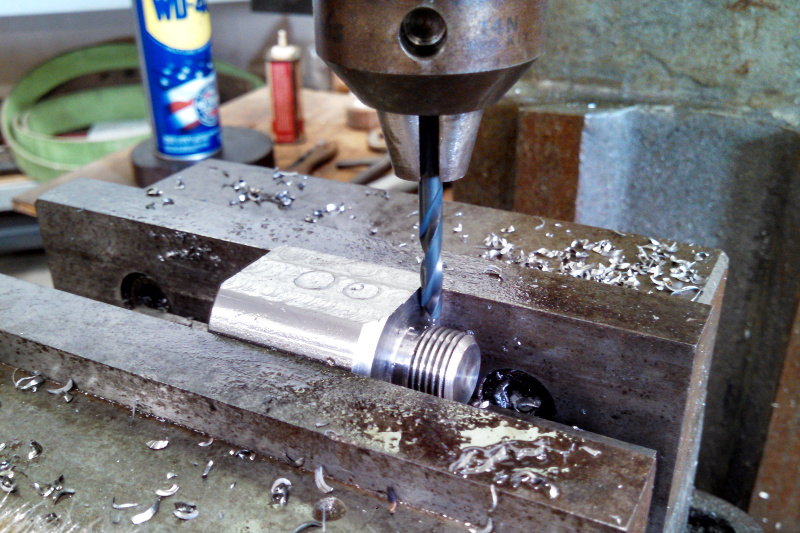
After I spotted the hole location I drilled through with a 15/32 drill.
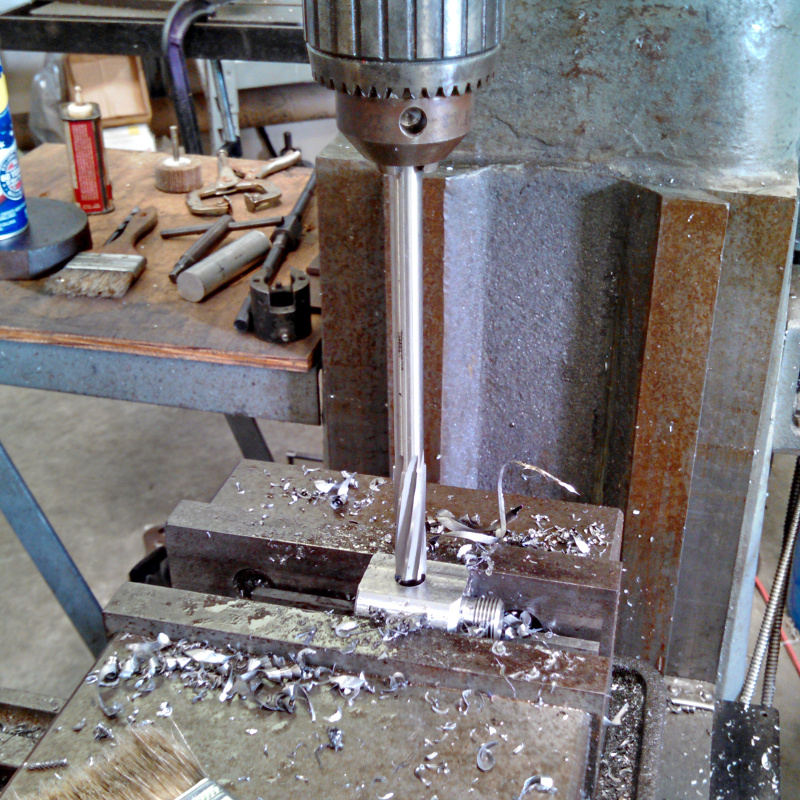
To finish the hole I reamed if with a .5000 chucking reamer. This gave me a more true size and better surface finish than a drill would have. Probably not really required on this part since the mating element is likely all kinds of sloppy anyway but still a good practice for pins.
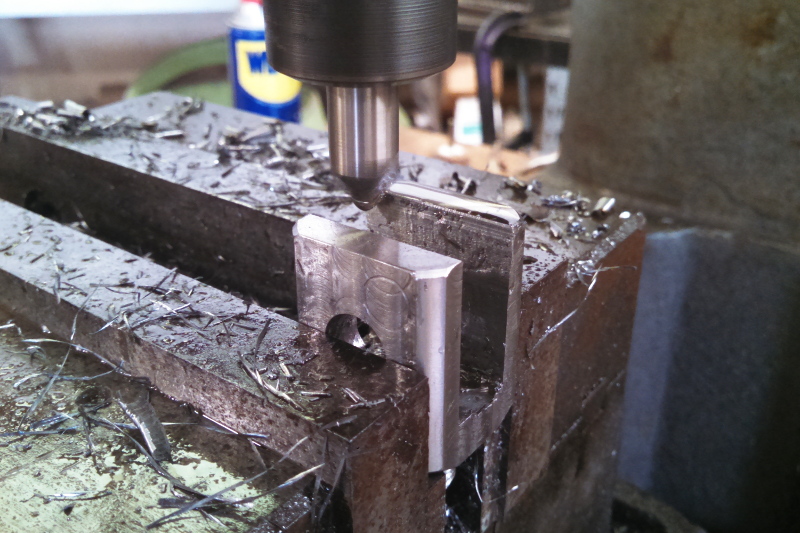
Then I rolled over 90degrees and milled the other two sides flat. After milling the flats I started making the slot. I did half from one side and half from the other side with a shorter endmill so I could cut material faster and not deal with chatter.
After the bulk of the material was out I stood the part up on end and cut the flat bottom with a long endmill and cleaned up the sides to final dimension. For my final pass on each side I used a .010in stepover and climb milled for a nicer finish. I also like to do finish passes with long endmills as a climb cut because I find they don't chatter as much.
At this point I decided that the clevis didn't really need that large radius and it wasn't worth my time to do it with the equipment on hand. So, I broke out the 45deg chamfer tool and quickly broke all the edges that were handy. On a square part like this you can set up the chamfer on one side then index the part around and hit all four or eight sides quickly in one setup.
The chamfer operation eliminated most burs and sharp edges but there is almost always a need for hitting a corner here and there with the file. It goes quick though and the part was finished in no time.
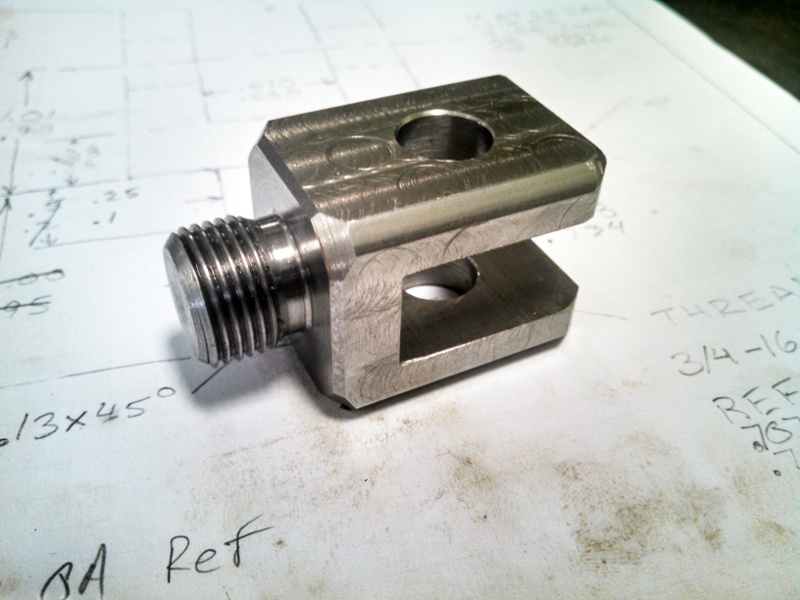
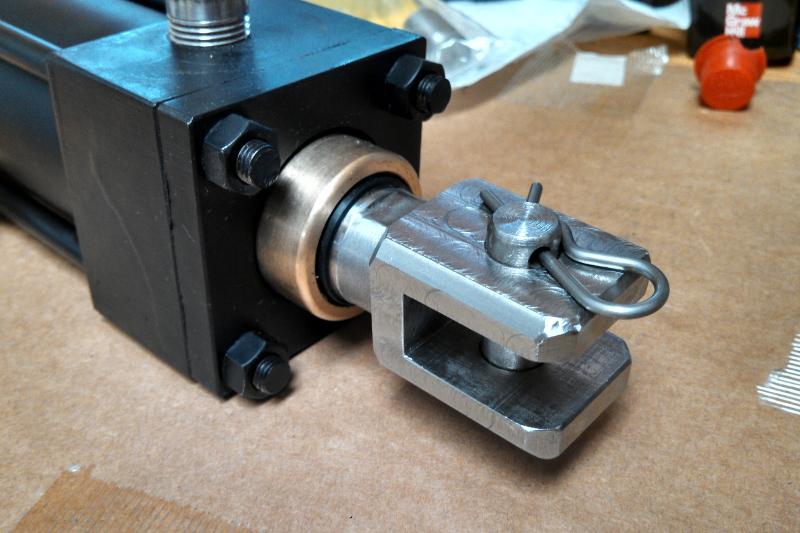
Here it is mounted on the cylinder with a clevis pin installed.
Not a long or fancy project, just a good example of everyday I need one of these now jobs. If I was making this for someone else I probably would have spent a few extra minutes to take a finishing pass on the square sides just so it looked better and someone wouldn't be disappointed that their expensive part (because any onesie-twosie custom is) but I knew it didn't matter and I was in a rush.