


A bench for putting on shoes.
The wifey would like a bench to sit on while putting on shoes. The front porch that it will go on isn't exactly large but that isn't much of a limiting factor. Mostly I just know this is an item I will live with for the rest of my life so I would like something nice, especially since it will greet every person that comes to our house.
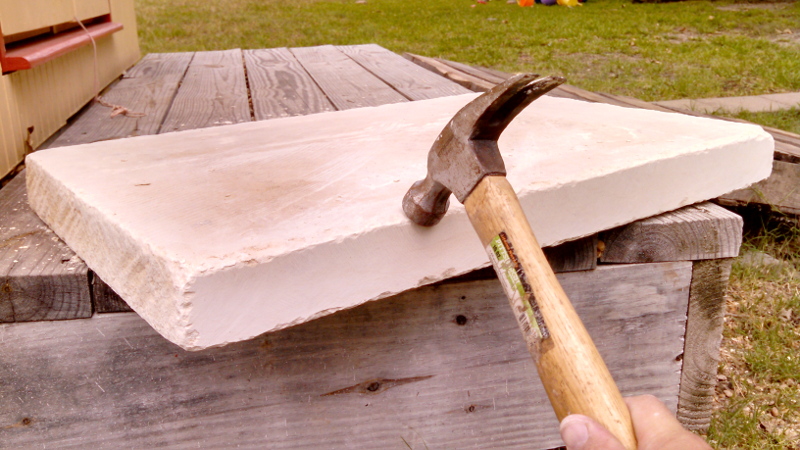
Even though I really shouldn't (because I need to complete the storage bin shelves and the shop) I went and made a project out of it. I have really been wanting to make some furniture with the limestone slabs I found out I can get at a local rock supply place so I picked a slab up during lunch one day and a week or so later cut it up into three equal parts.
It went even easier than I anticipated, the wet/dry diamond blade on the circular saw went right through dry. It was much easier than concrete
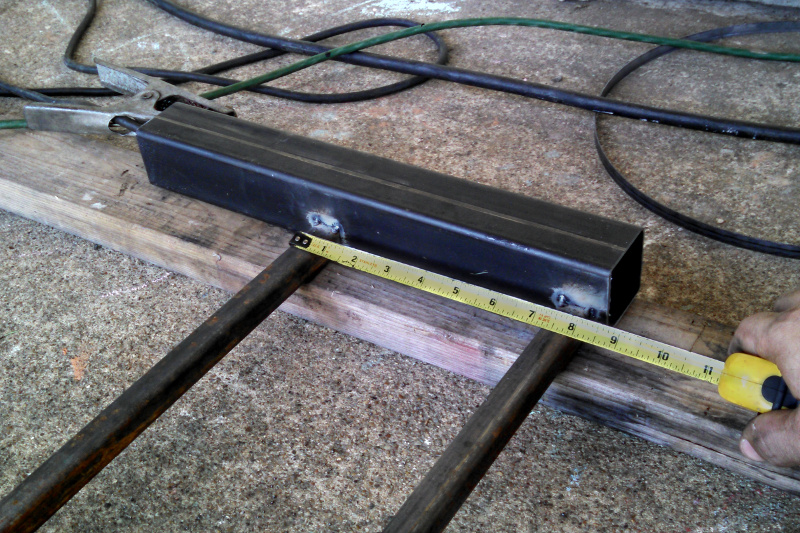
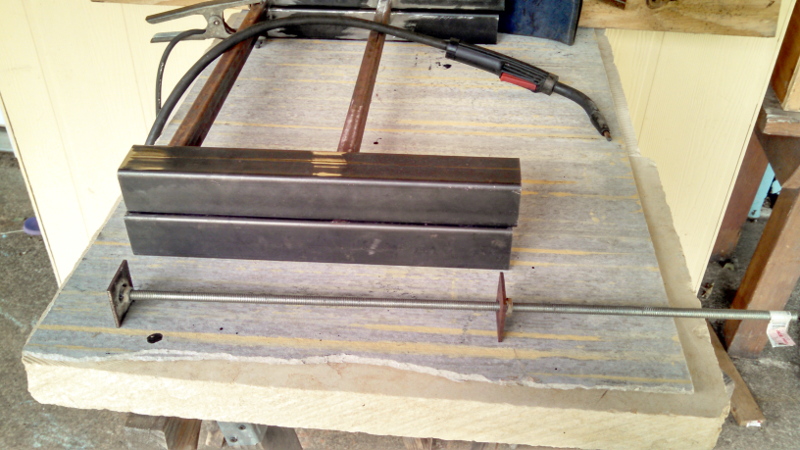
Then one Sunday when due to the day job and changing vessel plans I had only a short weekend available I started fabricating the legs. First step was cutting up some 2x2 square tube I picked up for this purpose (same thickness as the limestone slab).
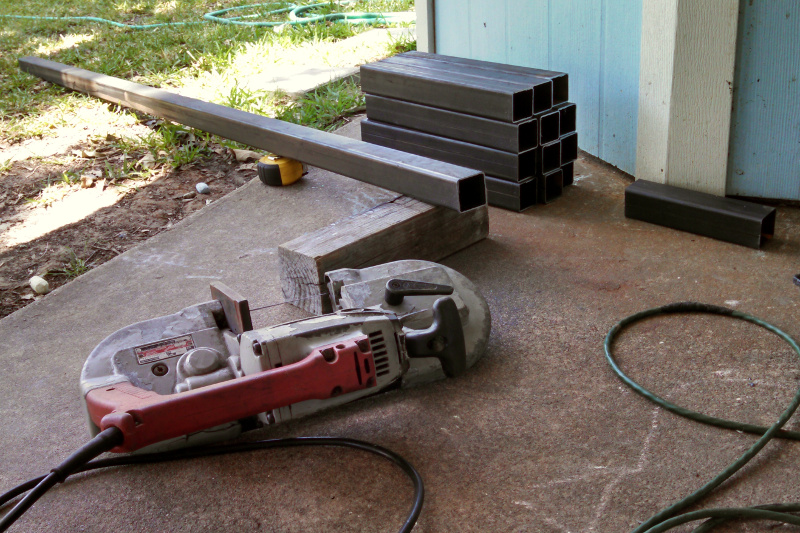
Because I didn't really have a clear plan yet at the steelyard (or even decide on 3 benches vs 2) I didn't pick up enough 3/4" tube or have enough 2"x1/8" flat bar on hand for 3 benches. So I cut up what I had, the third bench will have to wait for my next trip to pickup steel.
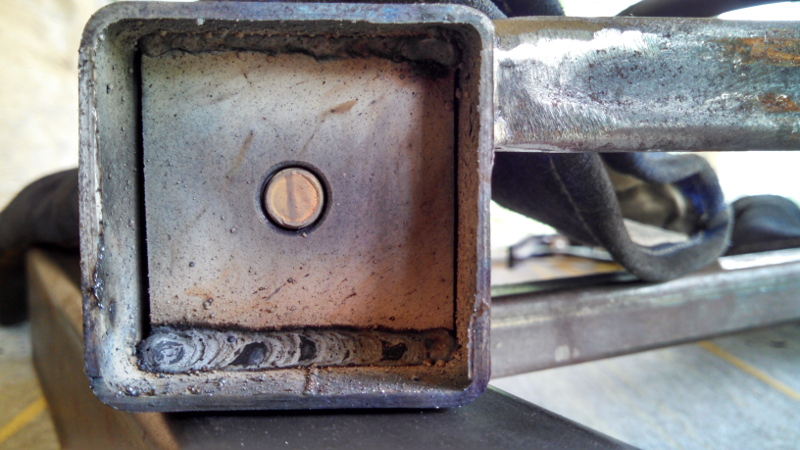
The welding is the fun part. I tacked the bottom 3/4" tube onto one of the legs using a square to keep it straight and a pair of 1/2" nuts to keep it a set distance from the edge of the larger tube.
Then I tacked on another little tube 7-1/4" above the first. This splits the distance and will make two equal shelves for shoes when completed.
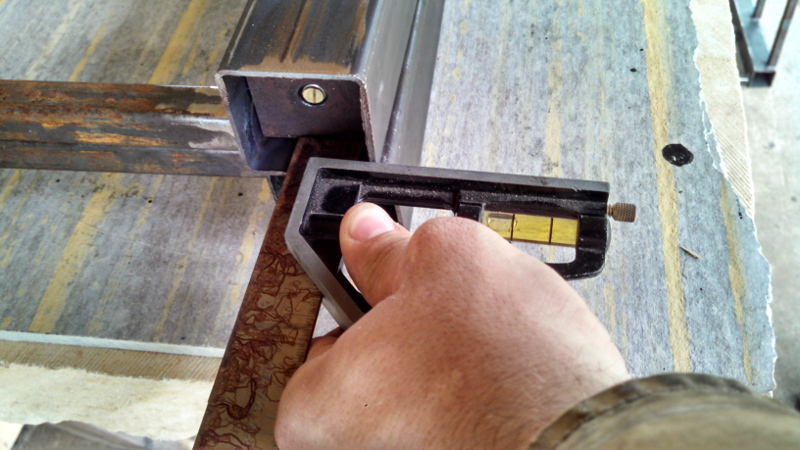
I checked that everything was square and the dimensions were right then I welded that side up and made another one just like it.
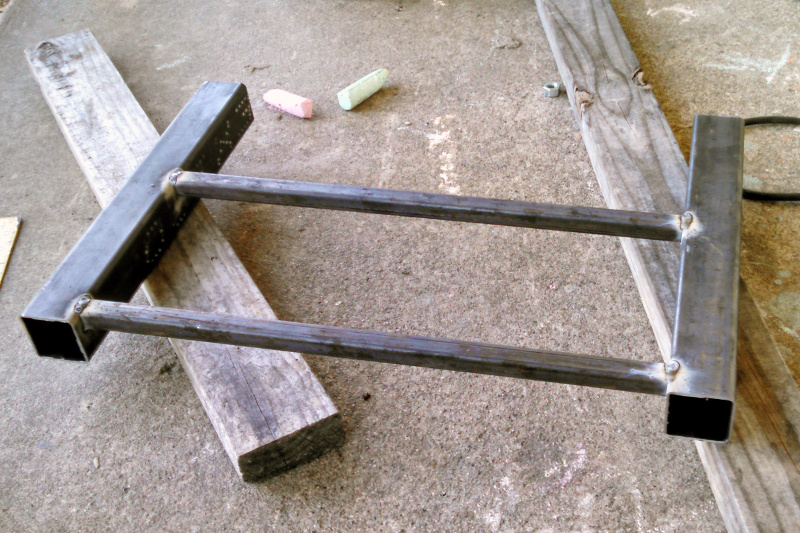
Using the square and nuts again in collaboration with more steel and clamps I set up the two welded out frames and tacked them together to make the entire frame.
After I checked that everything was the way I liked I finished welding everything out and grinding the exterior weld beads flush.
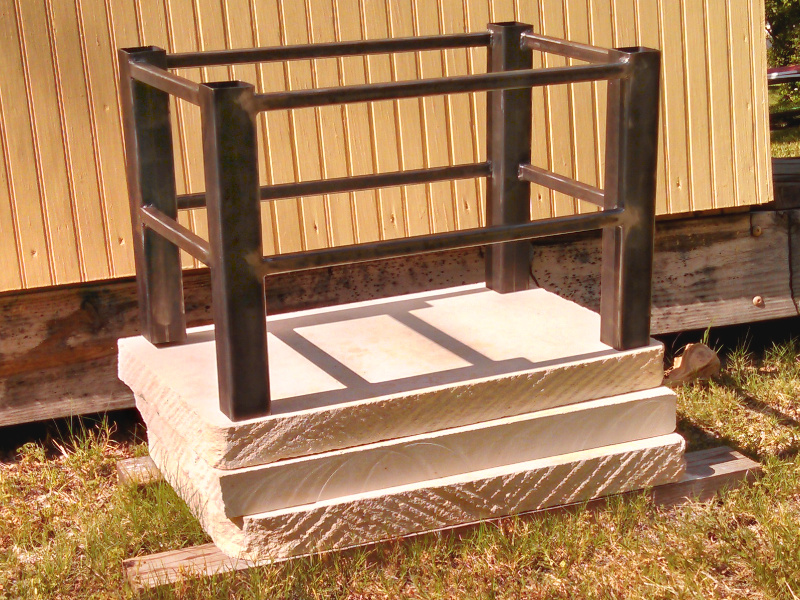
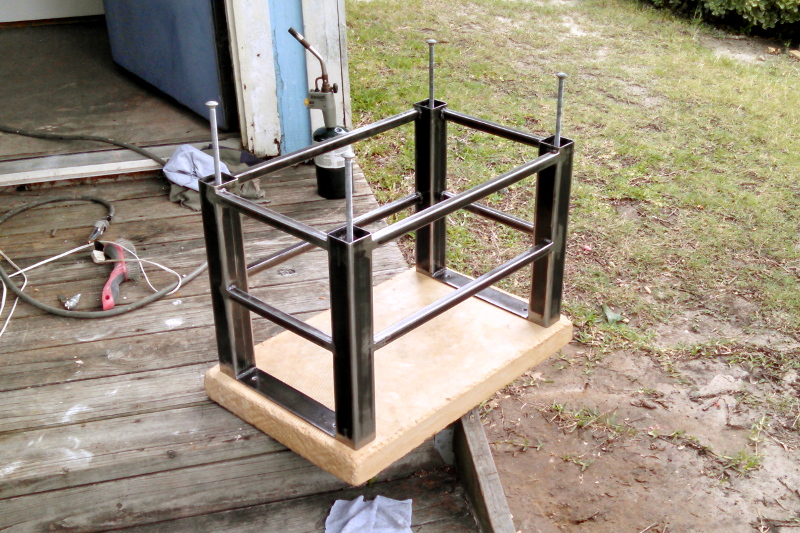
At this point I had to start cleaning up and come in to help with the kids who woke up from their nap. Before I did though I took the frame over to the stack of limestone tops to see what it would look like. This is obviously upside down as the limestone is actually the bench seat. Anyway, I like how it is going so far, can't wait to get more of it done.
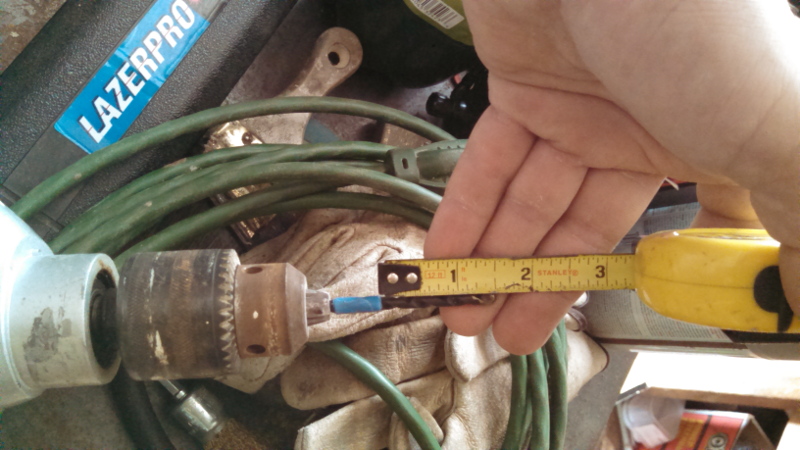
Without the shop I really can't break out the welder and stuff to work on projects like this during weekdays but I was able to do a small test related to the project on Monday.
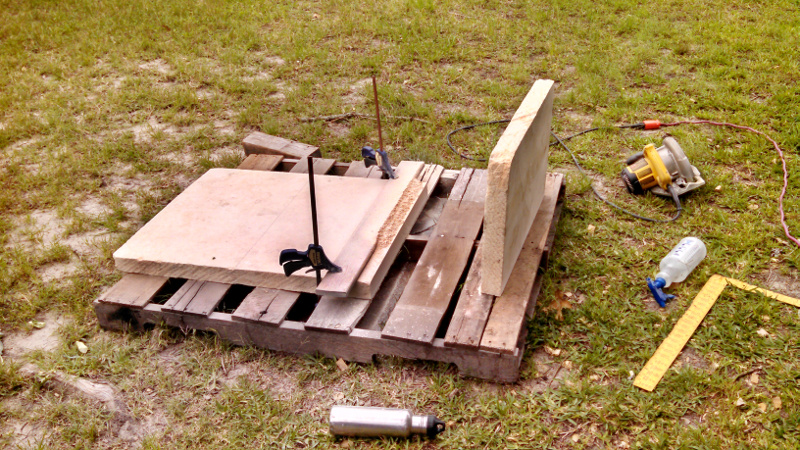
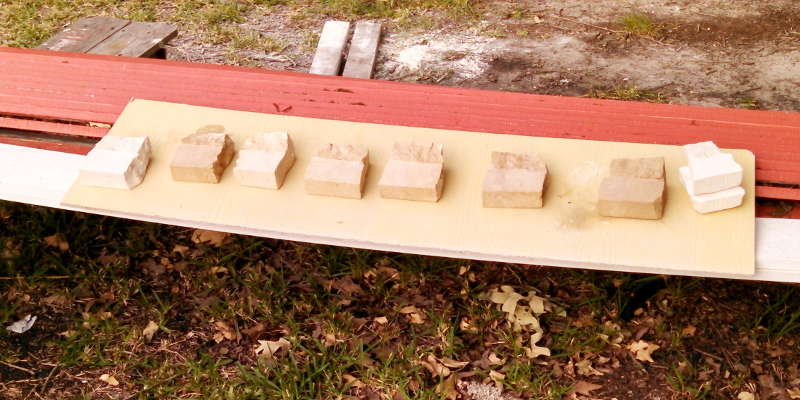
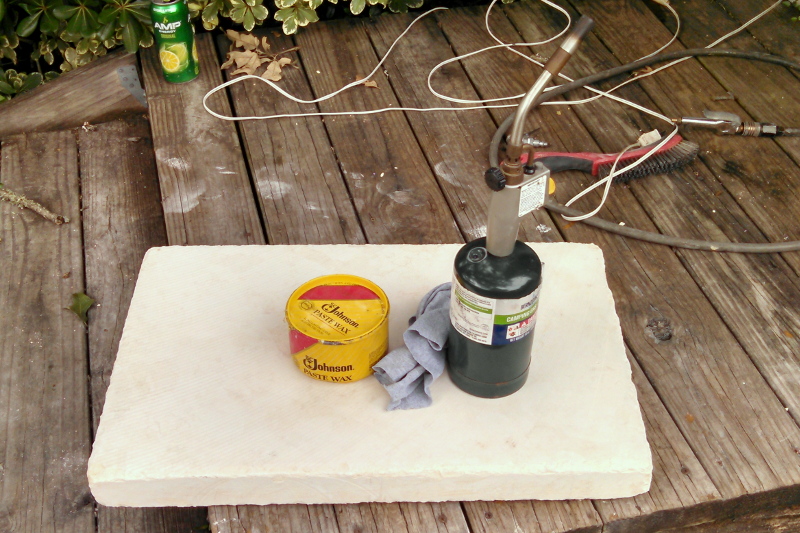
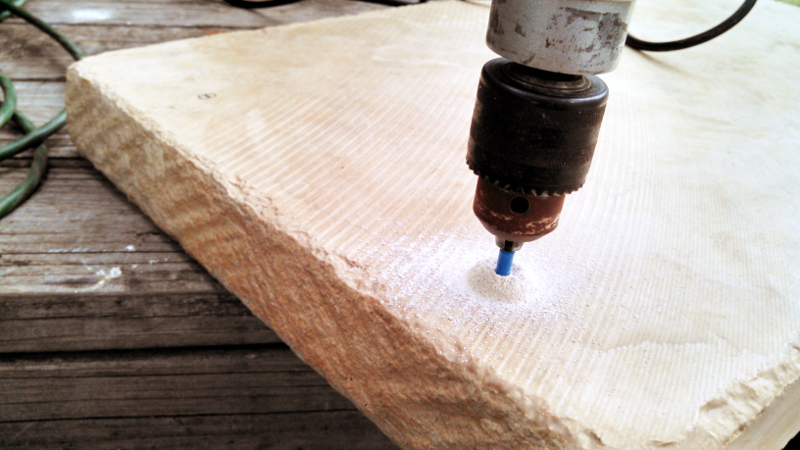
I know I don't want to just have straight limestone as is for the seat, it will get peoples pants dirty and wet if there has been any rain which it soaked up. I don't know what the best solution for that is yet though so I bought a little limestone edger to perform a test. First step was to use the circular saw again to cut it up.
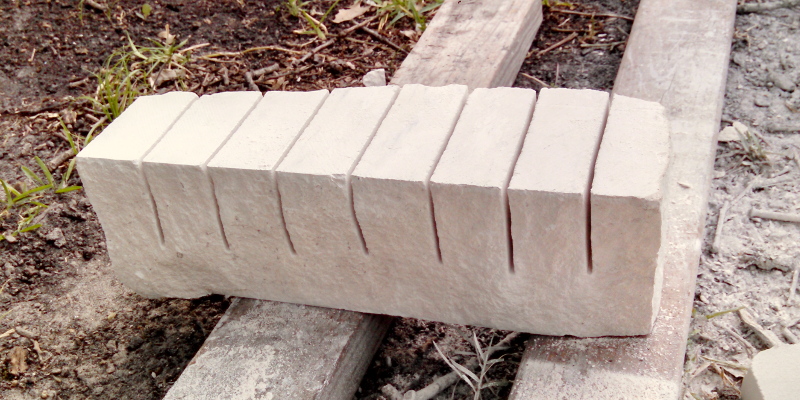
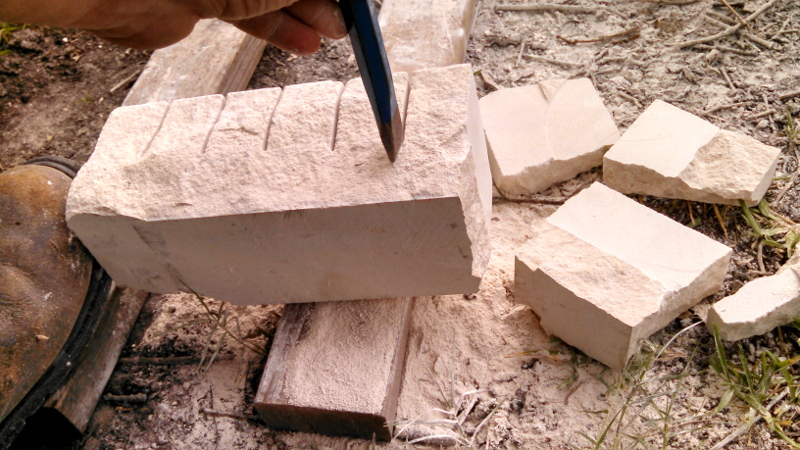
Then instead of flipping it over and performing a second cut from the other side I decided to use a chisel and break the rock at each slot. This will give me a mix of rough and saw cut surfaces to test finishes on.
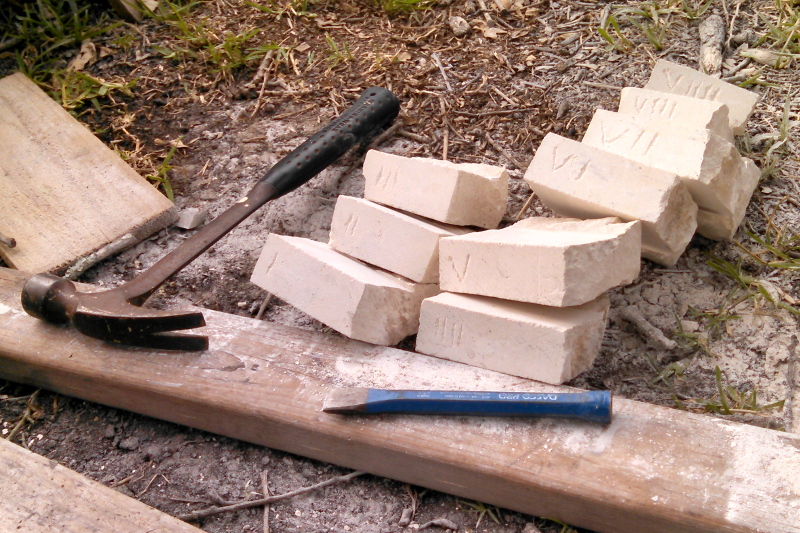
But one might ask, that is a lot of blocks, how are you going to keep track of which block had which finish. I could be really organized and make sure they stay in order but I intend to leave the rocks outside until I need to make my decision and that means they will be accessible to the children. Perfect sized stones + 2 year olds means that organization is a lost cause. They will move around the yard for sure. Extra wear as part of the test right? Anyway, the problem is easily solved by applying some crude numerals with the hammer and cold chisel.
Now what finishes am I going to test? First round is all the likely candidates I have in the chemical locker. Fancy $$$$$ teflon stone floor sealer, shellac, polyurethane varnish, tung oil, acrylic enamel and good 'ole paste wax, also fire (for heating the paste wax to get it to soak into the stone instead of just applying on the surface).
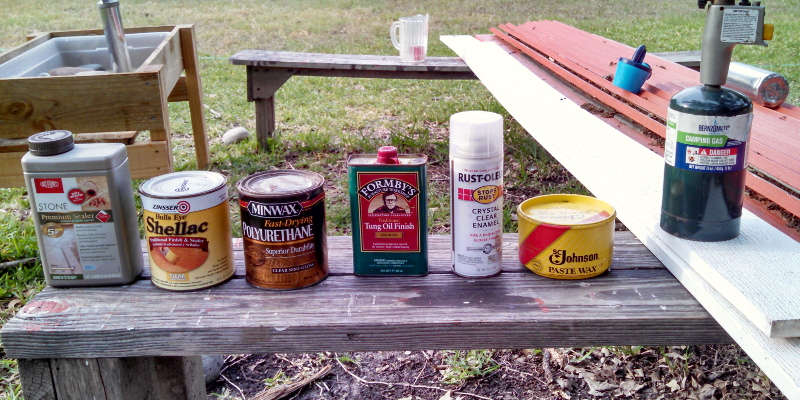
Didn't take long to apply the test finish to all of the coupons. I have already ruled out one of the contenders, paste wax without heat. It dried quickly with annoying little pockets of cracked wax in the pits of the rough section. Not attractive and probably not functional. I therefore gave it the flame treatment so now I have two test utilizing heat to drive the hard paste wax into the stone.
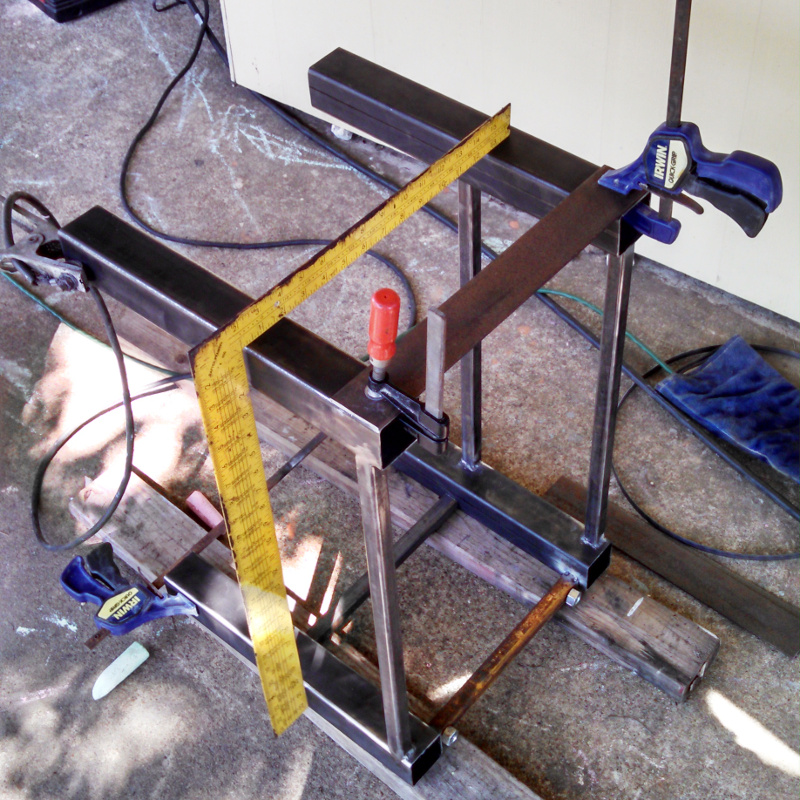
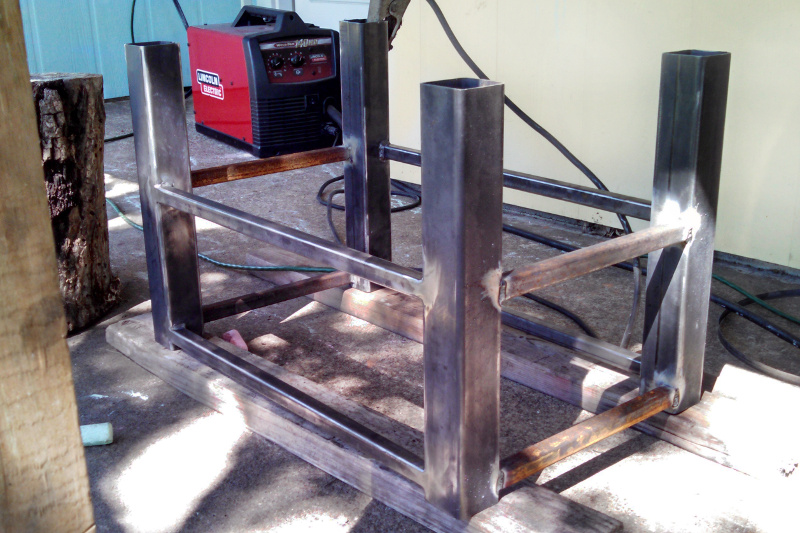
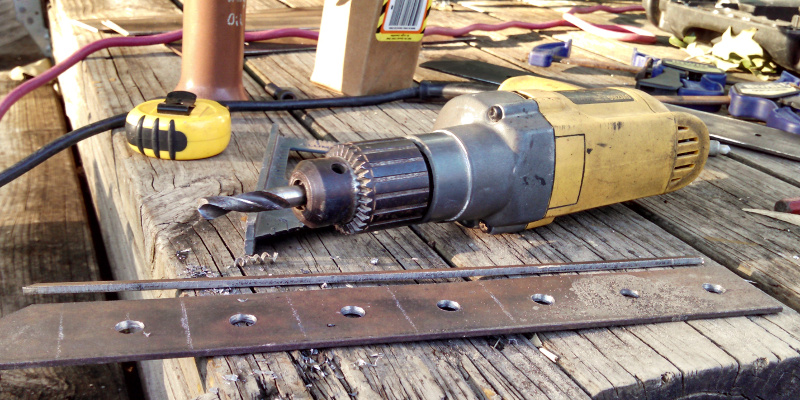
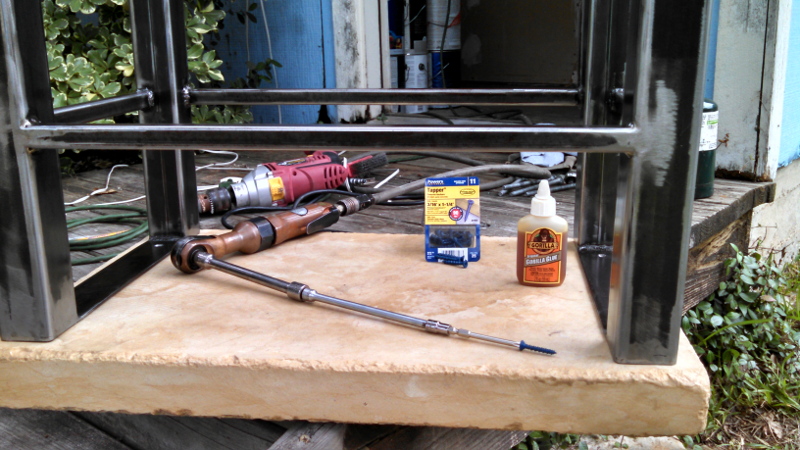
Now next weekend I had some time to work. My brother was over too help also so while he started welding up another frame I started making some of the other parts needed to finish the frames up. First was a strip of 2" x 1/8" flat bar that the limestone top will sit on. It will be difficult to drill those holes once the flat bar is welded to the rest of the frame so I cut them out and then drilled them.
Now I said it would be hard to drill the holes in the flat bar later but that isn't really true. The hard part would be countersinking the underside of the flat bar after drilling the holes. I want the flat head screws I will be using to fasten the bench to be sunk flush with the flat bar once installed but the cross tubes will get in the way of the drill for that. So I countersunk the holes and checked the fit with one of the screws I will use.

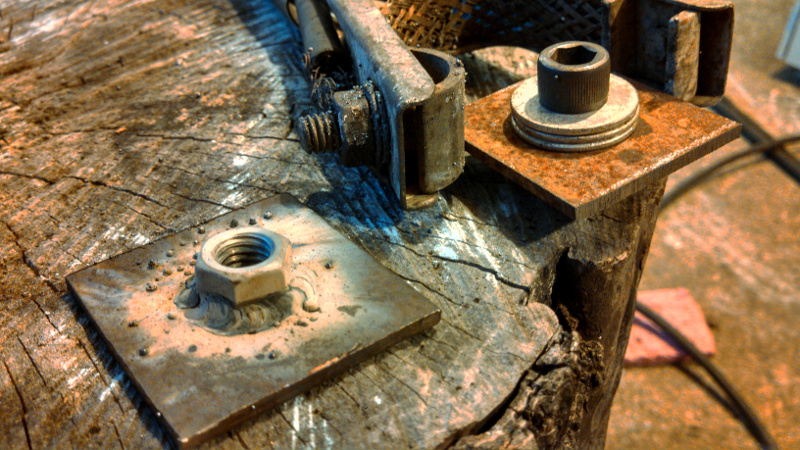
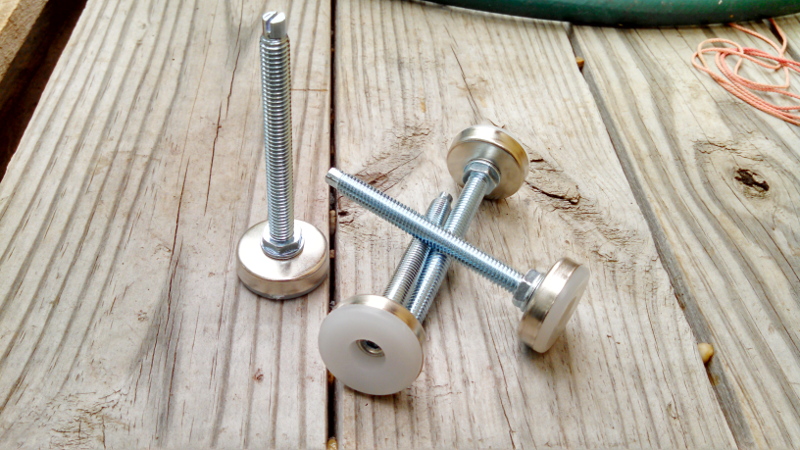
A universal problem with a rigid piece of furniture like this is sitting flat on a surface without rocking. In this particular case I know that the place it is going on the front porch is terribly uneven and if I made the bench flat it would require a shim to keep it from rocking. Since the bench is going to be in my possession longer than the house I definitely won't make the bench screwy to fit the house. That means adjustable feet. Good 'ole McMaster Carr has a large selection and I decided to go with some relatively cheap versions that have a 3/8" threaded section and a plastic donut underneath a steel cap.
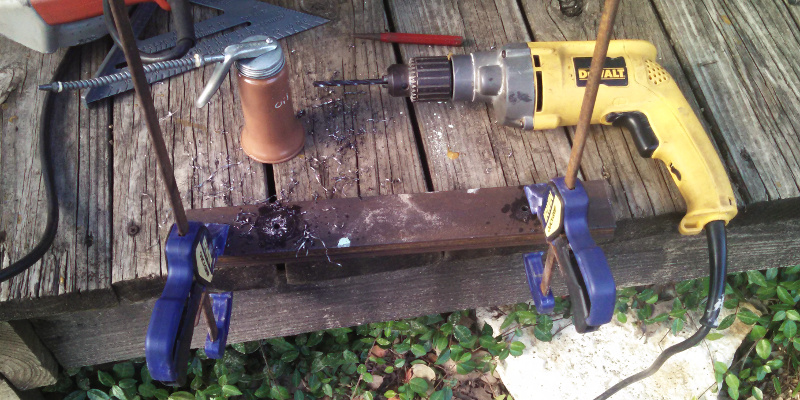
I don't really like how they look though (or how any one that exists would look in this situation) so I want to hide it as much as possible. To this end I am going to recess the nut that these feet screw into inside the legs so that it only has to stick out as much as needed to make things level. First step is drilling a bunch of holes in some of my 2"x1/8" flat bar. These will let the 3/8" stems on the feet pass through and it is easiest to do the drilling before I cut all the tabs out.
After I finished drilling I cut the tabs to 1-3/4" x 1-3/4" squares that fit loosely inside the 2"x2" square tube of the legs. Then I used a spare 3/8" screw to hold a regular 3/8" nut tight against the tab and concentric with center hole while I welded it in place. This weld doesn't have to be pretty at all, the nut and weld will be inside the leg once it is put in place.
Now I am unduly happy with my solution for setting the nut tabs inside the leg tubes. I was trying to decide how to do it when I finally realized how simple it was. I had some 3/8" threaded rod lying around so I just screwed two of the squares onto it, one on the very end that would get welded in place and then another that would sit close to the top of the tube and hold the threaded rod close to the center of the tube. That would make sure the nut on the bottom (which was the only part I cared about) would be co-axial with the tube.
To set the same depth I measured out what I wanted on a combination square then used it as a stop while I slide the nut tab into place.
Now, I purposely did not weld the tube in all the way around. I know that since I have that nut in the bottom this won't be a sealed system and some way or another water will likely find it's way inside. If I welded up all four sides the nut on the bottom could possibly allow water to collect in the bottom and have no way to drip out. So I left two sides with a gap so any water that does come in can drip right back out. I am probably way over-thinking it here but this is what causes cars to rust out when the corners of door panels don't have any way for water to drip out or some other feature that lets water collect but not roll off.
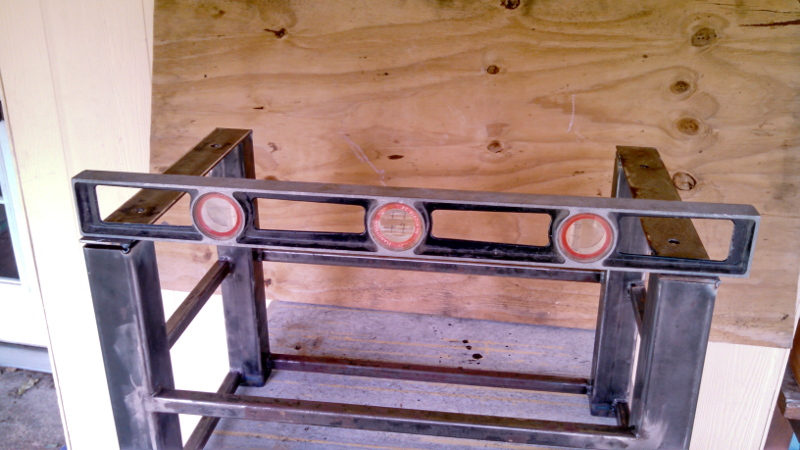
After welding in the nuts on the bottom of all the legs I got back to the first frame I had started. Those 1/8" x 2" flat bars needed to go on so I laid them on my makeshift work surface (some sawhorses, the limestone tops and hardiboard scraps to cover it up) and set the frame on top. I tacked everything in place while keeping it all flat then flipped it over to check that it was indeed flat. I placed a level across the back.
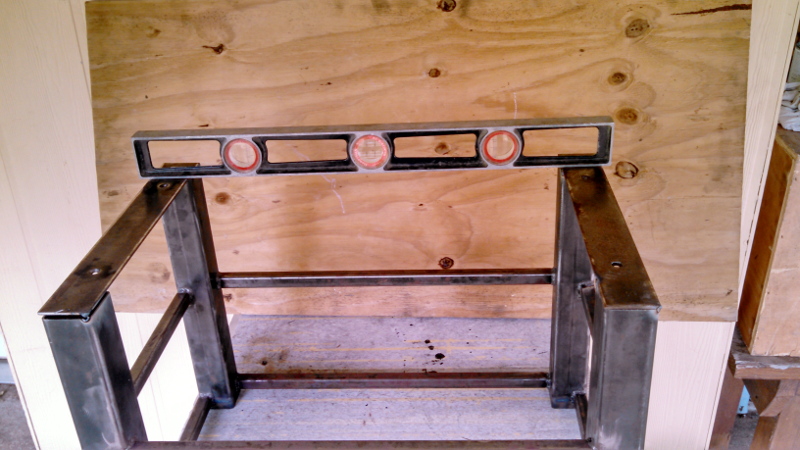
And then across the front to make sure it read the same in both places. It did, so that was good except you might barely be able to see I was stupid and tacked the flat bars in with the countersinks facing the side that would attach to the limestone instead of on the other side. Fortunately I noticed this before I welded it all out so I tacked again and repeated the level check.
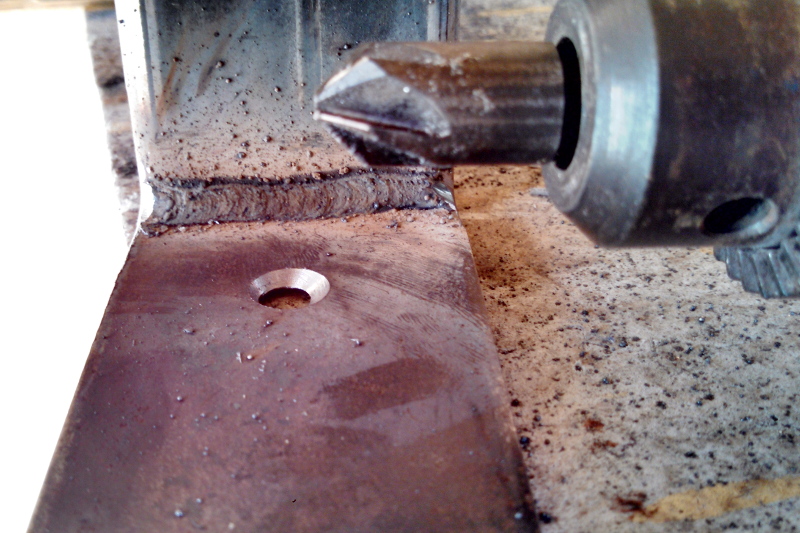
On the second one I did the same exact thing except I only had one flat bar wrong. I noticed this again but after I broke it off I somehow put it back on the exact same way. This time I didn't catch it until I welded everything out! I was rather mad at myself but what do you do? Well I got out the drill and did my best to countersink the side that needed it. It is a little crooked and results in less meat under the screw head than I want but it will honestly be good enough and won't ever be seen.
After I finished grinding all the outside welds and wire brushing everything smooth I immediately set about finishing the first frame before it had a chance to rust on me. First step is always a thorough wipe down with acetone. Sometimes on larger projects with more dirt I give everything a good blast with soap and water, then a rinse with water and finally a wipe with acetone but these frames were pretty clean from grinding and wire brushing by this point so a good wipe with acetone was enough.
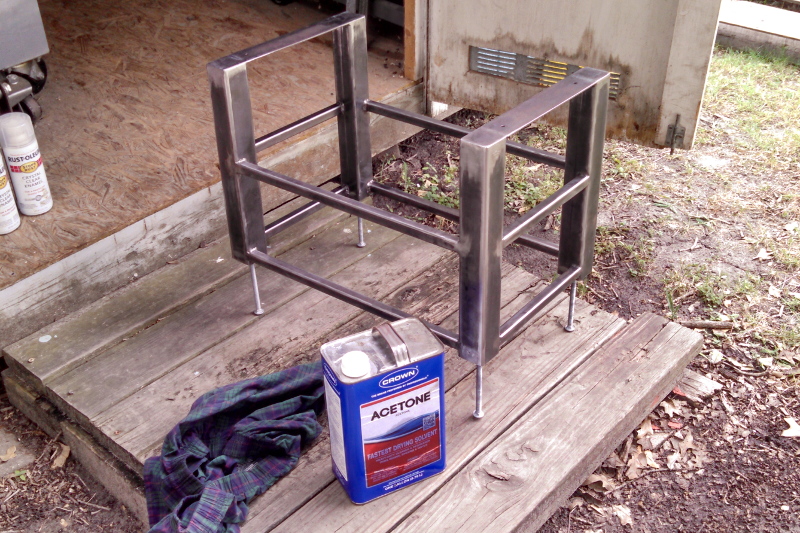
Then immediately an application of clear gloss Rustoleum. You can see I used some handy carriage bolts to hold the frame up off the pallet while I painted.
The next day I started on the limestone tops. I knew the fragile, sharp, as cut edges would chip and become ugly in short order so I pre-chipped all the corners with a hammer to round them over in a rough looking manner that wouldn't be ruined if they were later chipped some more.
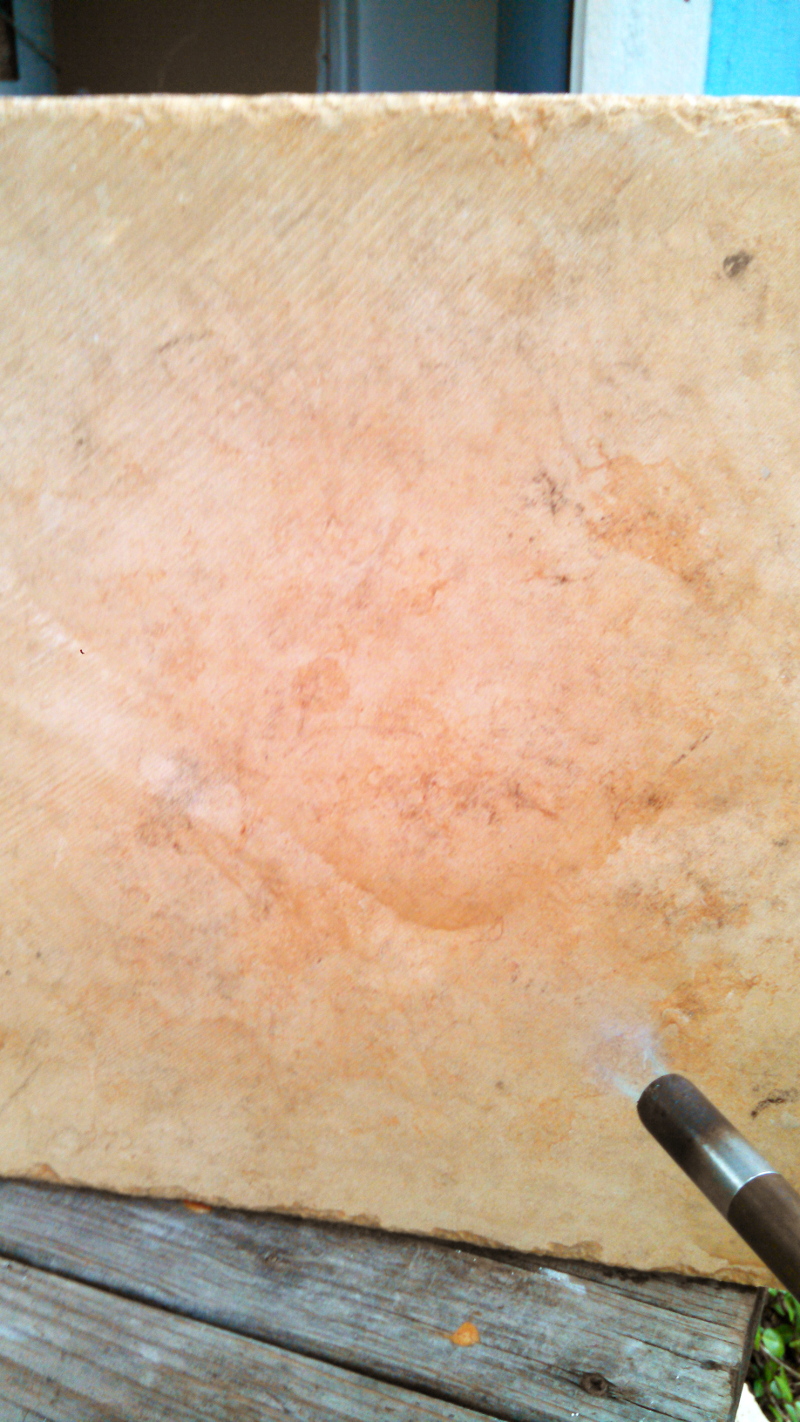
And we get to the finish for the limestone. What did I decide to go with? The answer is paste wax with heat to drive it in. After I let all those samples kick around the yard for a couple weeks I still liked the melted wax the most because it looked natural and didn't seem like it would come off quickly. It might not be perfect but it will be easy to maintain in the future by just wiping on some more whenever it looks like it needs it. It will also be easy to touch up any knick or scratches the top suffers.
It doesn't really show up in this picture but the more volatile elements of the wax burn away when you hit it with the torch and it is very easy to see where the wax is liquid and where it is solid. As you heat it up it flows into the stone almost like you dropped some water on it. I just smeared it on then chased it around until everywhere was covered. Then I heated it up and wiped off the excess with my hand.
One of the tops was finished now and two of the frames were ready so I was eager to get one of the benches into service (and dump the ugly thing that was sitting on the porch and kind of performing the bench role). I put one of the frames in place where it would go on the bottom side of the slab and marked the holes.
Then I measured out the depth I wanted to go with my drill bit and marked it with a strip of tape.
Limestone is really easy to work with and I didn't even turn on the hammer function as I drilled to me pre-marked depth.
I had four holes now, all ready to go. Some Gorilla glue to drop in the hole with screw just because, my masonry screws and a set of extensions that would let my air ratchet get down all the way to the screws. This is going to be quick right?
Nope! I squirted glue into my holes and placed the first screw in position, plunk it fell right in! Crap, I drilled the holes too big. I thought I had picked up a 5/32 drill to use with the 3/16" screws like they call for but I must have picked up a 3/16" drill. I already have glue in the holes so this is going to become a real mess quick if I don't do something. Luckily I am a horder and have a policy of trying to buy full packages of any fastener I purchase. My stash yielded the field expedient answer to my need, some plastic screw anchors for a 3/16" hole and flat head woodscrews the right size to go with them. I hammered the anchors in then cut the heads off flush with the surface. After that I screwed the screws in just like I was planning even if they were different ones.

Now the feet weren't a crisis. These are what I order from McMaster Carr a while ago for the project. See a little ugly but that is okay.
It's ok because that recess for the foot is just right to almost completely hide them. When screwed in until they bottom out they stick up just proud of the bottom.
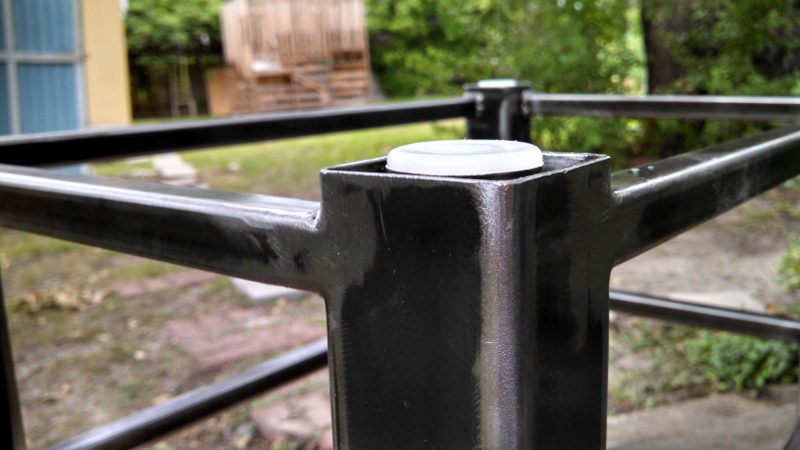
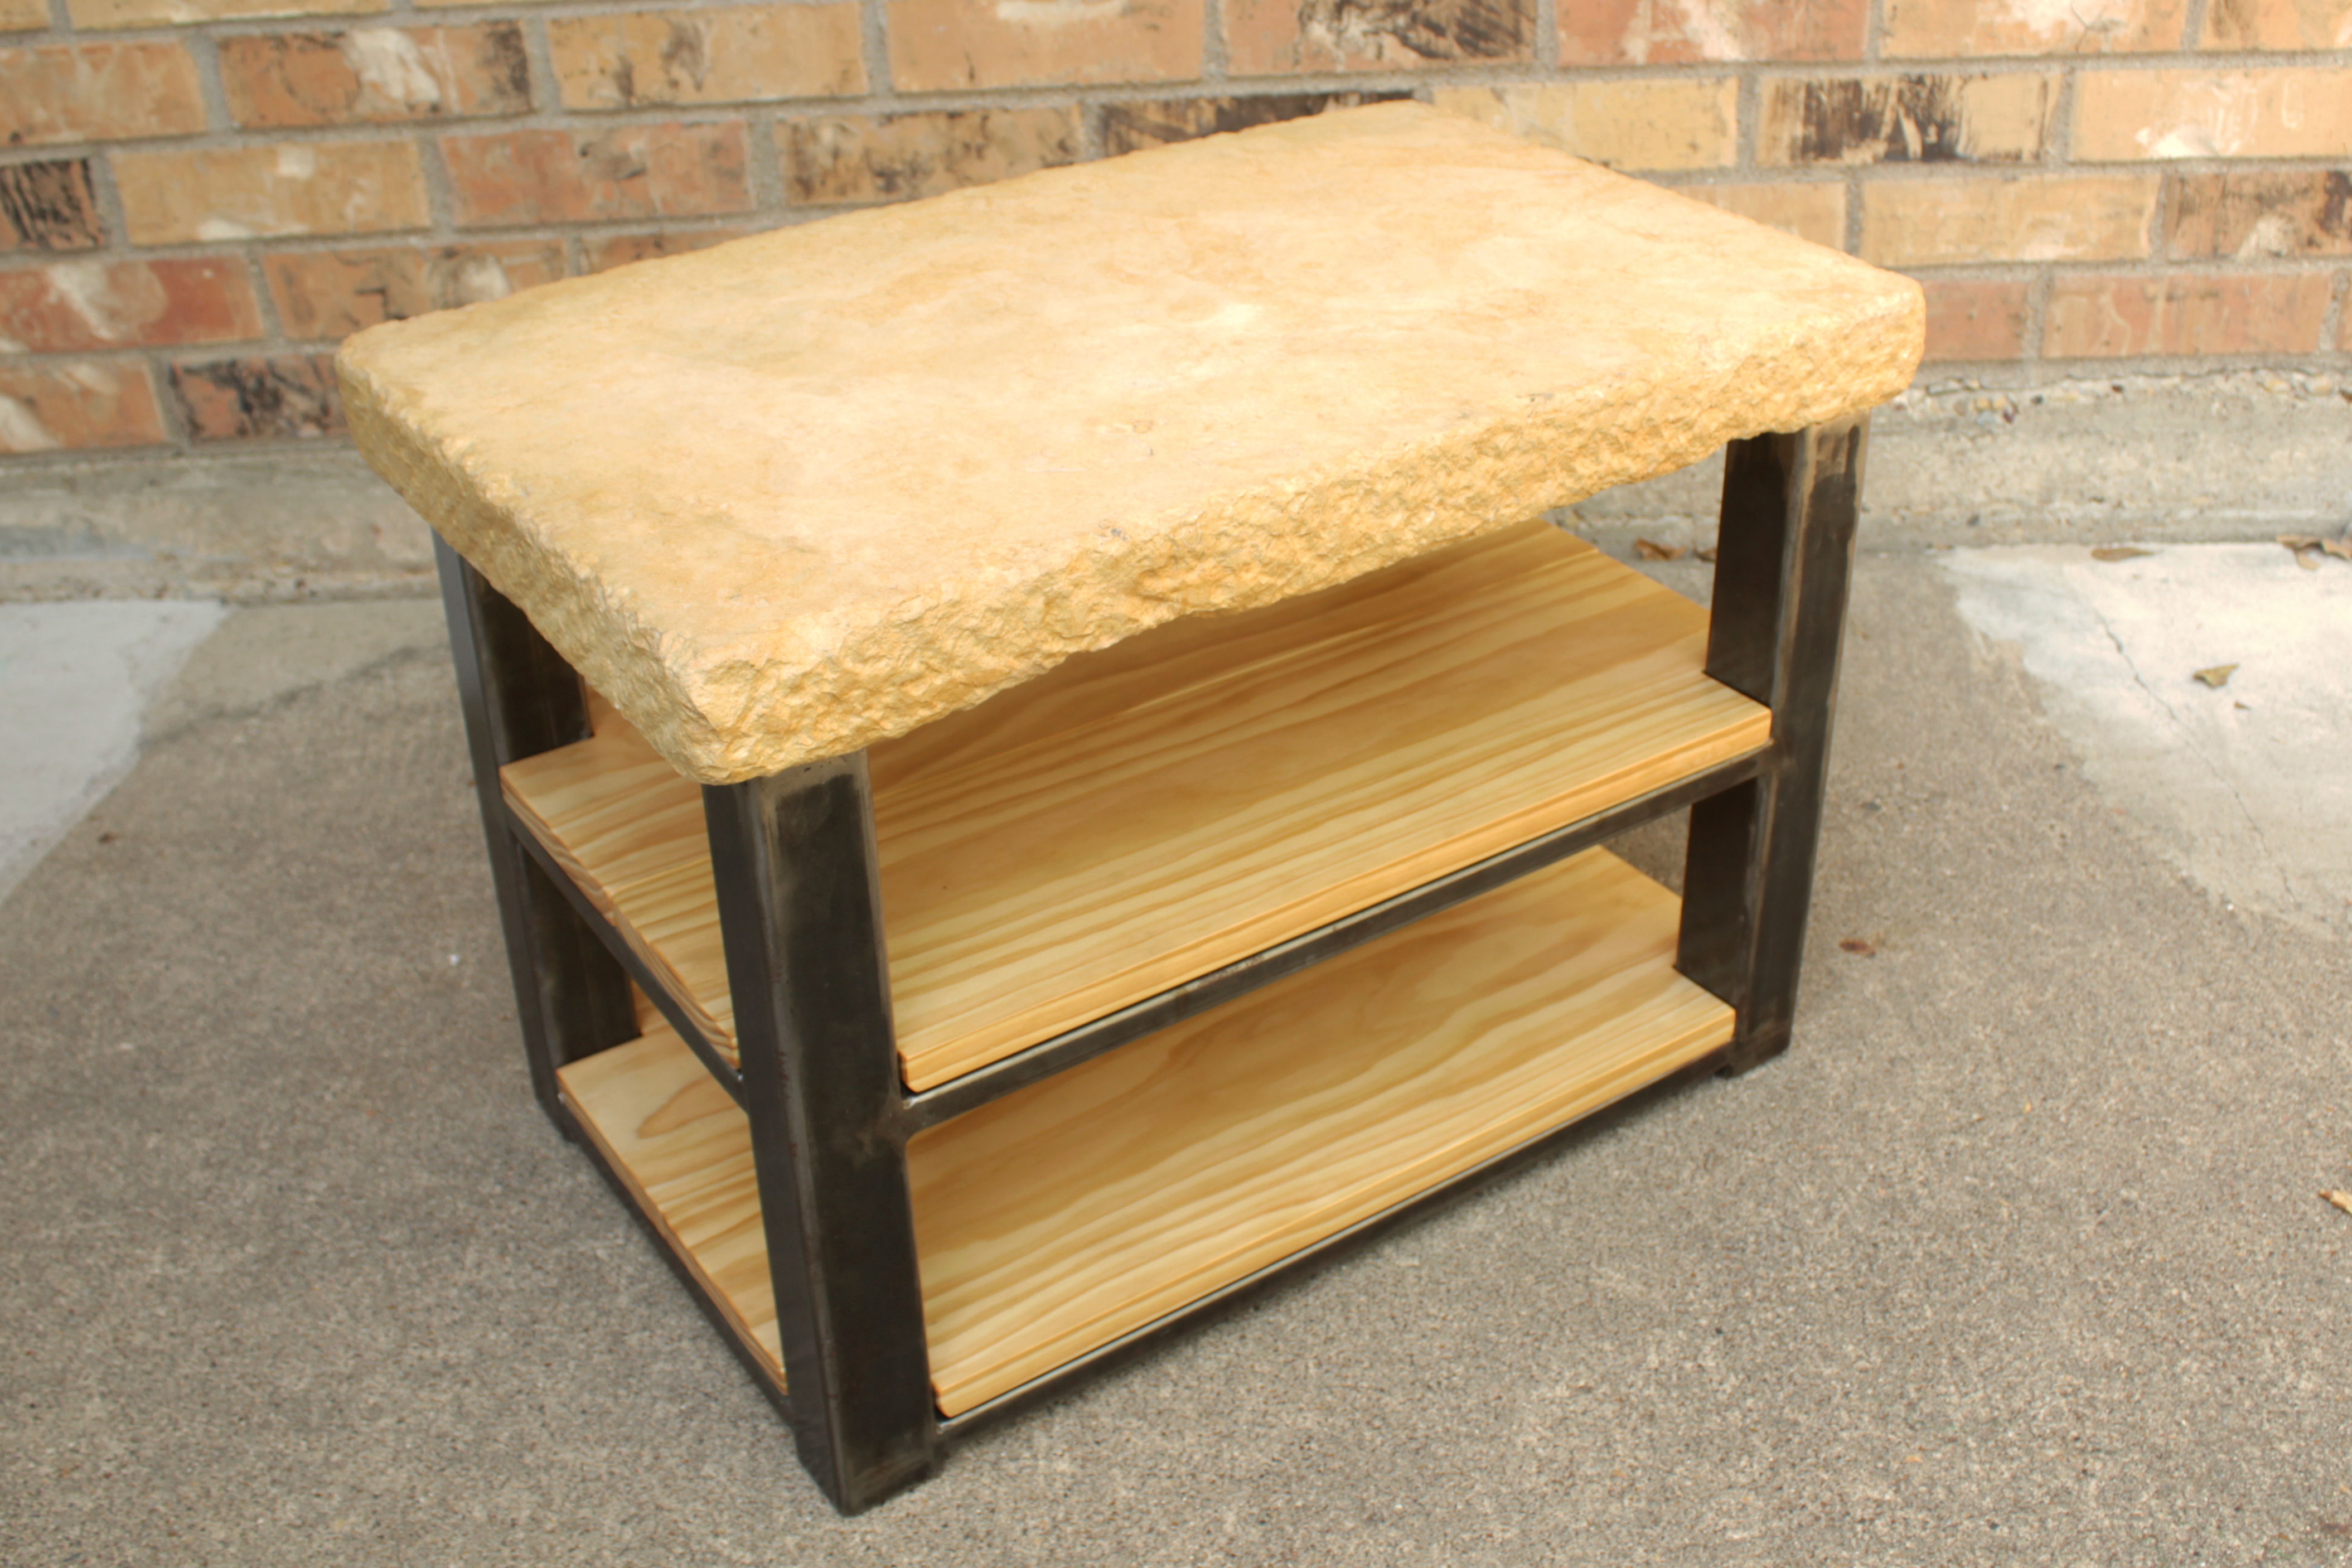
Flipped right side up you can't see the feet, it almost looks like the tubes rest on the ground. Coming along pretty good I'd say. Incidentally the limestone turned out pretty close to the lighter colored bricks on the house so it really fits in with that part and will go nicely with the tan that I will eventually paint the house.

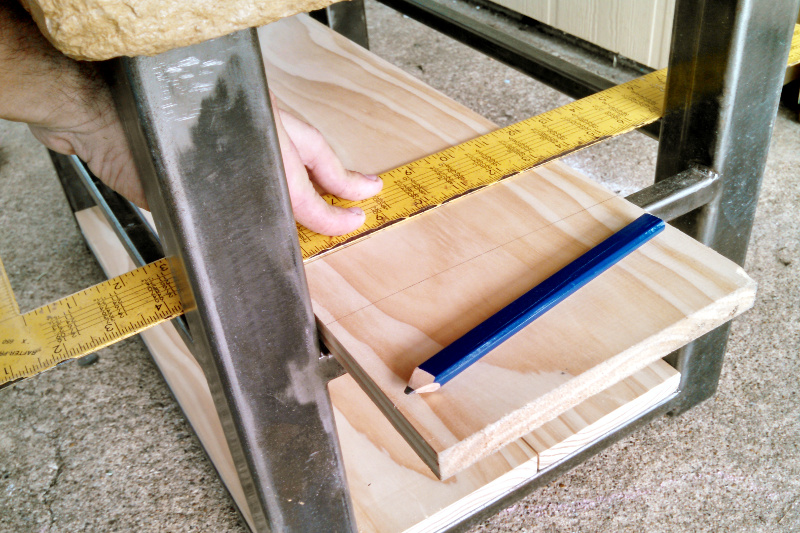
I still need to make the pine board shelves to hold the shoes but that will have to be another day as my belt sander currently resides with my brother so he can work on the storage bin shelves for me.
I eventually got my belt sander back so had no more excuse for leaving the benches incomplete. Even though the frames should be pretty square they are welded up things which weren't assembled on a jig, or nice flat welding table or even by a skilled welder. Just me on the back porch with an improvised table. That means cutting the matching boards to fit instead of trusting the dimensions so I put each shelf where it would go and marked it for cutting.
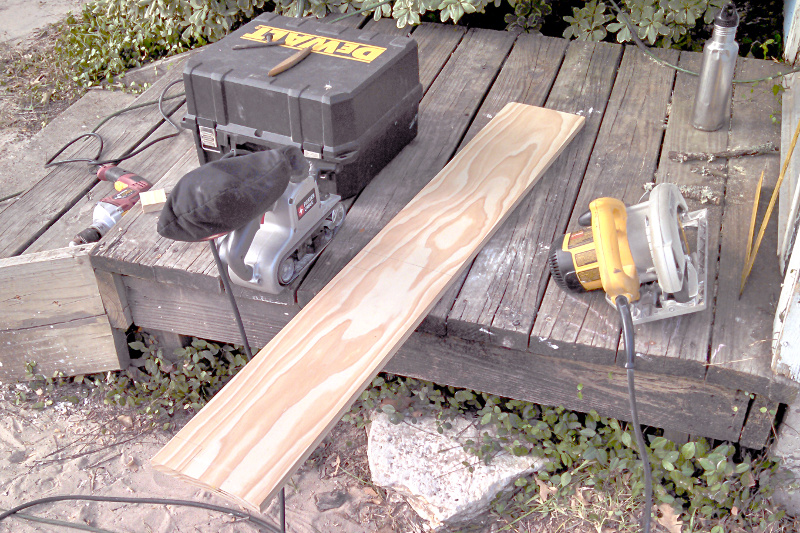
Then cut to the marks with the circular saw and use the belt sander to clean up the saw cut end. I know, I know I used the belt sander as an excuse not to make the shelves but I didn't even do much with it. That is on purpose and well worth it for this application. Instead of buying plain old pine board with a rough surface and knots I opted for select yellow pine. No knots, splitting or other issues which will make the shelves last much longer outdoors and all four faces are already perfect and suitable for finishing without any sanding work. If the project is small enough, the goal is something nice where knots aren't aesthetically required and you can afford it; pay for select pine. It is worth it in the time you save and the end result.
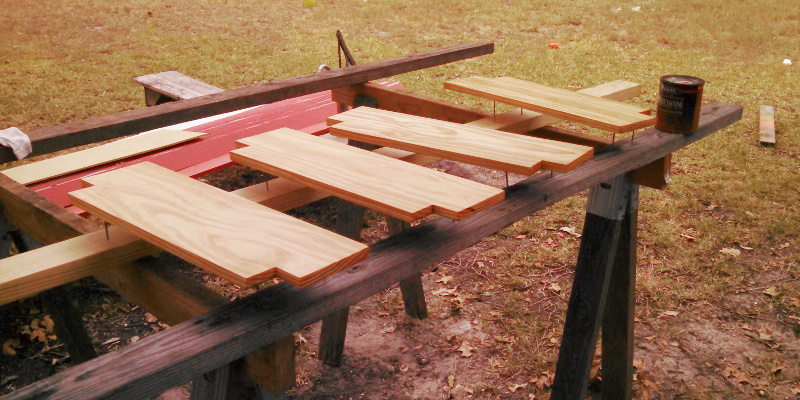
After all the shelves were cut and I test fit them I did give them a little sanding. Nothing on the faces of the boards just a few strokes of 220grit by hand on the edges and corners to knock them down a little. Otherwise the corners feel too sharp when you touch them and the the boards are more likely to get damaged.

Last step was finishing with semi-gloss polyurethane. Glossy finishes are more durable outside and shed water better but full on glossy seemed a little much compared to the limestone top. I am a little impatient sometimes and finished the top and bottom side of each board at the same time instead of doing one side then waiting for it to dry and flipping over for the other. I painted up the bottom side then supported it with nails while I finished the top side. Unless you require a perfect coat on all surfaces with some finish that will show all the imperfections this actually works quite well and yields a better result than painting each side one at a time unless you are super careful. I at least often get drips and runs on the bottom side that I can't see when I paint the two sides at different times.
And the end result. I'm satisfied with it. One of those projects where you know what it will look like and even if the path isn't exactly how you meant for it to go (countersink on the wrong side of a bar, wrong size holes in the limestone) the end result is exactly like you had in your mind when you started.
(Click on picture for higher resolution if desired.)

So the project is all finished but what do you do with three shoe benches and only two porches? Hopefully you get someone to buy the extras even though the fair price considering time and materials seems excessive and shipping costs a fortune because it is literally a rock.
If a heavy, high priced shoe bench sounds like something you must have then I'll put them up in the store