The Trailer
We knew we were leaving for California and would need to take both of our vehicles over there. We didn't really want to drive +2,000 miles separately and I had a truck so towing her car seemed like a clear option. Of course you can rent a trailer but I knew I would want on eventually anyway so why not buy one before the move and put that rental money toward a trailer of my own.
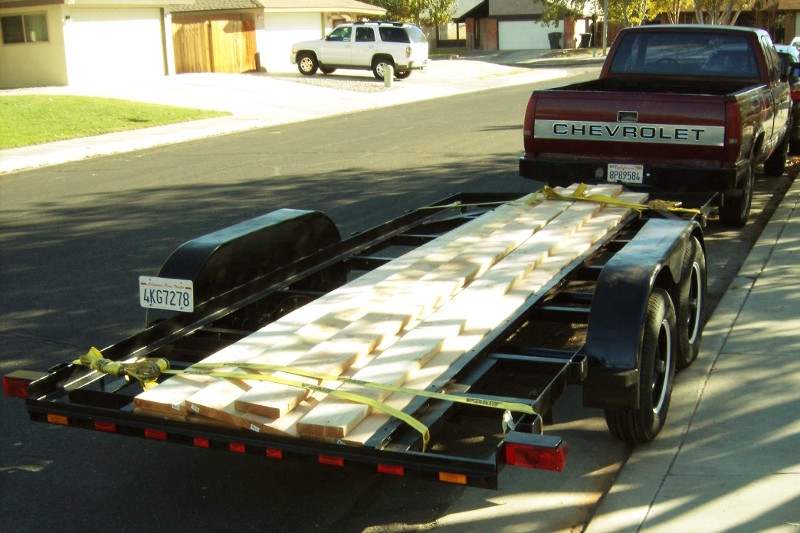
So I bought a car hauling trailer that was in rough shape. The axles and main structure were fine but the tires were shot, the paint was peeling off and the "deck" was made of many different kinds of random scrap metal.
One of the tires blew up on the way to discount tire from picking it up but luckily the spare made it to the store where I got a new set. The paint and "deck" were not necessary for car hauling so I didn't touch anything else except wiring before moving to California.
One of the first things on my project list then when I got to settled in was updating the trailer. Unfortunately I don't have any pictures before starting work on it so this page just jumps right in.

I removed all the "deck" junk and started stripping the peeling paint off. There was a structural issue I needed to change though. Running about 1.5ft inside the outer edge of the trailer on both sides there was a 2"x3" angle welded onto the cross members so that the 3" side of the L pointed up. This had been problematic for me before with the low ground clearance of the Porsche. I intended to deck the trailer with standard 2by lumber and if I just slapped that on there the angle would stick up 1.5" above the boards. Not exactly a flat deck like I needed for moving machines and stuff.
The easy thing to do would be just cut off that angle but it was structural. So, I did the math on what it would take to maintain the same stiffness (Area Moment of Inertia) and strength (Section Modulus) then decided to cut the angle off at 1.5" height and weld some additional steel on. The result was another L angle welded onto the bottom of the existing one and a strip welded on top of the cut off L so it would be flush with the planned deck.
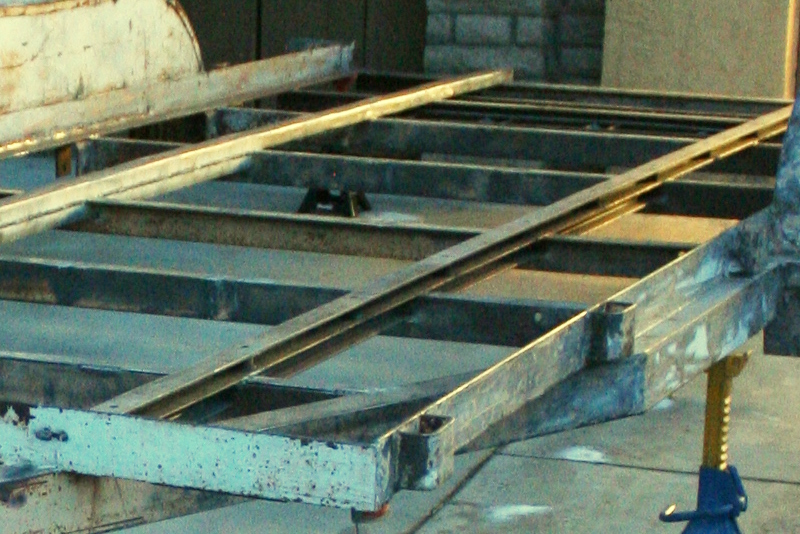
While I was at it I added some tie-down points. Every 18in along the new flush strip I welded in a piece of thick walled DOM tube then drilled and tapped it 1/2-13UNC to accept some lifting eyes. This was the only substantial use that the little power hacksaw I made for myself ever had but boy did it pay off. At the time I had no good way of cutting something like 1-1/4" OD x 1/2" wall tubing except that little saw. It took about 15 minutes to cut off a single slug but that meant I didn't have to do it by hand and was just quick enough to drop a new part off as soon as I finished welding the previous one in.
With the welding and stripping done it was time to paint. Now I really wanted a good paint job that stuck well and prevent the frame from rusting. To help the adhesion and eliminate any existing rust that I didn't wire brush off I sprayed the whole trailer with phosphoric acid.
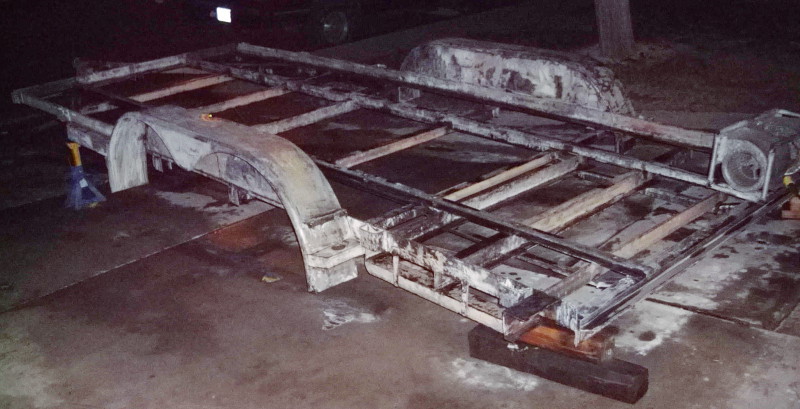
Now phosphoric acid is used to clean and etch concrete before staining so I didn't want to damage the concrete under the trailer with whatever dripped off when I sprayed it. To keep that from happening I sprayed the concrete down with water before spraying and then carried around a box of baking soda to sprinkle wherever the acid dripped. Then when I was done I rinsed the trailer and concrete with the hose. The fan in the picture was to help dry everything off as quickly as possible so the trailer wouldn't flash rust from the rinse water.
The next day I gave it a coat of oil based rust preventative primer, then after the appropriate wait time a gloss black enamel for the top coat.
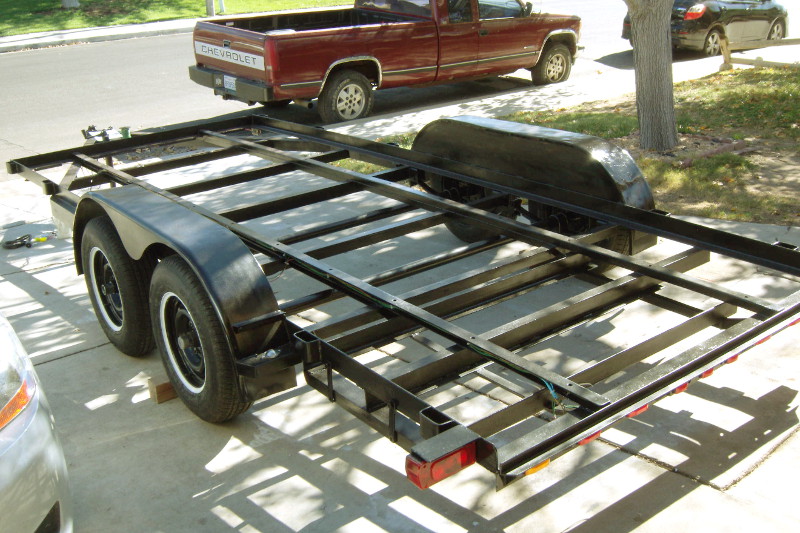
Next was the wiring for the brakes and lights. I ran it through the newly reinforced structural members where it couldn't be snagged or hurt by anything.
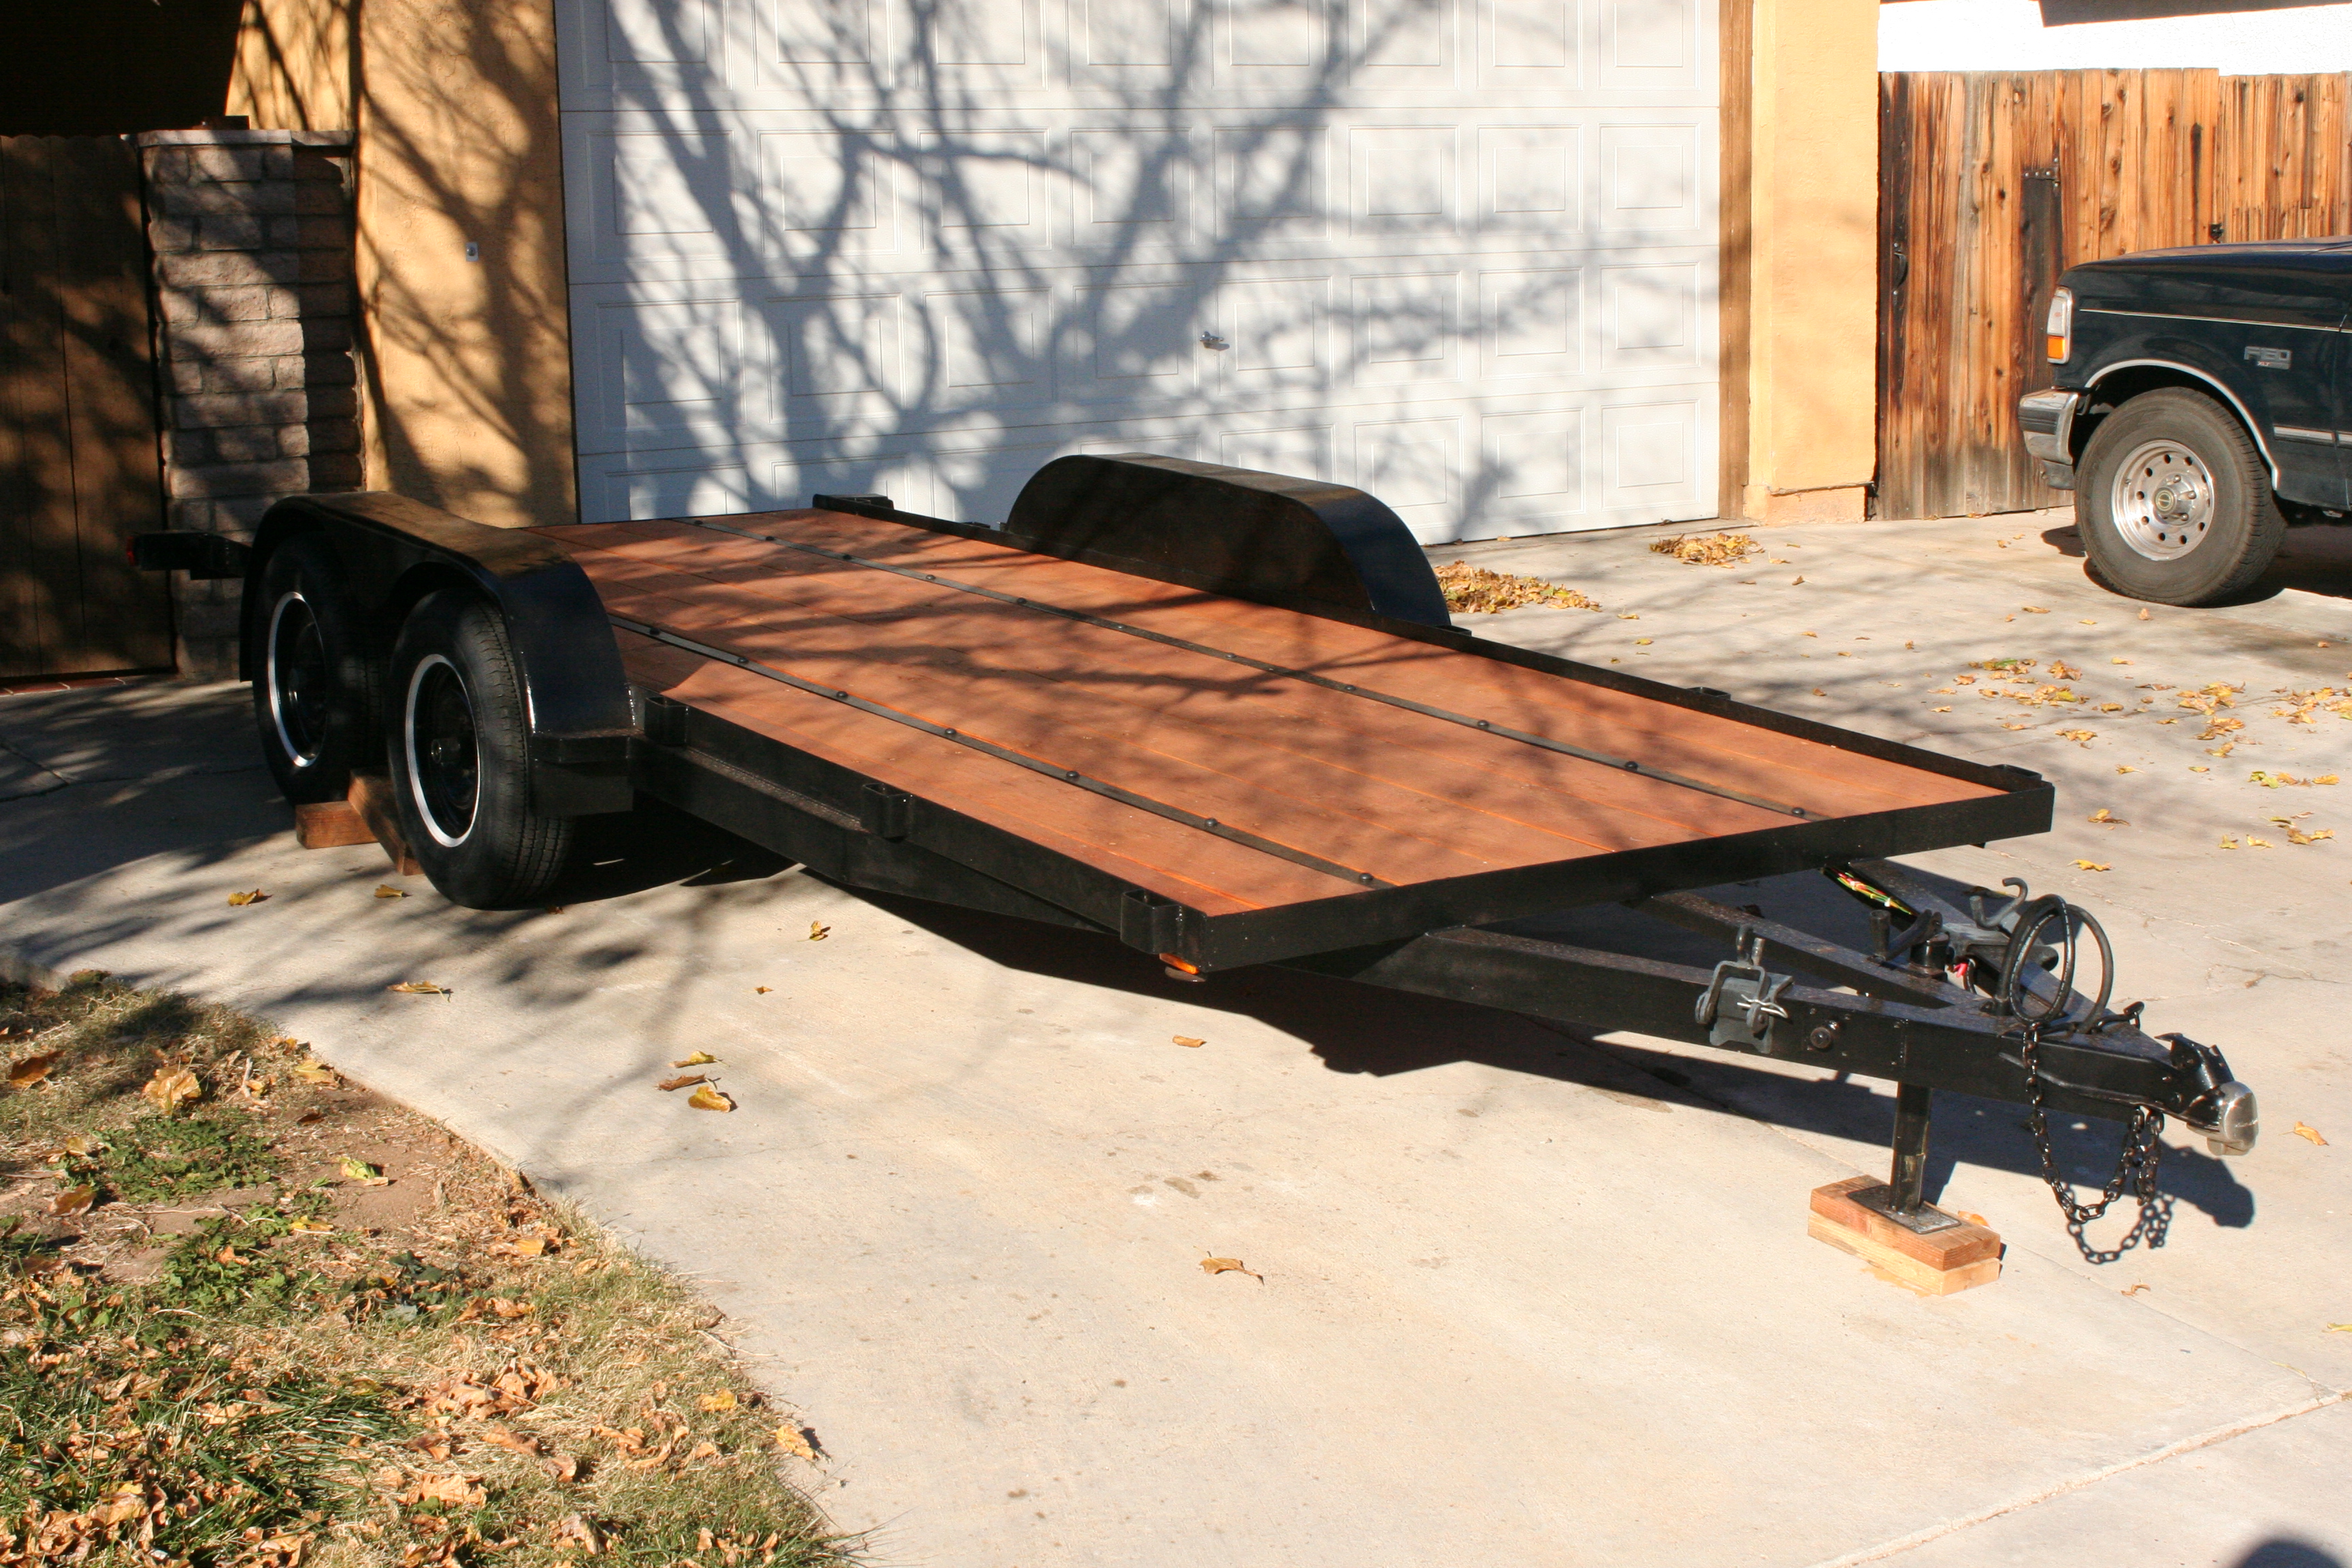
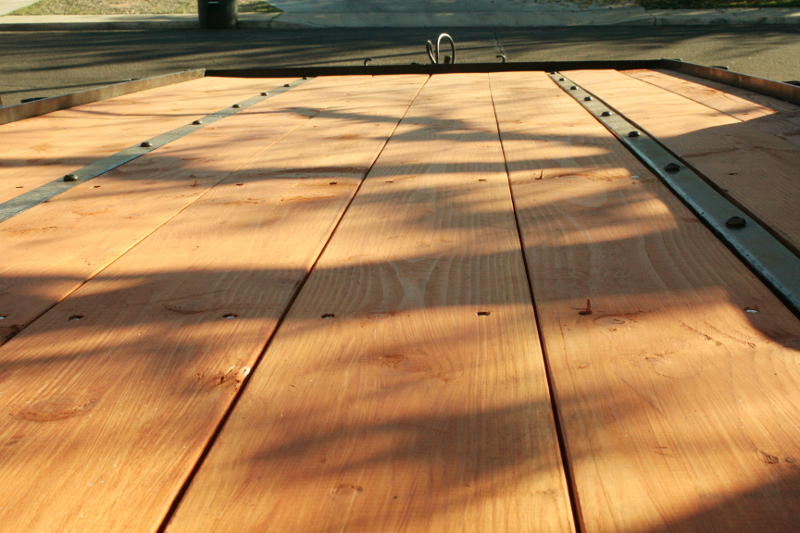
Then off to the lumber yard for some boards. Like I mentioned earlier I used plain old pine 2x something lumber (not pressure treated). Before installation I gave it two coats of sealing stain on all side.
To secure it to the trailer frame I match drilled the boards to the frame for 1/4" carriage bolts.
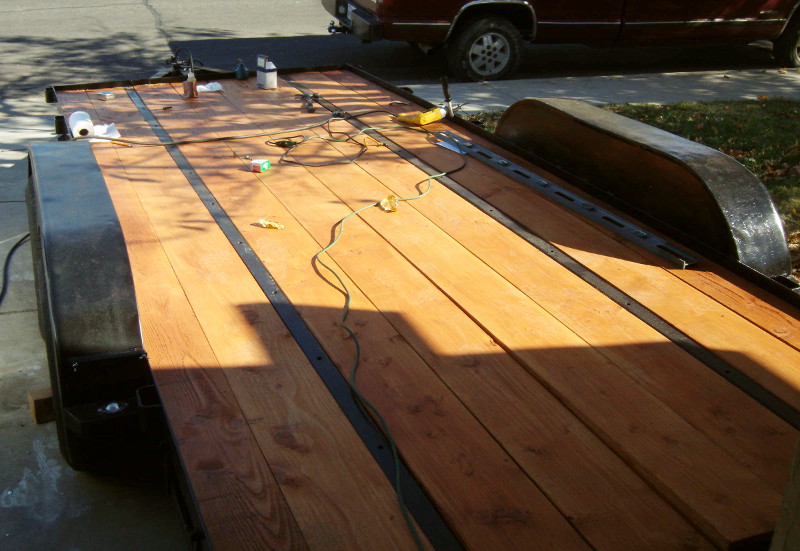
I put the carriage bolts round head up and sucked them all just below flush with the rest of the deck. Then I gave all my tapped holes a generous helping of anti-seize and installed a button head cap screw in every one to keep them clean and rust free.
And there you have it, the completed trailer. I have been happy with it and don't understand how other people live without one. It moves cars, machines, lumber, trash, steel and whatever else is needed. The wood deck has been very helpful (it isn't as slippery as a steel deck and you can put nails or screws in wherever you want to secure a load) and the tapped tiedown holes have come in handy many, many times. I want to move up to a larger truck and a gooseneck trailer one day but I don't know if I'll ever let this one go.