


My Industro-lite horizontal mill
This little thing is a jewel of a machine - well it is now. It was made by a small company up in Oregon that probably only made a few hundred of these machines which is a real pity because there are some good design touches and after a rebuild this turned into a real addition to the shop.
I went to go pick this machine up with my brother. No pictures but we both had mohawks that day in anticipation of attending a big metal show that afternoon. We took a little longer than anticipated loading the mill up and unfortunately missed Five Finger Death Punch as a result but the important part is we picked up the mill.
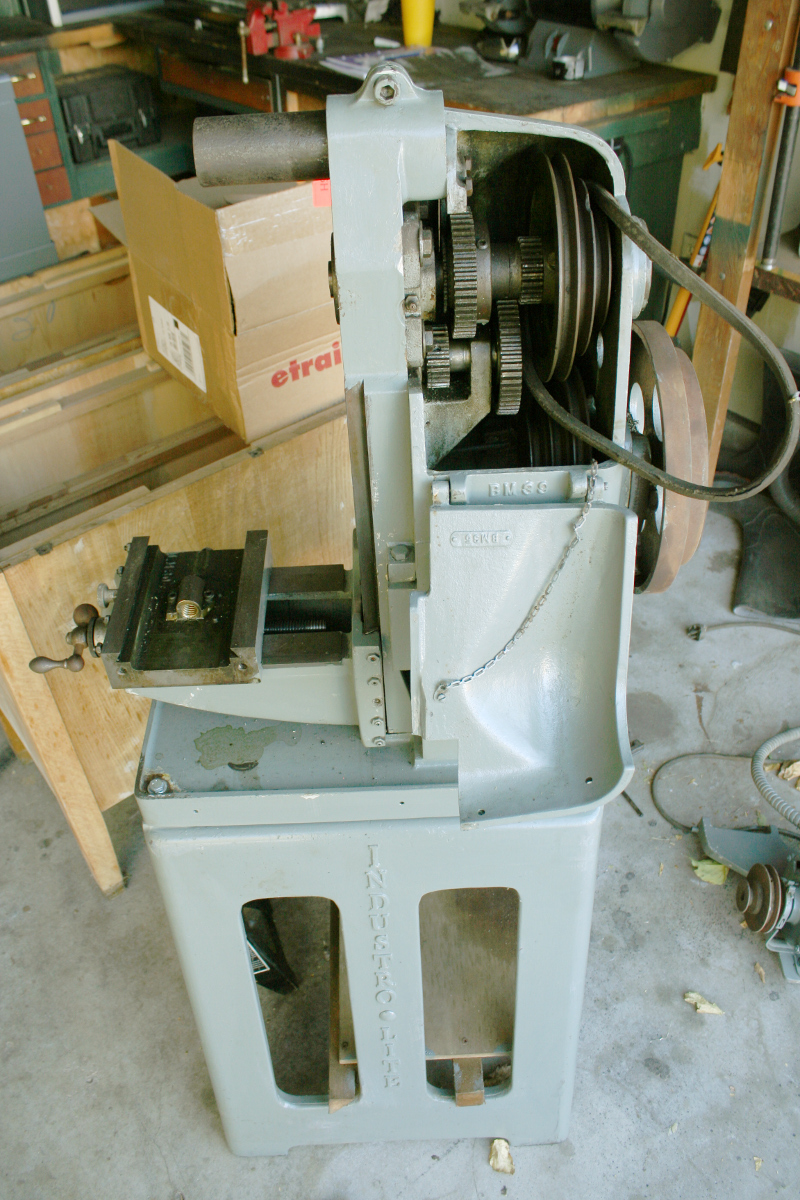
Forgot to take a picture of the mill before unloading it. Here it is right after though. We took off the drive motor and the table while loading it to make it easier to handle and keep anything from bouncing around and breaking.
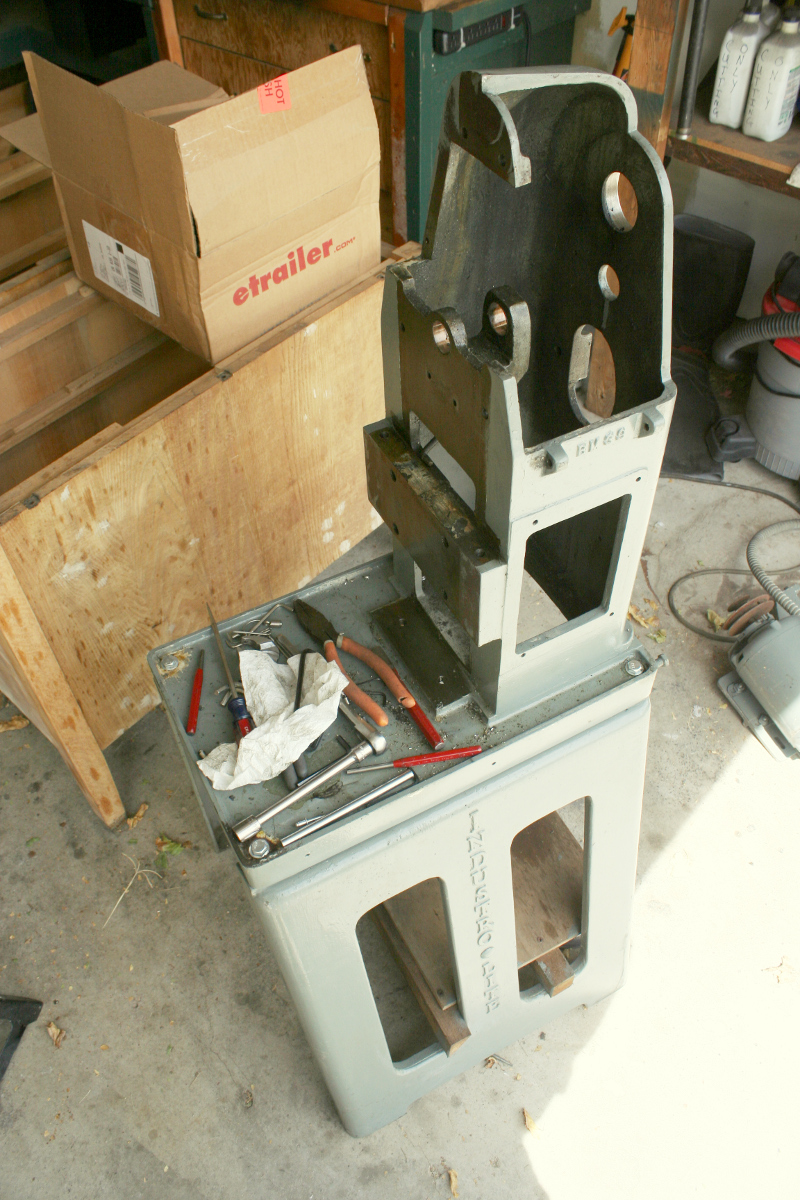
I was anticipating a complete rebuild so I went ahead and tore everything down to the bare castings.
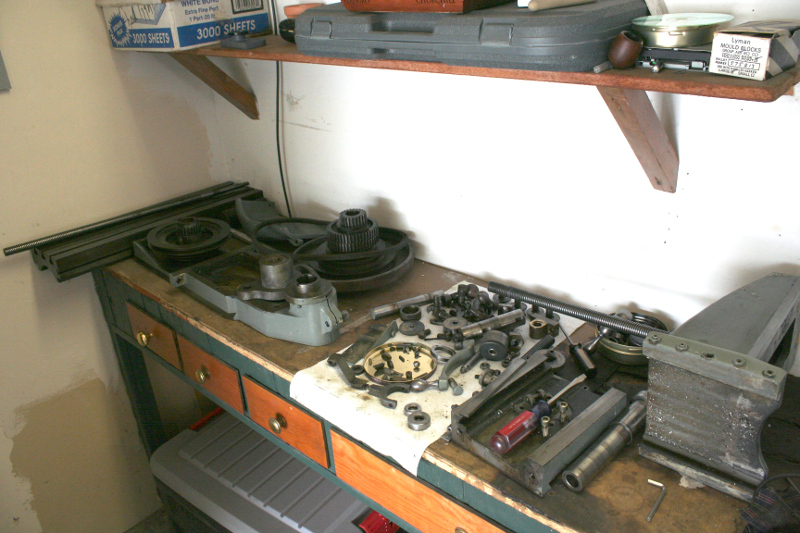
And here are the guts covering the bench.
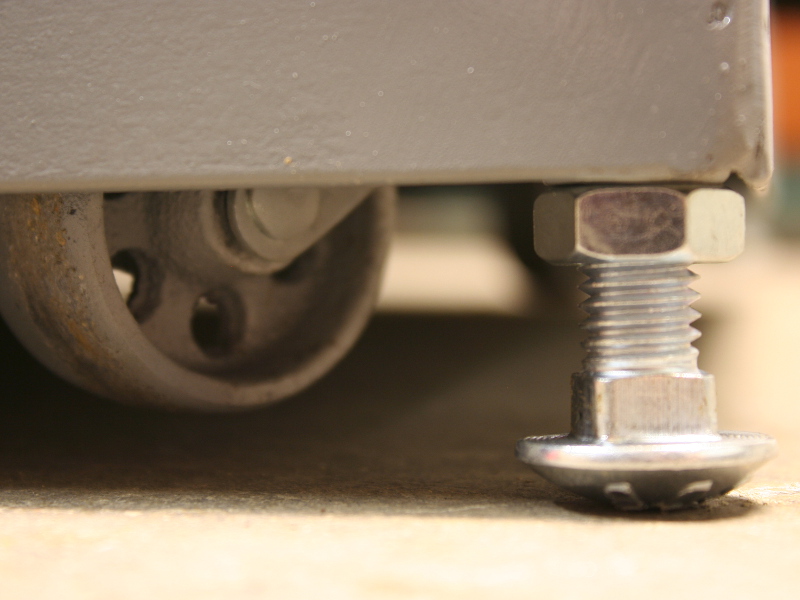
Start at the base and work up right? I welded up a rolling platform for the base to sit on then cleaned and painted thte base and mounted it to the platform.
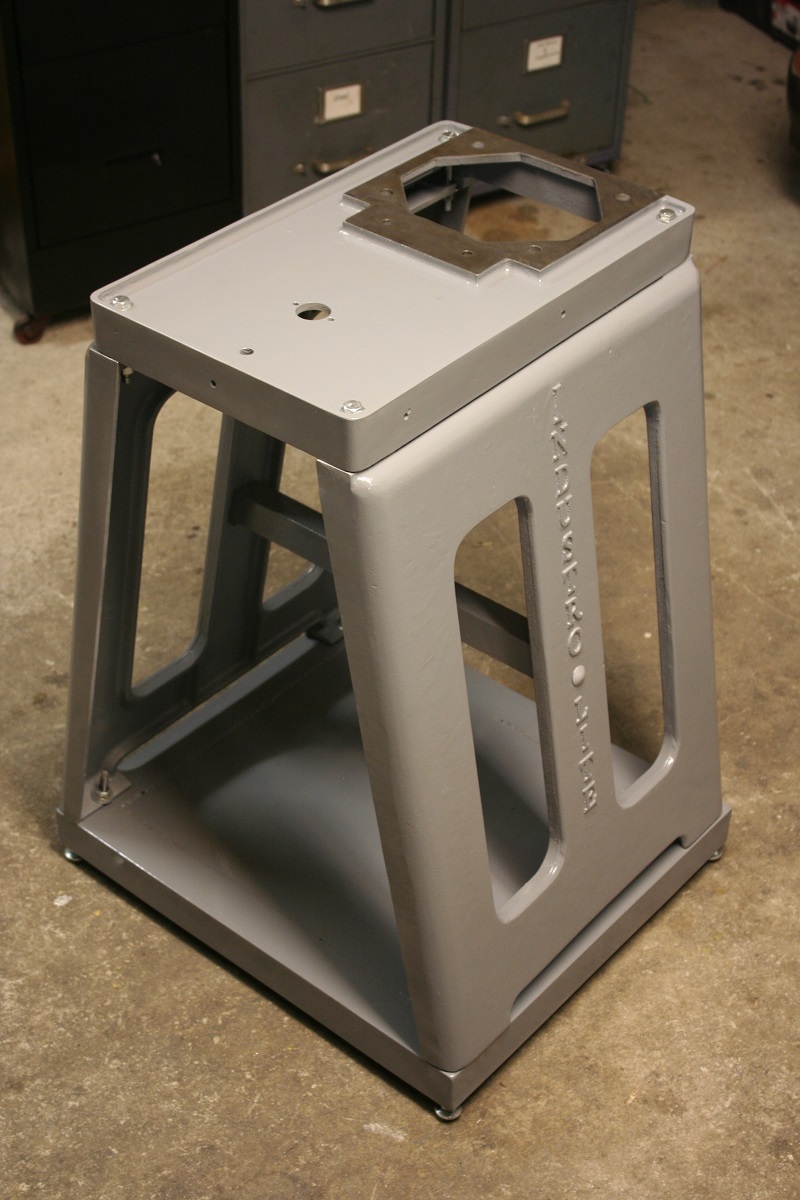
A favorite detail of mine for small machines (like the rockwell grinder), build in some casters along with a leveling screw to jack the machine up off the ground if wanted.
Cleaning and painting is all fun and games but not really a rebuild. Here we get into something, the high/low shift gear fork was broken so I pinned it together with some sandwiching plates and brazed the whole mess together. Looks a little sloppy before it is finished and painted but it is completely invisible in the assembled machine and just needs to be strong, not pretty.
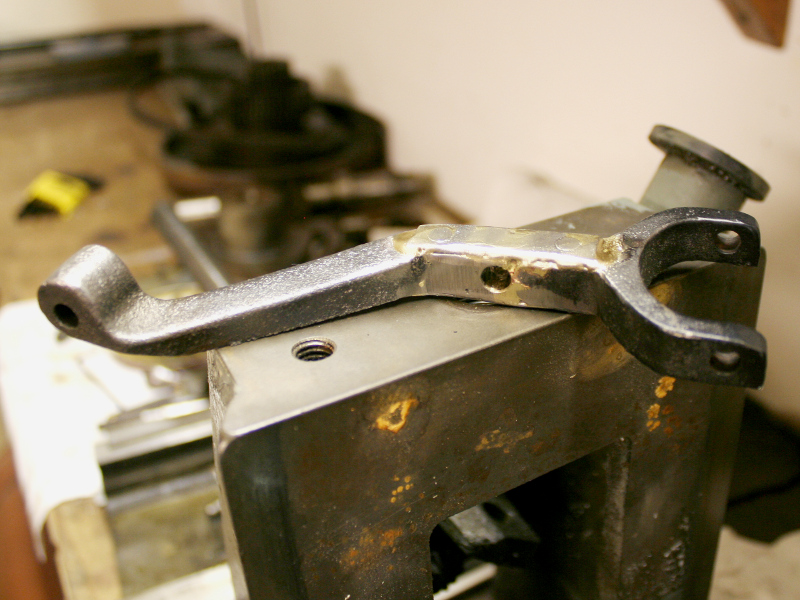
This is actually jumping ahead in the rebuild timeline but here it is installed on the machine. It moves that back gear set in and out to engage / disengage the spindle. Not a high stressed part at all provided there isn't a gorilla trying to use it without knowing how it works.

This machine actually wasn't a very intensive rebuild. The knee did need some scraping (about .002" of wear) but all of the other surfaces were good enough to just leave alone. I didn't end up taking any picture during the scraping, if you are interested in the process I show more on the rockwell grinder rebuild page. Here is the result though, in hindsight I'm not happy with the swirly finish pass I did but you learn as you go right?
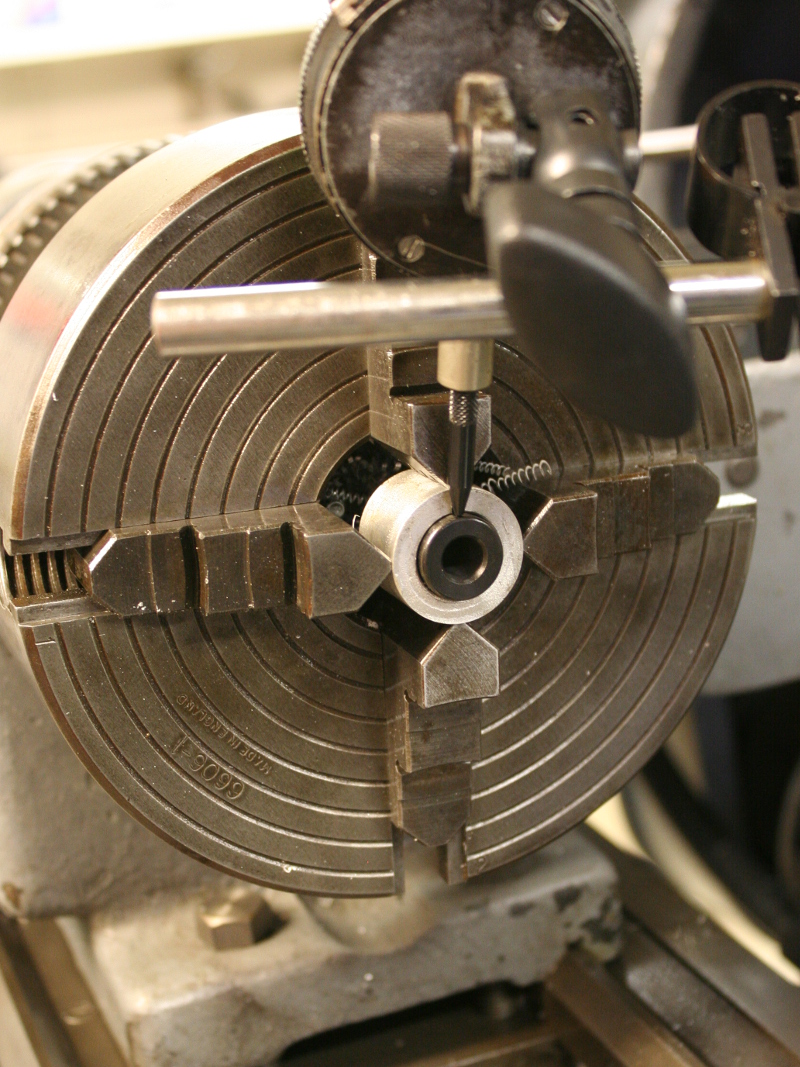
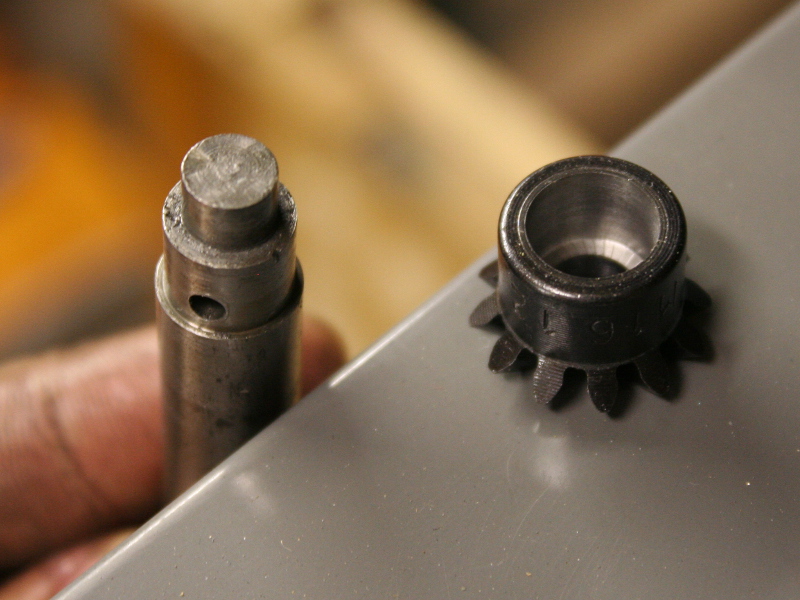
Now before I re-installed the table I needed to fix one more part of the knee. The elevation screw (screw you can see under the knee in the previous picture) had a really chewy miter gear on top. I couldn't find an exact replacement for it so I ordered a set with a smaller bore from Browning. I indicated them in on the lathe and bore them out to the size I needed.
Almost ready to install, just missing the cross drilled hole to hold in place.
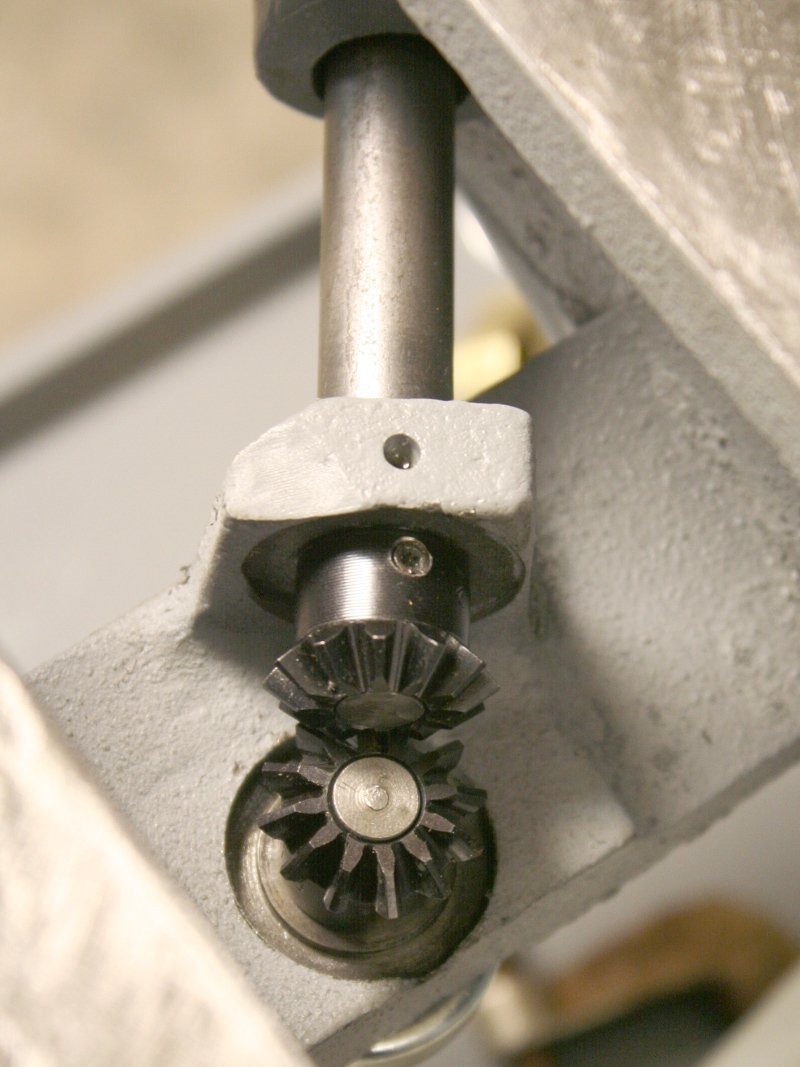
And installed on the machine, one crank of the handle turns the knee screw by one revolution.
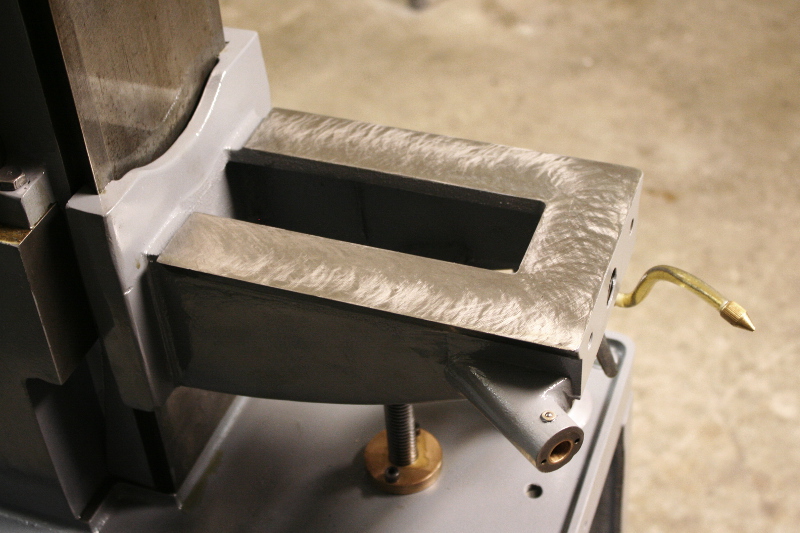
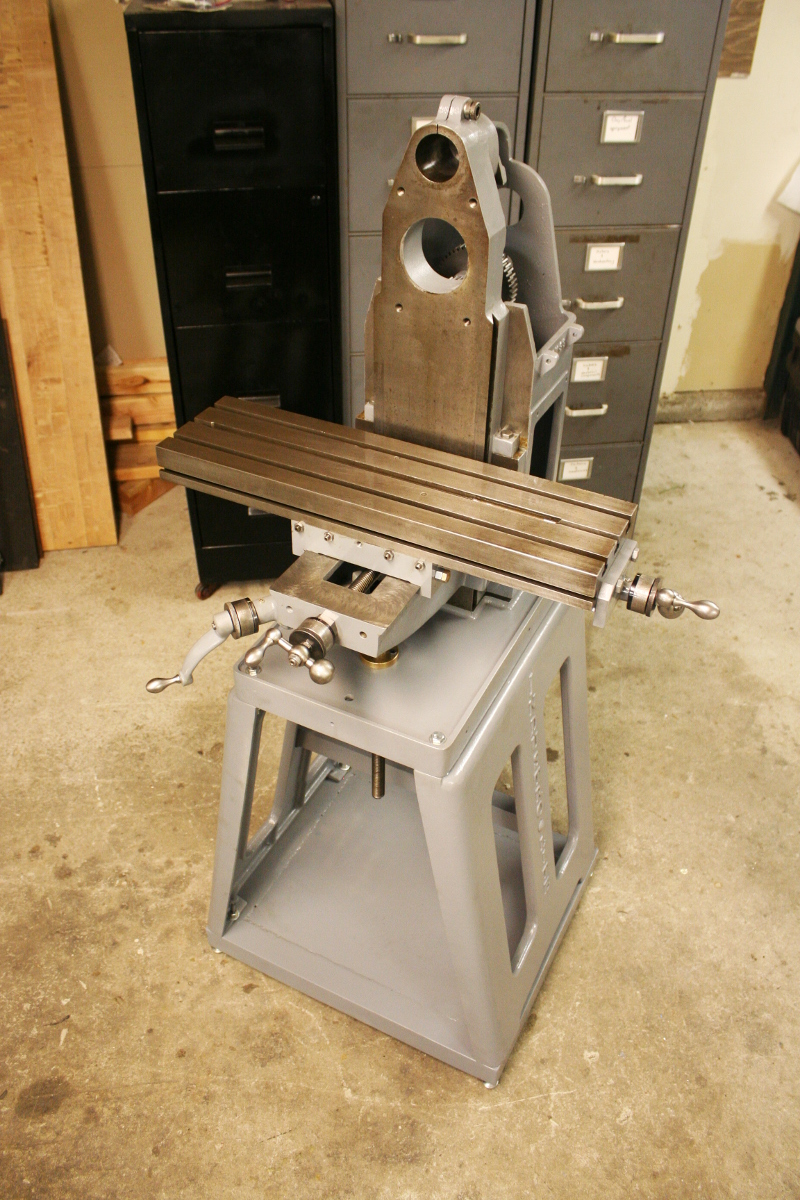
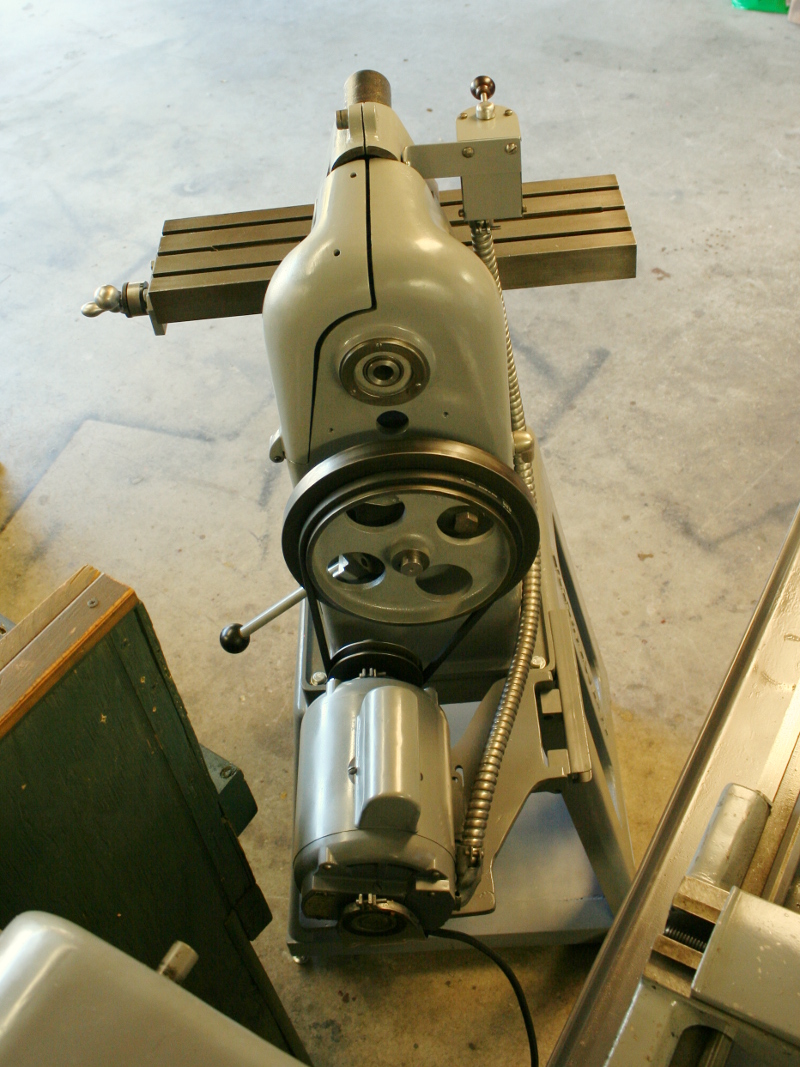
Things are really coming together now, the table is back on the machine and everything moves nicely.
It even has a manufacturers tag! That really cleaned up well compared to what some of them end up looking like. Looks like I have #132.

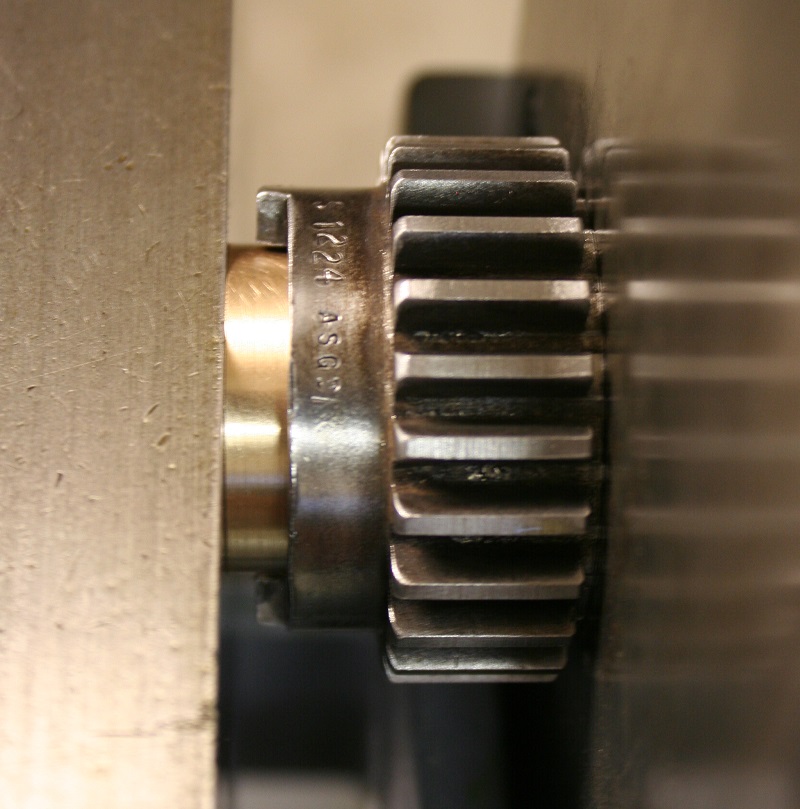
There are a few things amiss in the drive-train though. It looks like a gear that rides on the spindle saw some time without oil, it is all kinds of scored.
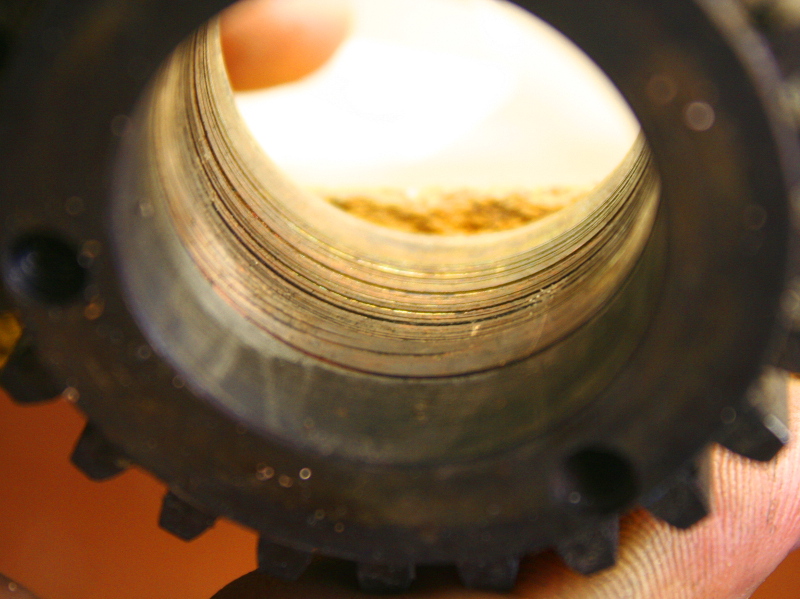
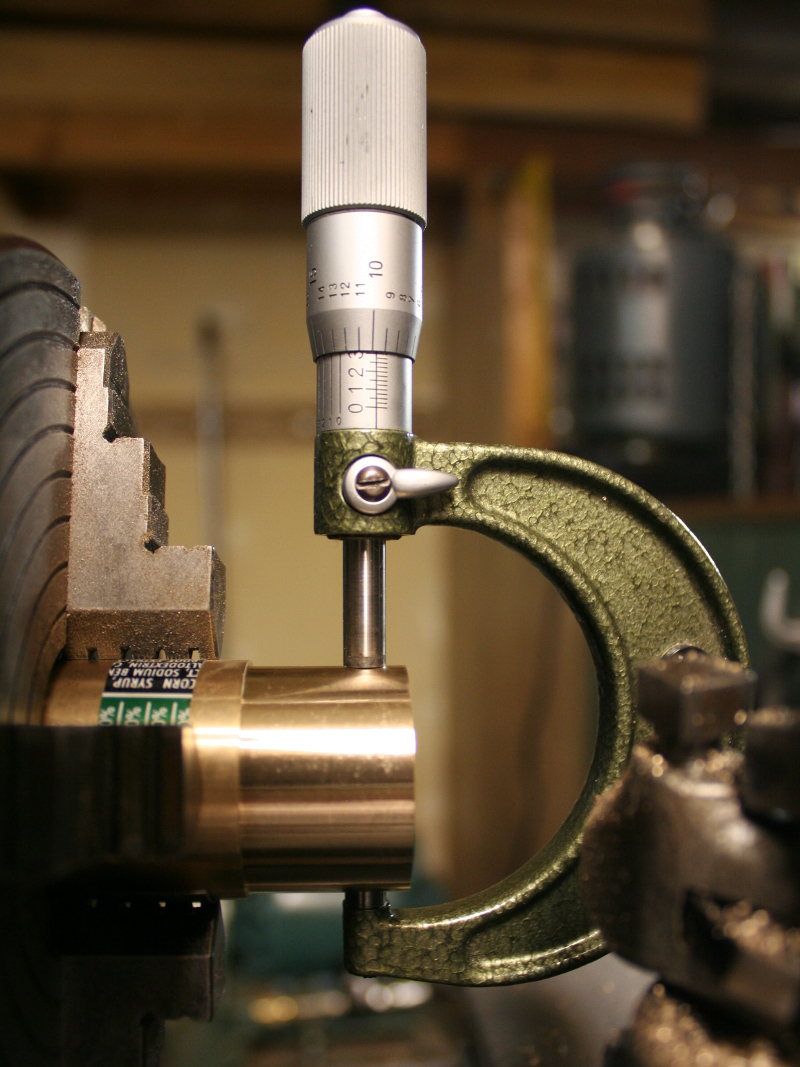
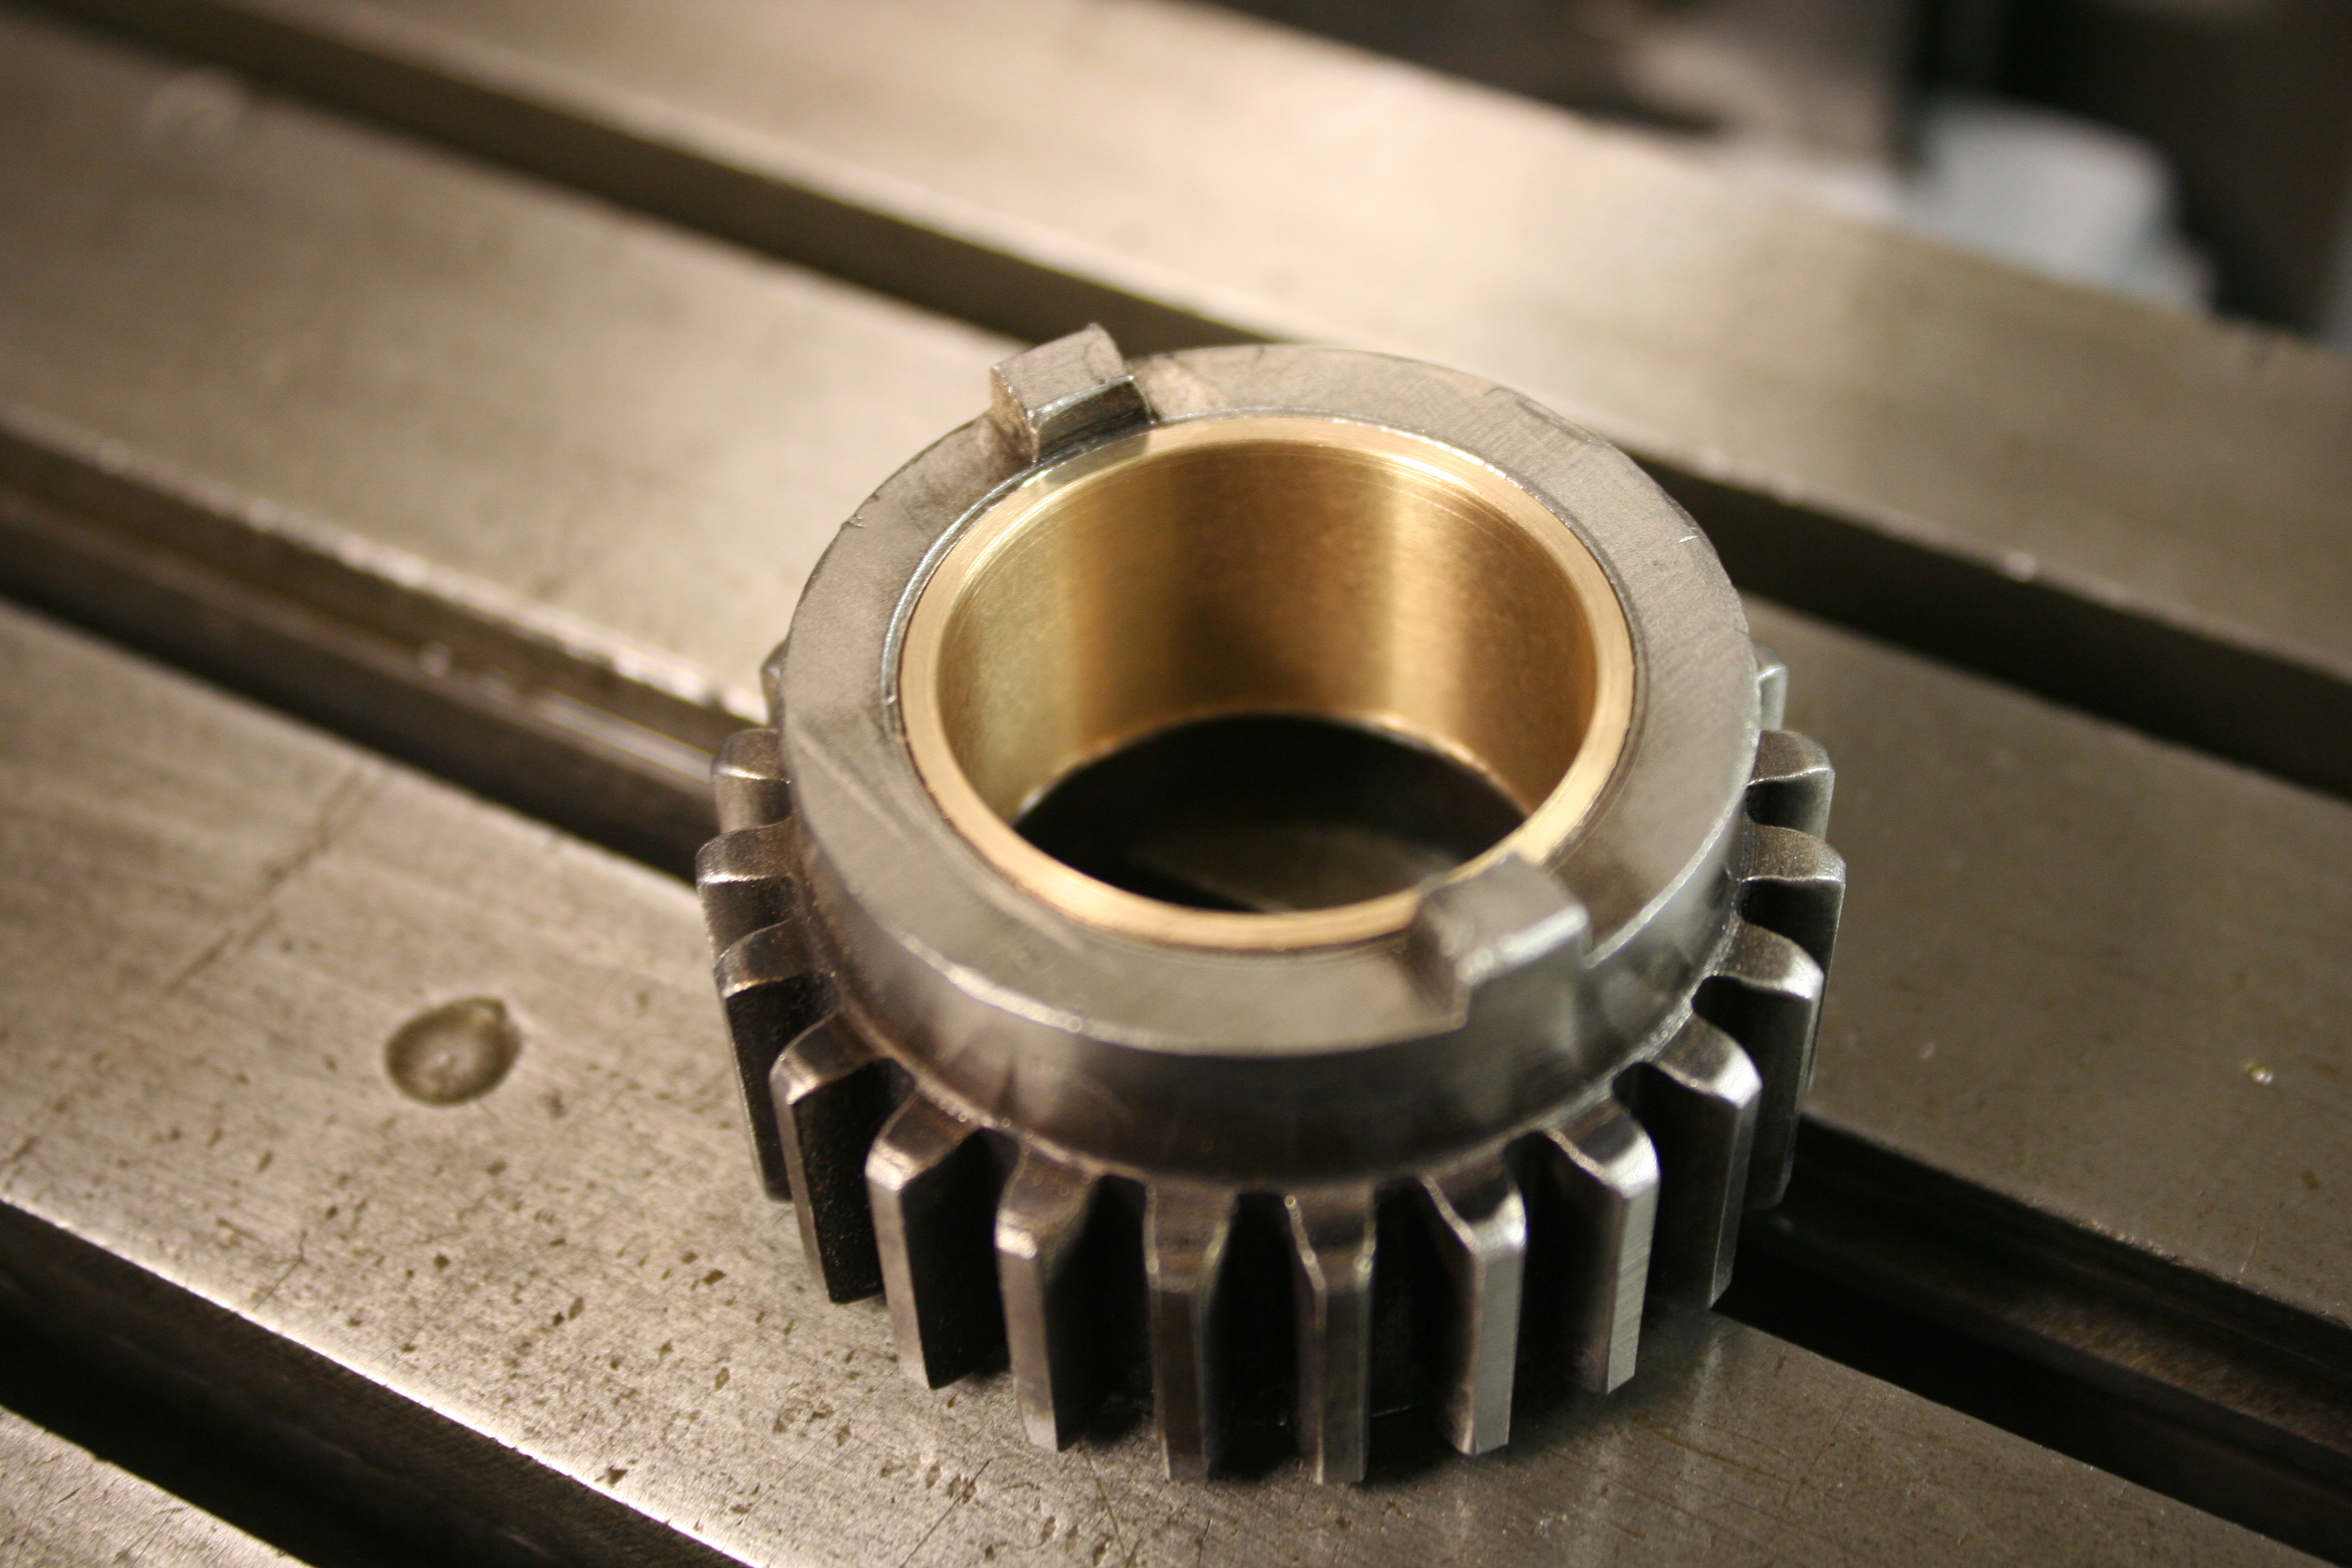
Fortunately the spindle almost unblemished that region so I really just have to fix the gear. Order up the closest stock 932 bronze bushing and turn it to size for a press fit into the gear.
Then since I didn't have a good press of any kind that I trusted to do a nice job pushing in the new bushing I used the mill itself to squeeze it into place. It is important to not beat them in or try and press them with something that won't start it straight. If it gets banged or started crooked things aren't going to work out well.
Now isn't this a satisfying picture of the finished product? This has been a background picture for at least some time on pretty much every computer I have had since the rebuild. It fits the dark grey themes I like to run. You can click for a higher resolution version.
Next up in the drive-train is some damage to the v belt sheave. I globbed some bronze and set up to turn it back down in the lathe.
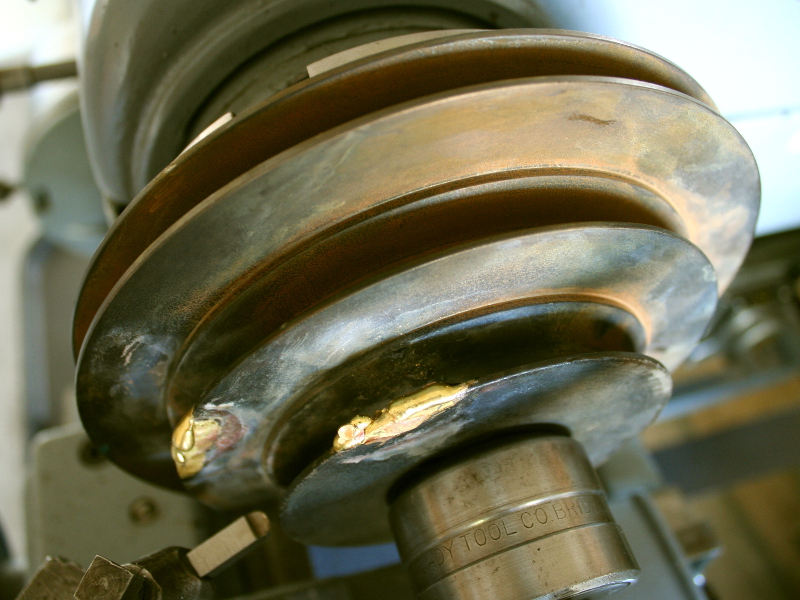
And there she is all cleaned up. Not perfect but good enough for using!

Now I didn't take enough pictures during the teardown and I had a little difficulty figuring out the main bearings. Overall it made sense, one tapered bearing close to the nose of the spindle, another close behind it and then a simple deep groove ball bearing at the far end.
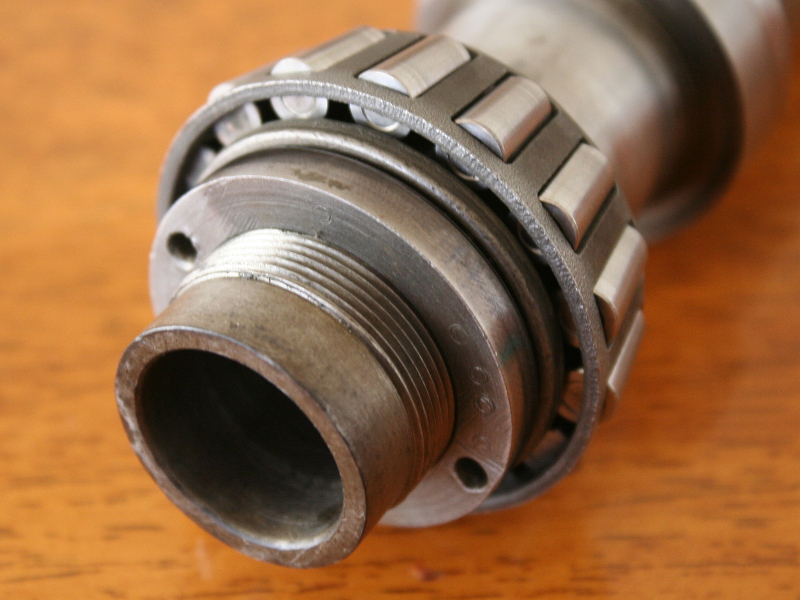
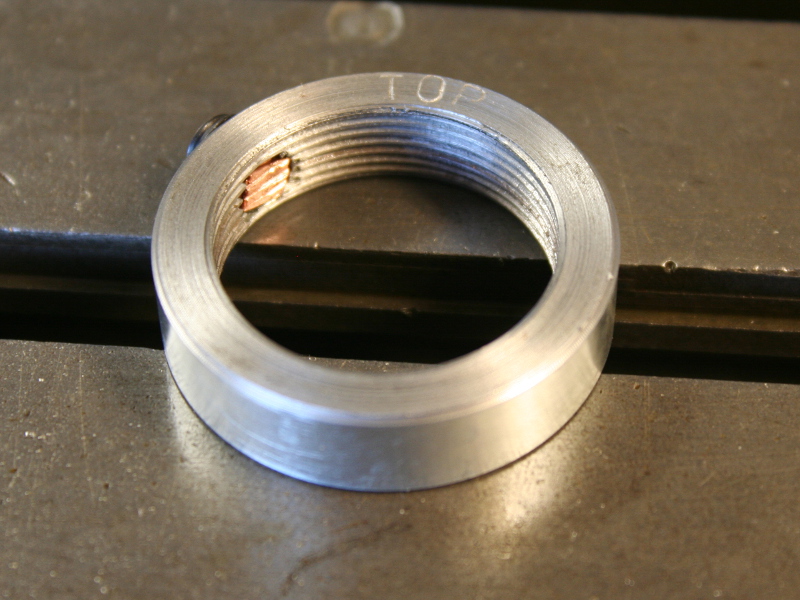
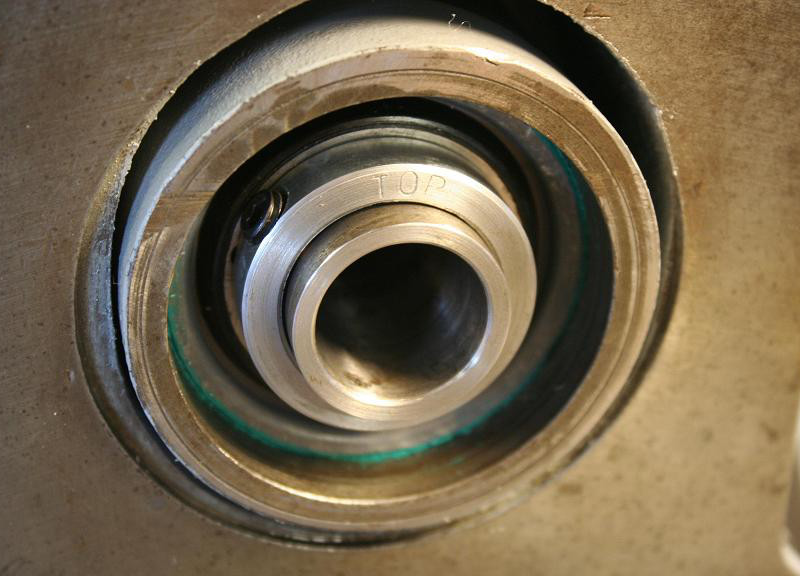
What I thought might have missing parts and I didn't understand for sure was the tapered bearing preload. Truck axles and the like don't have any preload but precision machine bearings are run with a preload to take up the slack and make the spindle as stiff as possible without causing excess heat and wear. I eventually figured out with the assistance of other owners that the nut (ring with spanner pin hole in it) I had did indeed just tighten up directly against the outermost bearing and the lip seal to protect it rode on that nut.

I didn't want to risk the nut rotating and relieving the bearing preload so I machined a backup nut with setscrew to help hold it in place.
With the motor not mounted yet I installed the spindle but left the bearings loose. Once the motor was up and running I would come back and gradually adjust the bear preload until the spindle started warming up just a little. In the end I snuck up to a tightness which just started to increase the resistance felt when turned by hand. At that point the bearings would reach a constant 110deg when running high speed in 90deg ambient air.
I don't remember exactly how the motor was mounted to the mill but it was something goofy that didn't seem original or work right so I made a little part that attached to some pre-existing holes in the base.
The bracket was not the biggest issue with the motor side of things though. There was some nasty grease inside the motor and the wiring outside the winding themselves were falling apart.
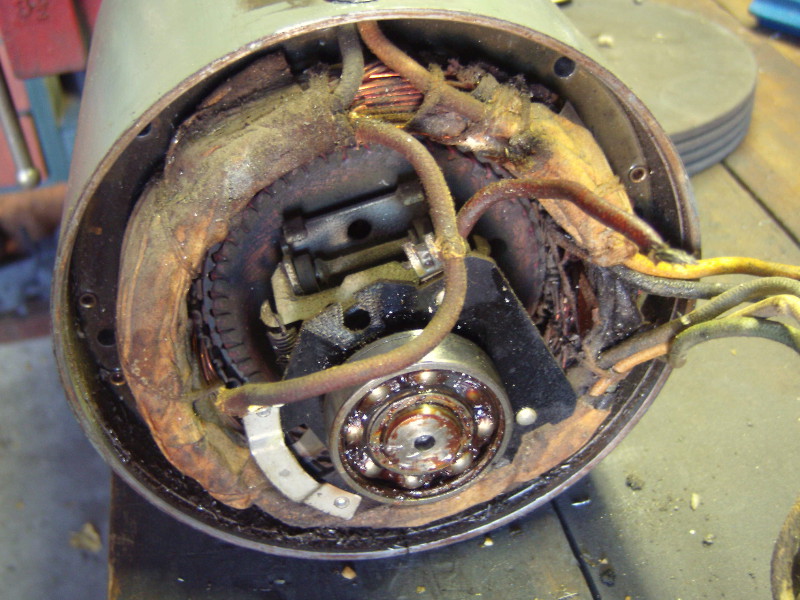
So I cleaned up the guts, replaced the failing insulation and gave the can a new paint job.

Then I turned a damaged part of the centrifugal switch on the stator and put her back together.
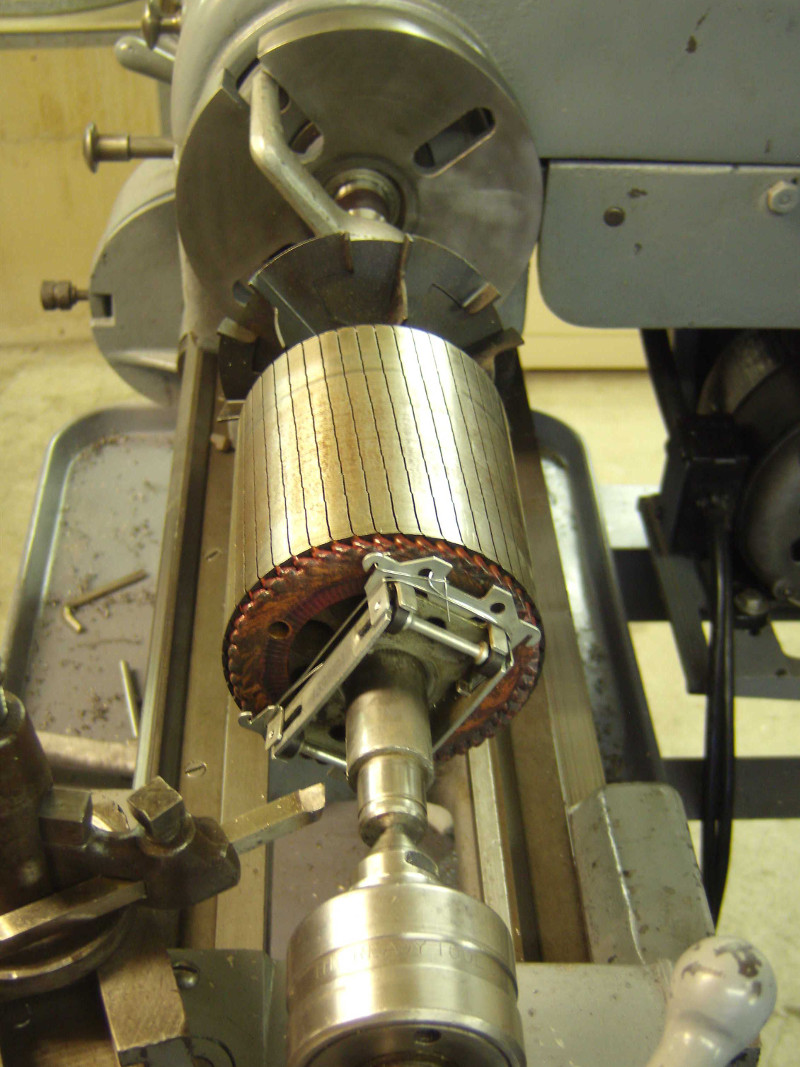
There it is, all painted and back on the mill.
Finally all finished and ready to make chips. I say all finished, I did not get an overarm, outboard support or any arbors to go with the mill so those are on the list to bring this little gem fully up to speed but she is functional and quite useful even without them.
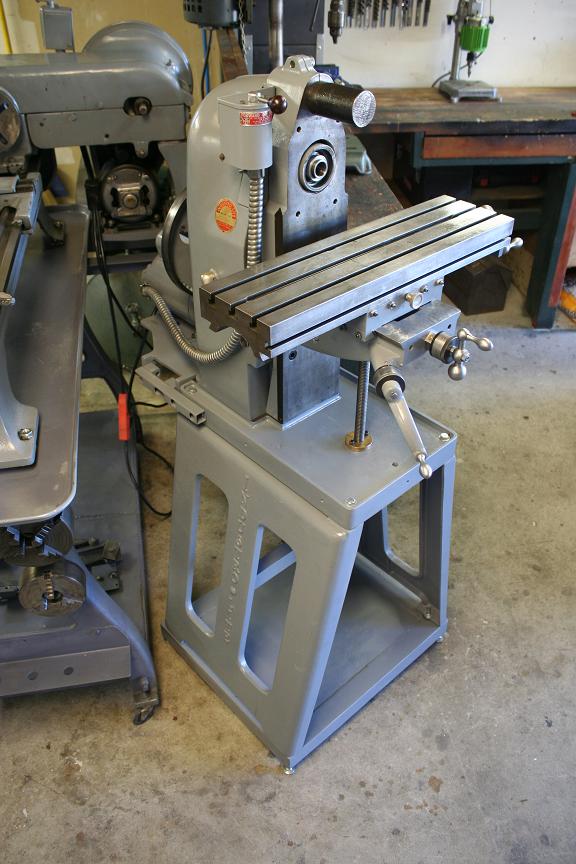
This is one of the machines I don't think I'll ever let go. Not because of the time I spent rebuilding it but because it really is a nice little machine and quite handy to have. If you ever see an industrolite pick it up. Spare parts are not existent but there really isn't much on here that would be difficult to make yourself and it is a much better machine than anything else in its size I have seen.