


Rockwell Delta Grinder Rebuild
I purchased a Rockwell tool and cutter grinder for $350 off Craigslist. As one might expect for a price like that it was worn out and needed a complete rebuild.
Here she is the night I picked her up. You can see I don't like things moving around on me. Since I used a wooden deck on the trailer build I can quickly block the bottom of a machine in with some random bits of lumber and screws or even easier duplex nails (if you don't know what those are look them up, they are the ones with two heads so they always stick up and are easy to pull out later). I also used those tapped bolt holes I included on the frame to put in some swivel eyes where convenient.
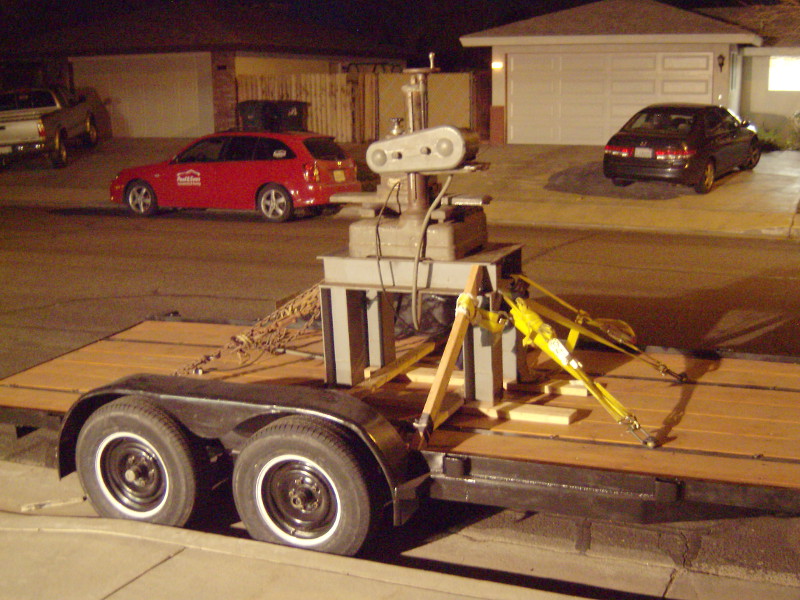
I threw a tarp over it and a lightbulb to keep the condensation off that night then unloaded in the morning. Notice the strap I used to hold it back in case it wanted to start sliding on its own. This isn't that heavy of a machine really (probably sub 1,000lb in this picture) but it pays to be careful and go slowly when moving things like this around by yourself.

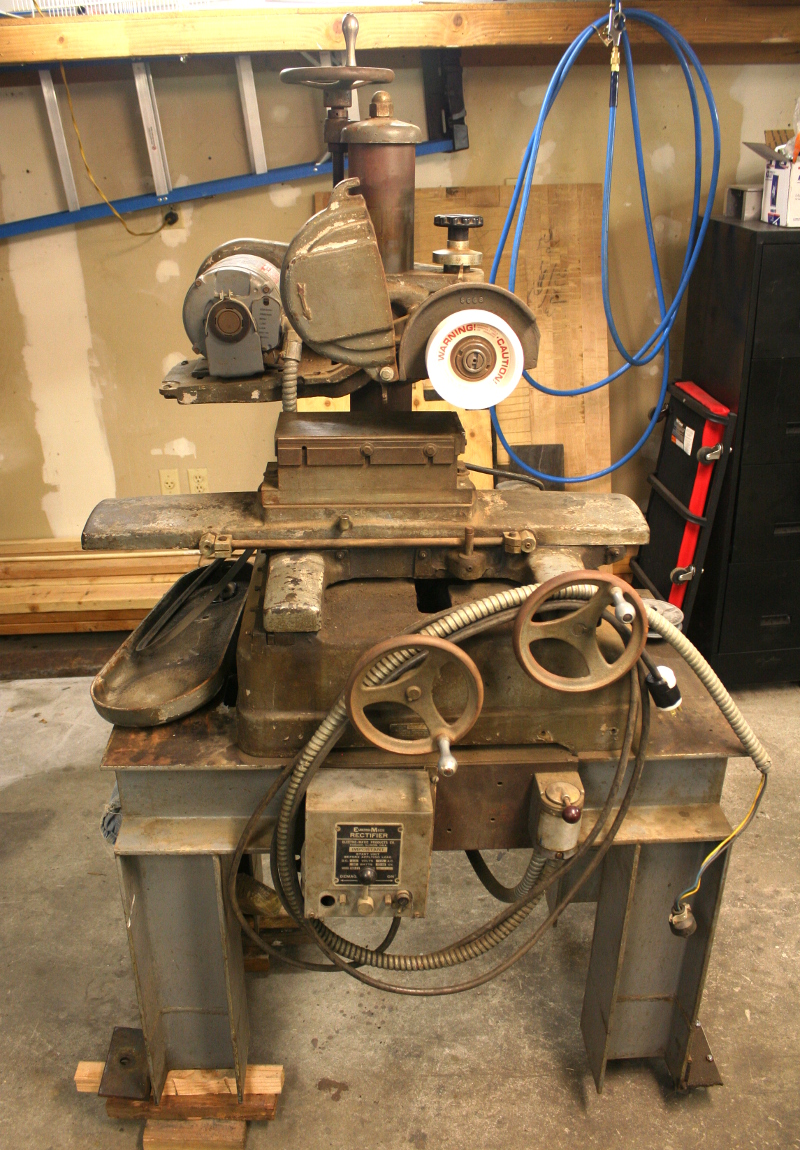
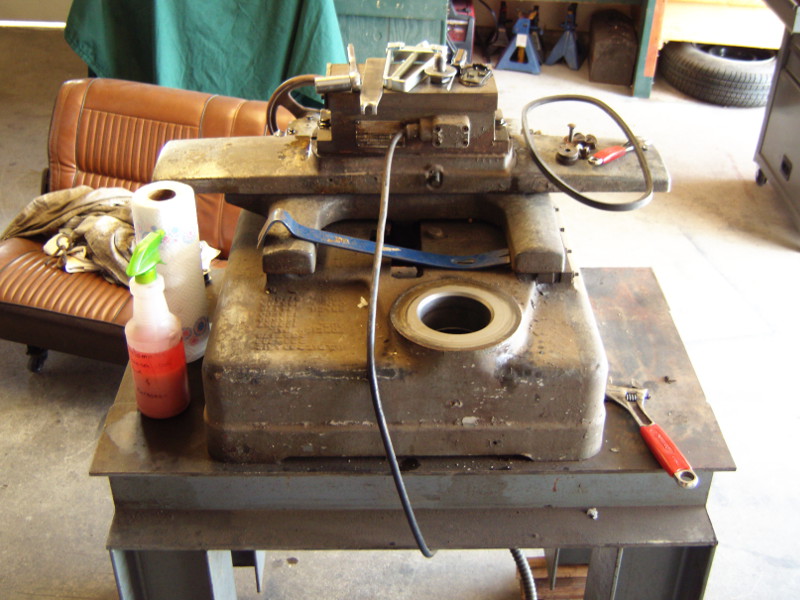
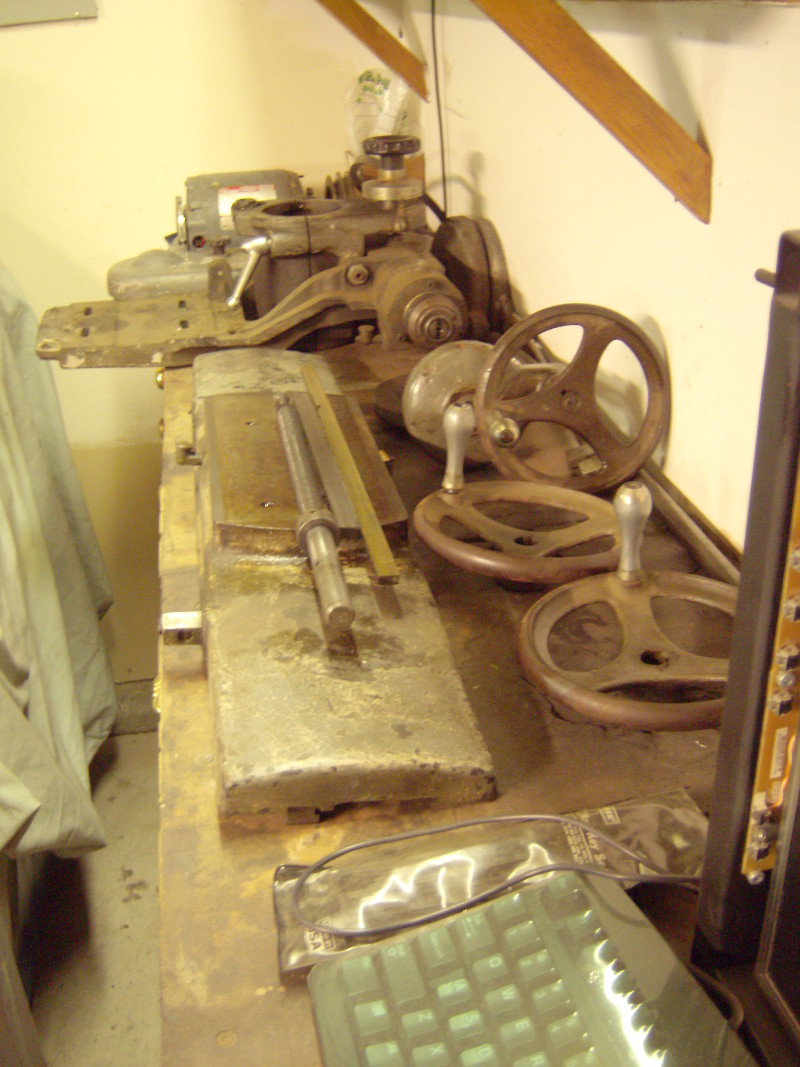
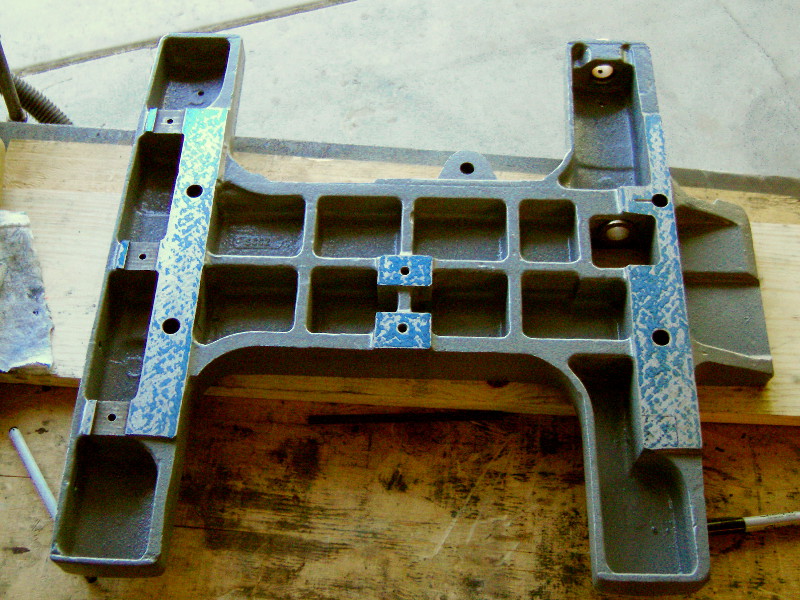
So here is a good look at what I had to work with. This one is going to take some work!
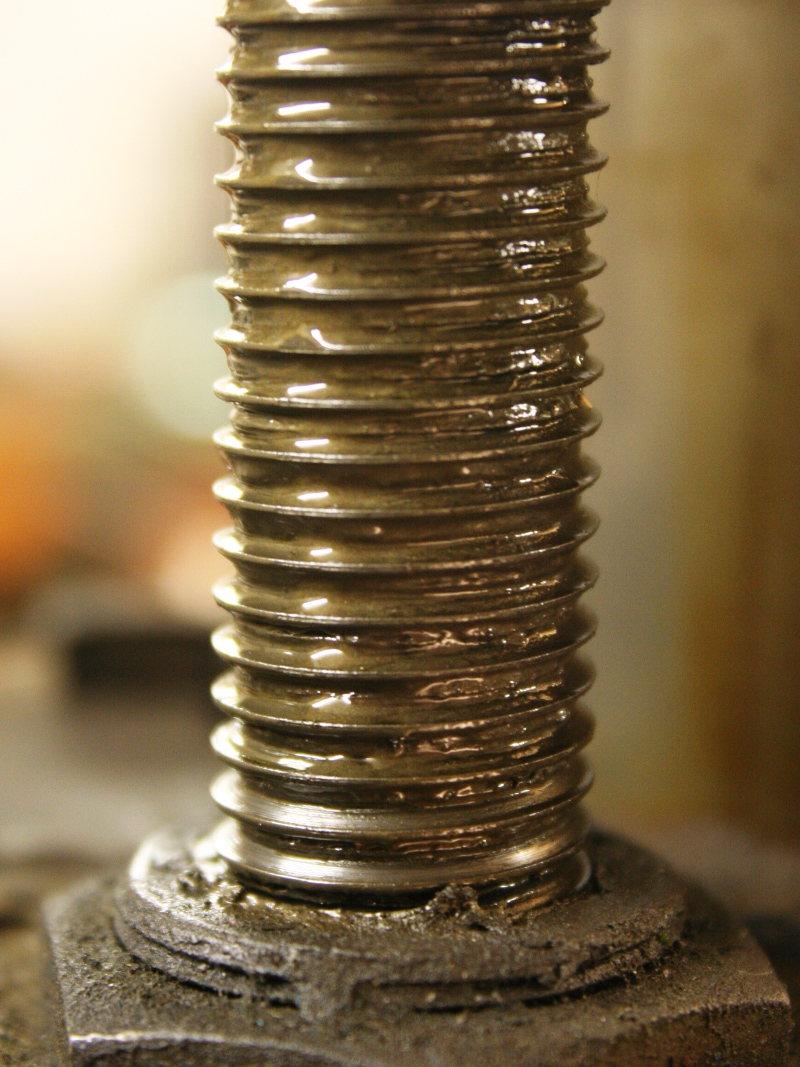
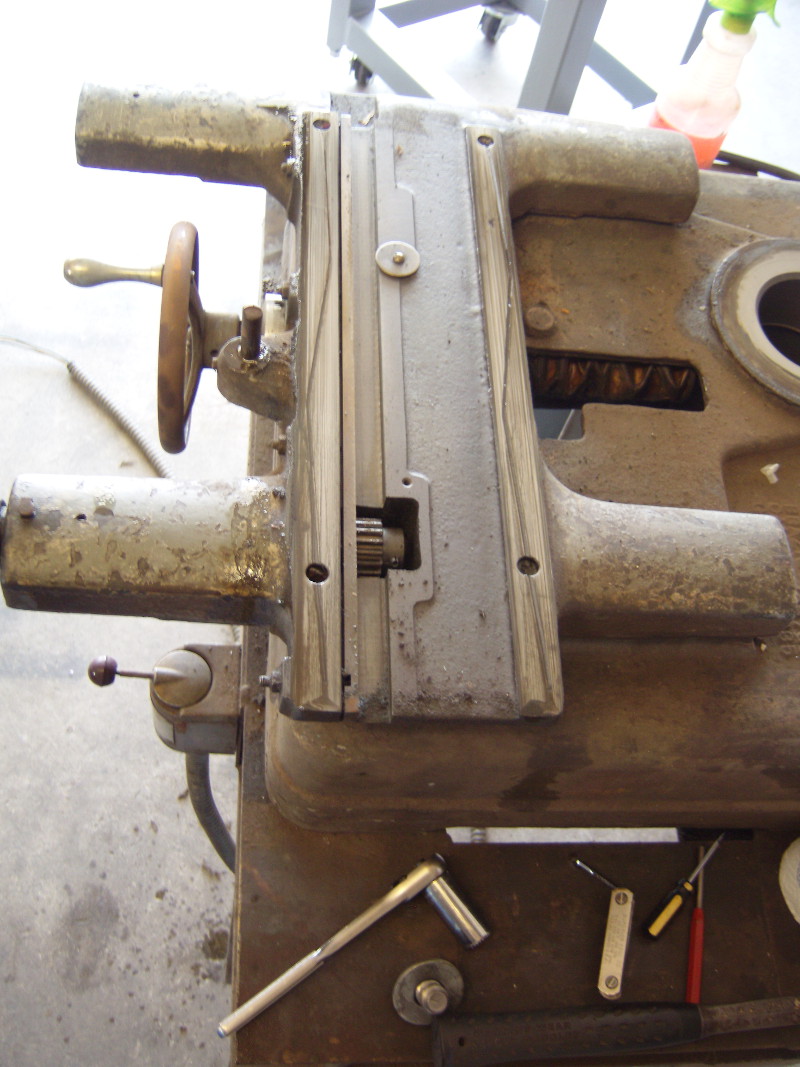
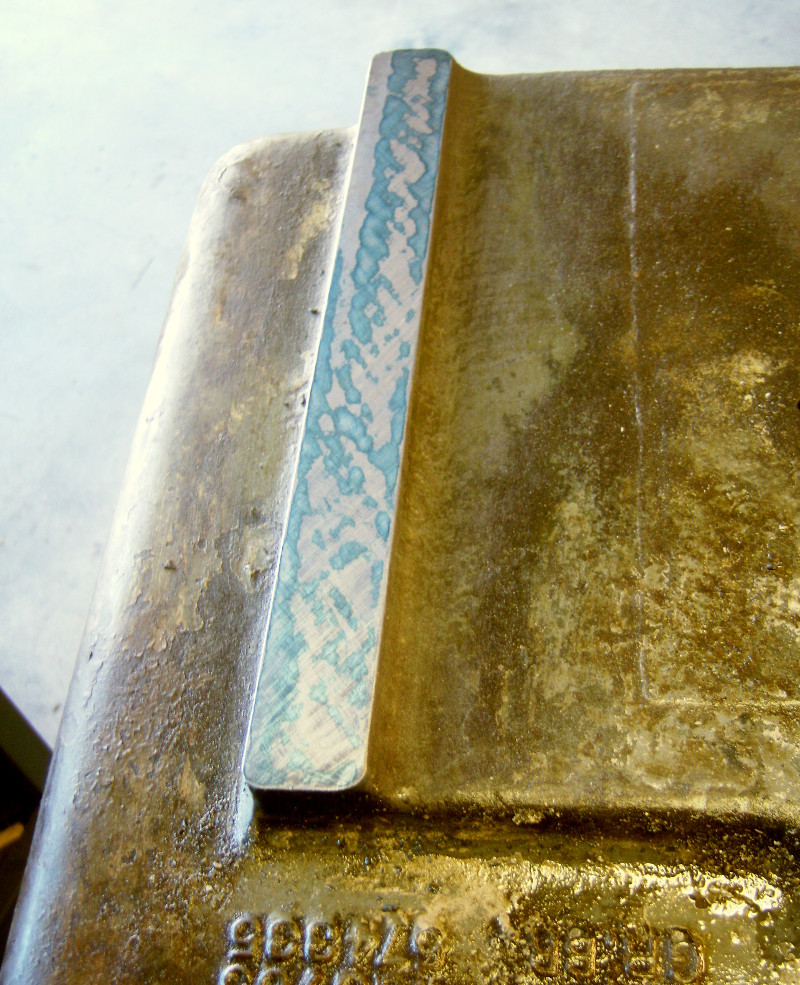
As one would expect on a grinder without dust collection anything that is unguarded will be a magnet for that abrasive dust and wear out in short order. The elevation screw is completely shot, look at how sharp the acme thread has become!
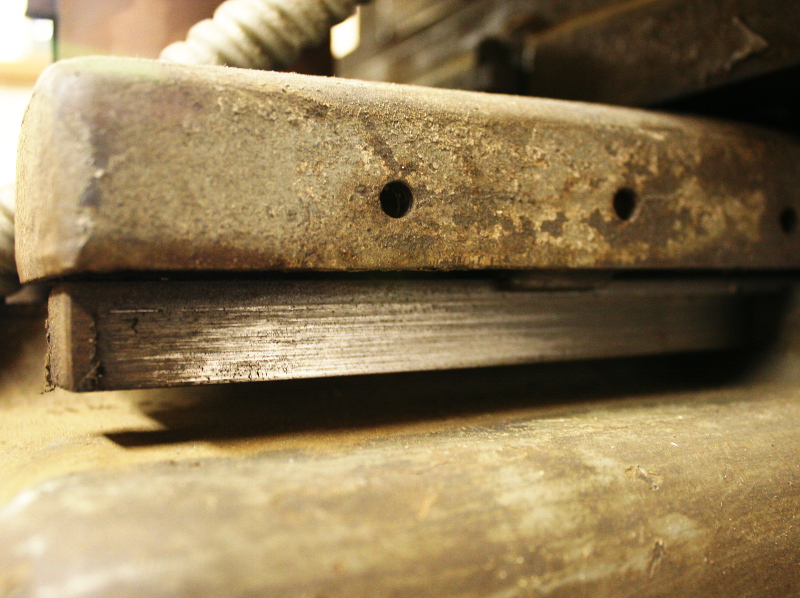
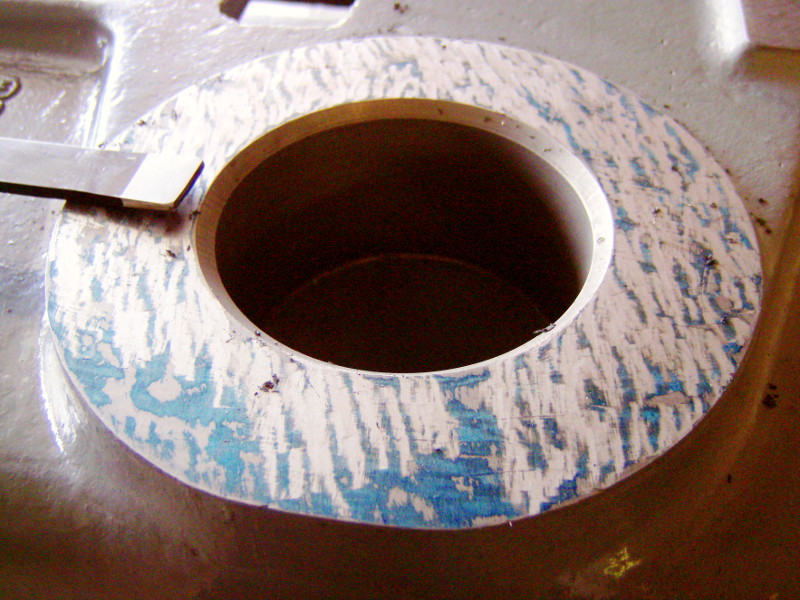
The ways are not any better, there is serious wear on the cross slide.
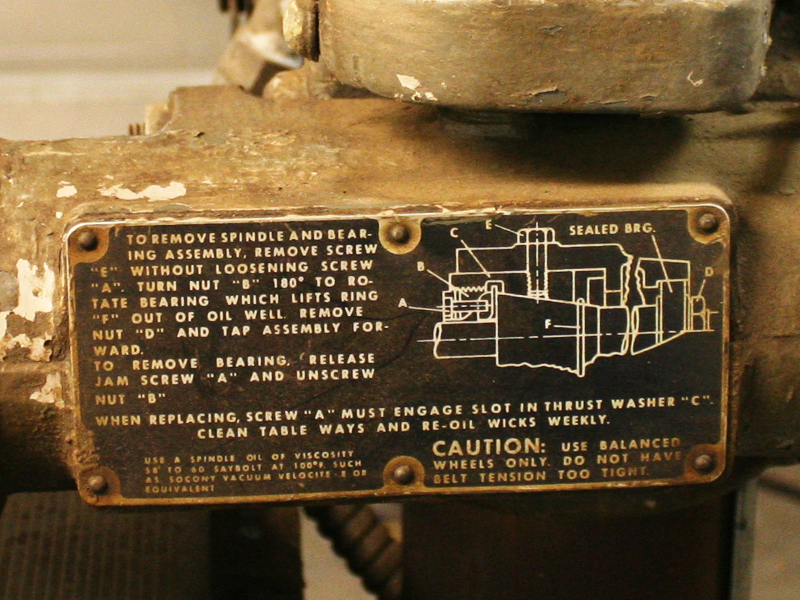
This is nice, disassembly instructions on the machine itself!
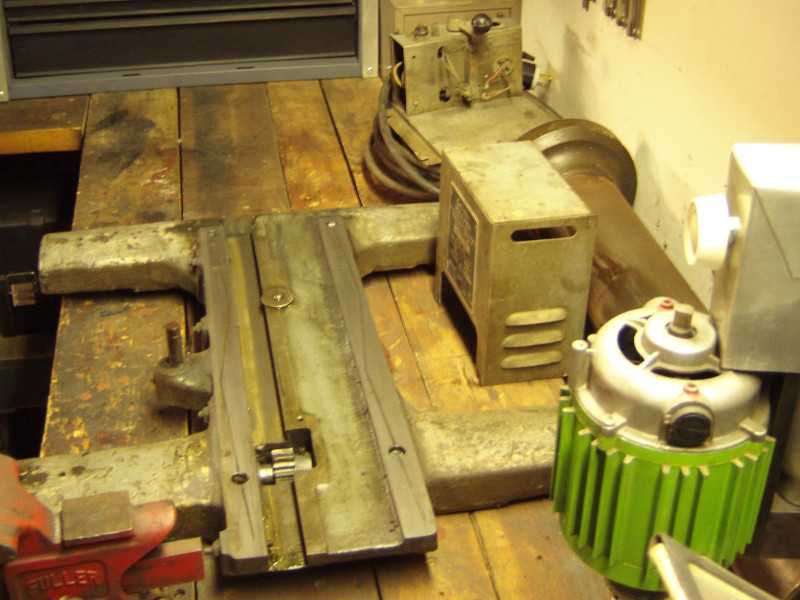
So time to get into the teardown. I took the spindle, motor and vertical column off.
Then the magnetic chuck and the table.
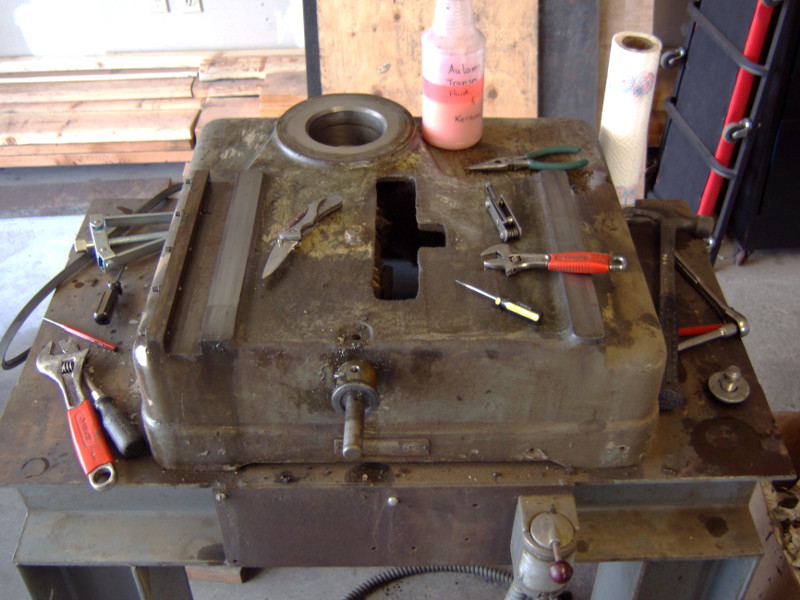
Then the cross slide, almost down to just the base now.
And here are some of the parts, I'll go through everything as I start cleaning, reassembling and fixing anything that needs it.
It's gonna be some work, there are even more parts.
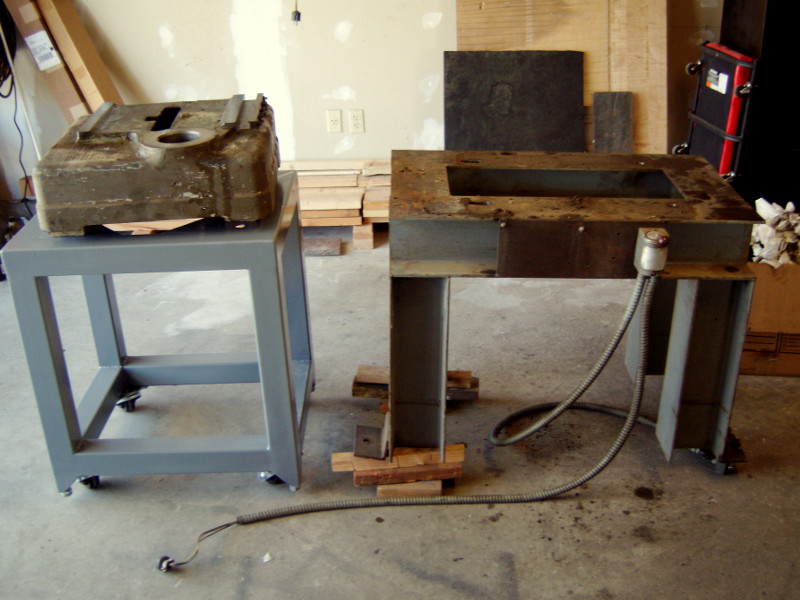
First things first though. The table it is sitting on is a classic example of someone had something lying around so they used it. The I-beam came from Bethlehem Steel and weighs about 300lb. Certainly beefier than needed and not really something that fits the machine properly. I'll re-use it as a beating on stuff table but the grinder will get a new stand made just for it.
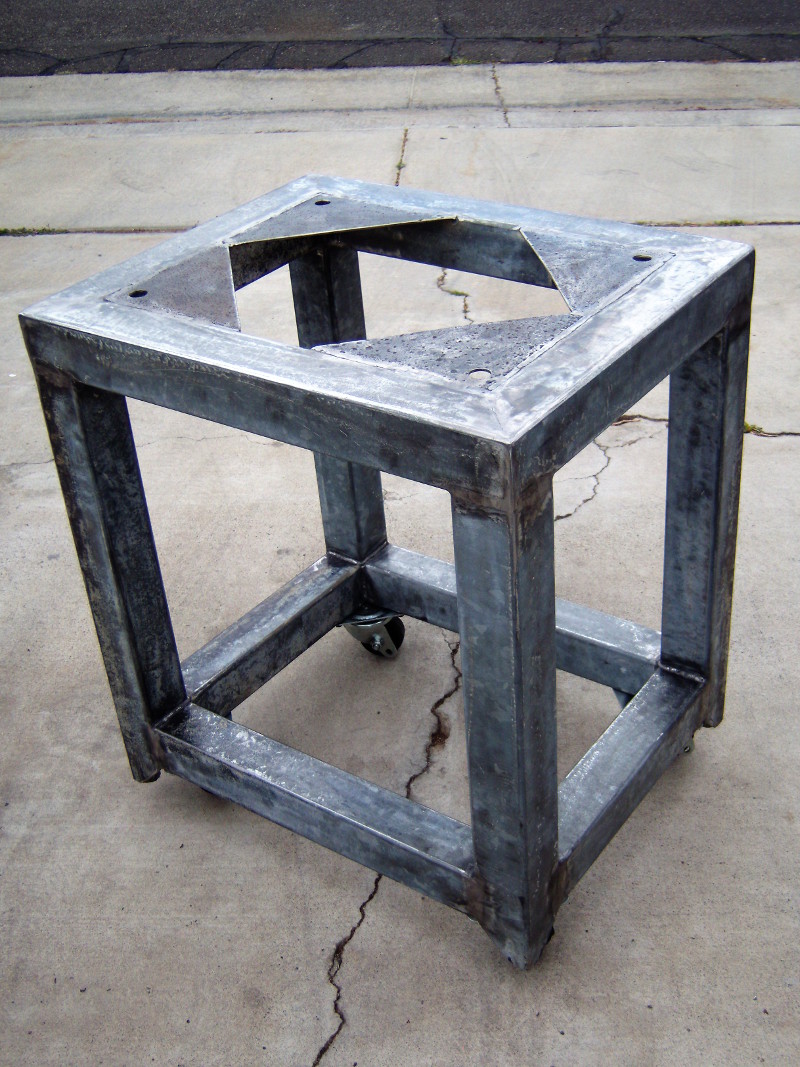
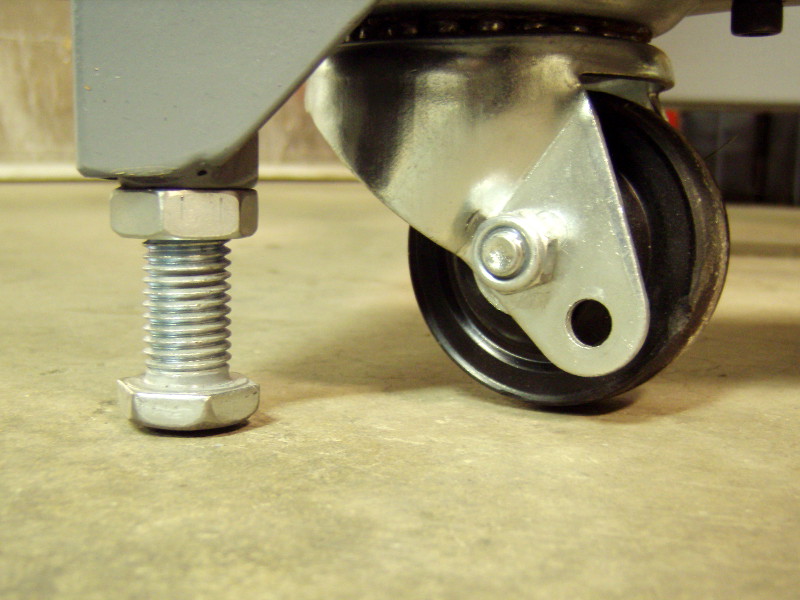
And of course as I like to do with my smaller machines when practical I have included casters to roll it around as well as a means to jack it up and level it. Just coupling nuts welded into the frame and some standard hex head cap screws with the head turned down a little to make a dome.
A little grunting with some levers and blocks of wood to introduce the base to its new support.
I mentioned that this machine needed a major rebuild right? Everything needs repair including the base. The ways are all worn out and not even close to being flat or co-planar anymore so there is no choice except to blue them up an start scraping.
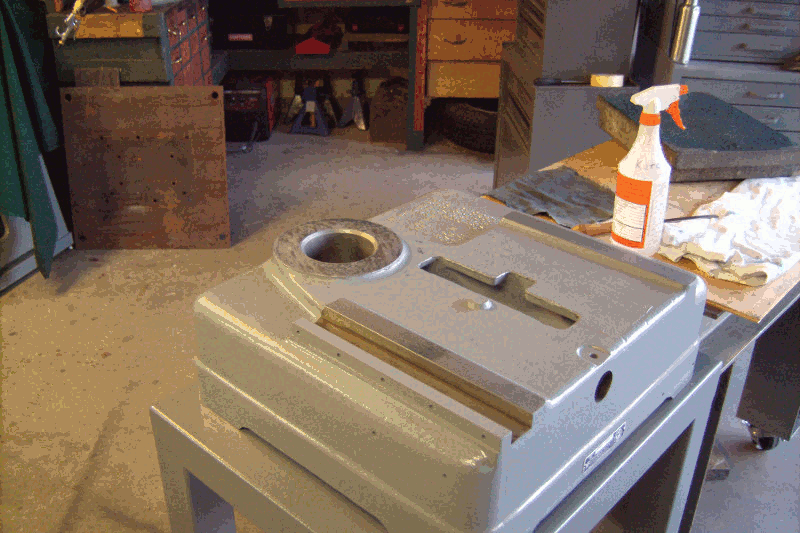
Before I finished scraping the base I stripped it an re-painted. I am going with plain ole glossy smoke grey Rustoleum because it is always easy to find. It isn't the best paint ever but it is easy to work with and because it is always available easy to touch up tools with whenever you want.
After painting I cleaned up the important surfaces and got back to scraping. While there wasn't any wear on the part of the base casting that holds the column I had to scrape it as well to make sure I kept everything co-planar and brought all of the surfaces straight down. Important to maintain the column perpendicularity to the base.
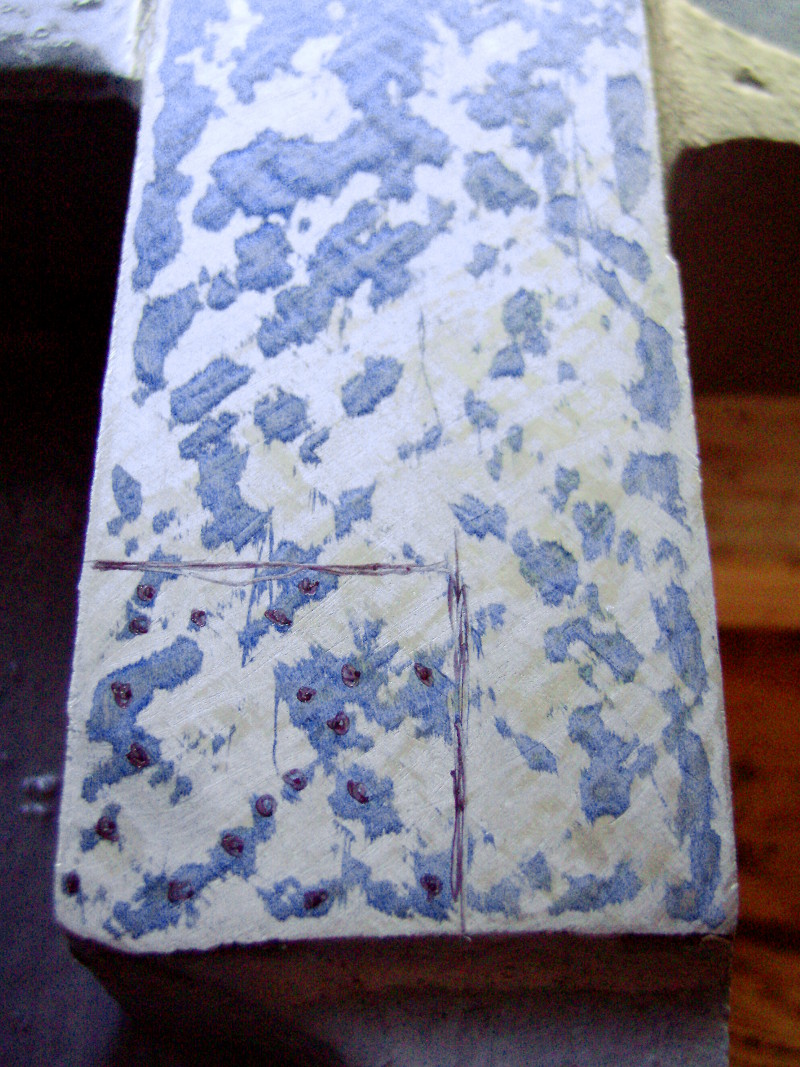
Scraping can definitely be pretty satisfying. If you aren't familiar with the process the basic concept is to compare the surface with a known reference (in this case a 4" thick 18" x 24" granite surface plate) by the transfer of a thin layer of dye then use a hand tool that looks like a blunt chisel to scrape off the high spots. You keep doing this again and again removing between .005" and .0001" at a time from the high spots. It is a time intensive process for sure. I probably removed a few thousandths during the hour this timelapse took.
Once I finished the two planes on the base I moved up to the cross slide and the 4 planes it has. This is much harder than the base because not only does the surfaces need to be brought back to flat planes the relationship between them must be retained. The top surface must be parallel to the bottom surface and the guide surface for in-out motion must be perpendicular to those as well as the side-side axis. This requires a lot of additional measuring throughout the process to bring all the aspects together at once. Here is progress on the bottom surface, I am still chasing an even spot distribution but I have contact everywhere so it is getting close.
Eventually you get an even distribution in the size and coverage of the dye marks and you start splitting the marks into a finer distributed pattern. As part of the process you may count the points per square inch. This cross slide print (dye marking) is not really evenly distributed enough yet for this machine but for illustration I counted the PPI for a section of it. I got 20 points in this square inch. It is almost impossible to see in a picture but the points that I counted are actually where the dye smear is thinner than the surrounding area as that is where it actually touches. The dye has a thickness to it which becomes important as you get closer to the end of the process.
Now you might think the end goal is complete contact all over, no points to split anymore but that isn't the case. The irregularities in the scrapped finish are actually important to the function of the linear bearing the way makes. The low spots retain oil and help preserve the fluid film between the two surface. Perfectly flat surfaces without these imperfections are much more likely to have a problem called "stick slip". The fluid film squeezes out and the two parts want to stick together. This makes it hard to start a motion but once the motion gets going the fluid film comes into play again and everything slides easily. This makes movements jerky and difficult to control, no good for a machine tool
After much more scraping (along with some replacement of bushings) the base and cross slide were ready to be re-united.

To be continued...... The grinder is almost finished but the machine is currently in storage and I don't have pictures showing it's current state. It is what one might generously call an "extended" project. I partially disassembled it again for the move from California back to Texas and haven't had a place to spread out and get going on it again.
My money is on it reaching the magic 7 year mark since I still need to build a shop to put it in.