


The Changing Table
August, 2015
This project is the tale of a much too common theme, no one makes what I want at any price. Poopy diapers and kids that need their clothes changed, this is what changing tables are made for right? So what do you do with the diapers and dirty clothes? You can buy a standalone trachcan and a standalone clothes hamper but apparently it is too difficult for anyone to incorporate that into the peice of furniture that is specifically made for changing kids. Seriously, the wife and I both looked and looked. There is not a changing table that includes a hamper and trashcan at any price.
If I was a rich man who could afford it I would go commission a table that has what I want and be done with it (though probably still grumbling that no one makes it). I'm not though so as always it gets added to the project pile. I started planning a simple thing made of plywood and dimensional lumber just slapped together as quick as possible since the kid/diaper situation will be limited in duration.
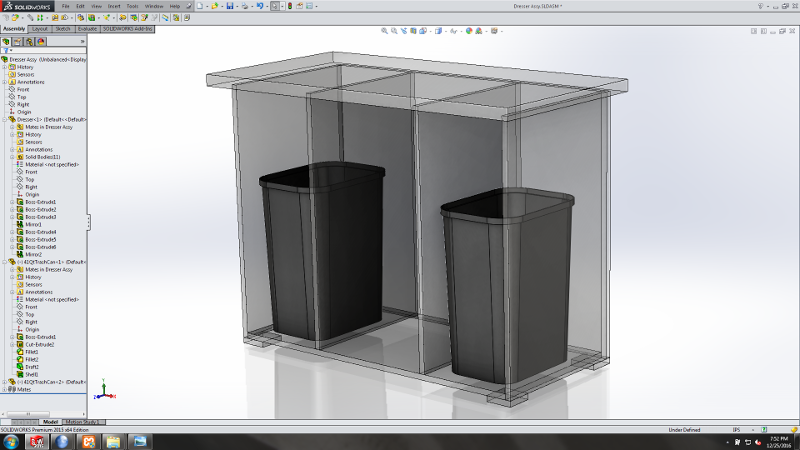
The trashcans it is designed around stayed but the "simple slapped together" plan started falling apart immediately (this happens to me every time) and while I was in the hardware store I decided that I would switch to glue laminated boards instead since they wouldn't cost much more than the plywood.
Unfortunately I have essentially zero pictures of construction progress. I did some of it in Austin during trips to visit Elizabeth and the kids while they were in the NICU then some of it back home in Bryan.
For the top I glued up two pine 2x10s. They weren't straight or flat when I put them together though so I had to fix that. I'm not someone who owns a planer or thickness sander, much less one large enough to feed something this size through so handwork it was. The way I decided to do it is pretty similar to scraping a machine like my Industrolite horizontal mill or Rockwell tool and cutter grinder.
First step is to map out where the high spots are. I set my 6ft level ontop and drew a line everywhere it touched then moved it over an inch and marked again. Once the whole table was marked up I would go at it with a hand plane and remove all the marks.
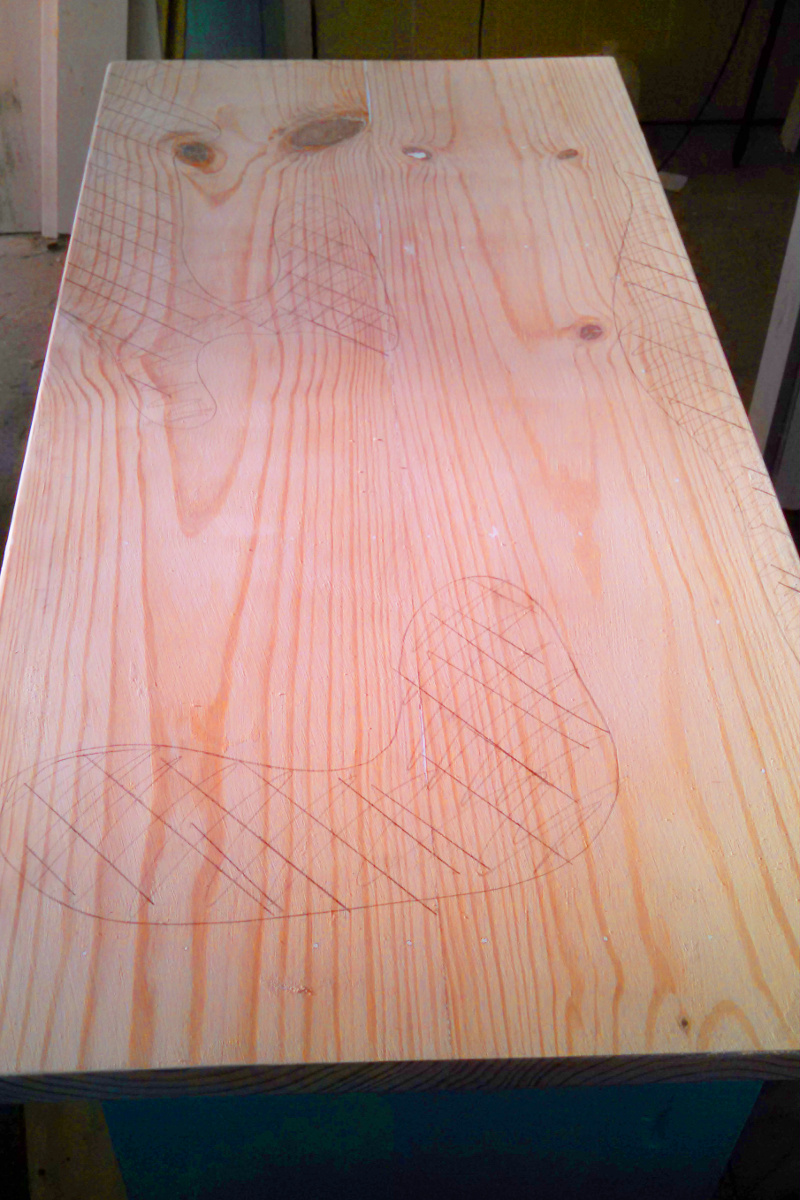
For the next pass I would set the level on the table with a different orientation than I did the last round to ensure that the resulting surface would be flat in all directions, not just one. Planing goes pretty quickly and soon I switched over to using my belt sander instead of the hand plane and then worked up in grit until I reached a flat, smooth surface ready for a first coat of polyurethane.
I missed taking pictures of all the fiddly bits of construction also. The face is all flush and the center drawers sit on ball bearing slides, they work just like any other drawer. The hamper and trash work just like a trash can at a fast food restauraunt. Door below to remove the trash can and door on top that you push out of the way with your hands to drop something in. The upper doors are self closing with some gas springs. In reality I probably could have used gravity to close the upper doors but I went with the spring because I was planning to add air tight seals.
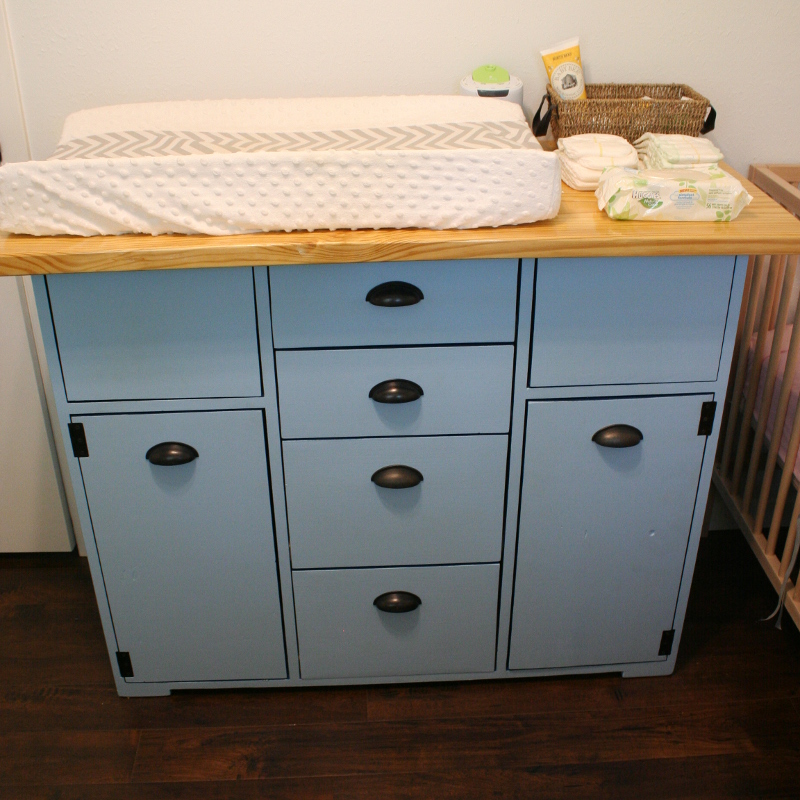
The top is coated with glossy polyurethane so it is easy to wipe. The lower exterior is painted with standard interior latex paint and the interior is painted with a darker blue oil based paint.
It really is a shame I didn't document progress better. This isn't as nice as some other furniture I have made but it has been easy to use and incredibly useful. A great example of why doesn't anyone make it and how does everyone else live without it?